

Portrait Reference Preparation
How to Prepare a Portrait Photo for a Tattoo Stencil
Choose and prepare a portrait reference without losing the facial information that carries likeness. Compare landmarks, pose, perspective, crop, clarity, and supporting photos before converting the image.
portrait tattoo reference · portrait photo tattoo stencil · tattoo reference preparation · portrait likeness
- August 23, 2026
- 13 min
Do not choose a portrait reference by megapixels alone. Choose the image that most reliably preserves the relationships that make this person recognisable.
A technically large photograph can be a weak source if the face is tiny in the frame, one eye disappears into shadow, the camera is extremely close, or the expression you need is not actually present. An old or modest file can be much stronger when the head shape, eye placement, nose, mouth, jaw, expression, and characteristic asymmetry remain trustworthy.
Use one question to control the preparation stage:
Does this photo preserve the specific visual relationships that make this person recognisable, in a form reliable enough to interpret into a stencil?
This job ends before stencil generation begins. You are deciding which photo to trust and which details are actually clear enough to use, not tracing it yet.
Choose the strongest likeness source, not the prettiest file
When a client sends several portraits, compare what each image clearly shows about the person rather than ranking them by file size or apparent sharpness.
Judge these dimensions separately:
- Identity structure: can you locate the head silhouette, eye line, nose base, mouth, jaw, chin, expression, and distinctive asymmetry with confidence?
- Edge certainty: are important boundaries actually knowable, or have blur and motion created several plausible positions?
- Tonal separation: can you distinguish important forms inside highlights and shadows?
- Subject detail: how much real information exists on the face itself, not just in the full image dimensions?
- Perspective: does the camera view create relationships appropriate for the portrait you intend to reproduce?
- Occlusion: are critical features hidden by hair, hands, glare, another person, clothing, or the frame edge?
- Context: does the crop preserve enough surrounding structure to judge relationships correctly?
None of these is a universal score. One unresolved mouth corner can matter more than thousands of sharp hair pixels.
If the dominant uncertainty is smeared or doubled edge position, use the blurry-reference diagnostic. If important geometry is hidden by collapsed dark tones, use the dark-reference diagnostic. The Reference Photo Quality Checker is useful for measurable preflight such as focus-region sharpness, tonal behavior, crop coverage, and intended-size sampling. It does not decide which photo should be your main likeness reference.
Build the likeness around the features that matter most
Portrait likeness is relational. Prepare the source around the relationships that identify this particular person and pose.
Identity-critical features
Depending on the face and view, this can include:
- overall head and face silhouette;
- eye position, angle, openness, and spacing;
- brow-to-eye relationship;
- nose direction, base, width, nostril shape, and projection cues;
- mouth width, lip posture, mouth corners, and angle;
- jaw path and chin shape;
- characteristic asymmetry;
- expression-defining geometry.
This is not a fixed ranking. In a profile, the forehead-nose-lip-chin silhouette may dominate. In a smiling three-quarter view, eyelid opening, cheek compression, mouth corners, and foreshortening may matter more.
Supporting identity cues
Hairline, ears, beard, glasses, scars, major wrinkle structure, and characteristic hairstyle can strengthen recognition. They do not compensate for incorrect underlying structure. Correct glasses on the wrong eye spacing do not create likeness.
Texture and low-priority information
Pores, random highlights, tiny hair strands, image noise, small clothing texture, and irrelevant background can be visually crisp while carrying little identity value.
Prepare the source around what makes the person recognisable, not around preserving every visible pixel.
Map importance and certainty before editing
Mark the source mentally or on a working copy before sharpening, restoration, tight cropping, or conversion.
- Green: identity-critical and clear. Preserve these relationships.
- Amber: useful but partly uncertain. Verify before treating it as geometry.
- Gray: low-value or expendable. Do not spend recovery effort here unless the design needs it.
- Red: identity-critical but uncertain. Resolve with a better source, a supporting photo, or an explicit artist/client decision before conversion.
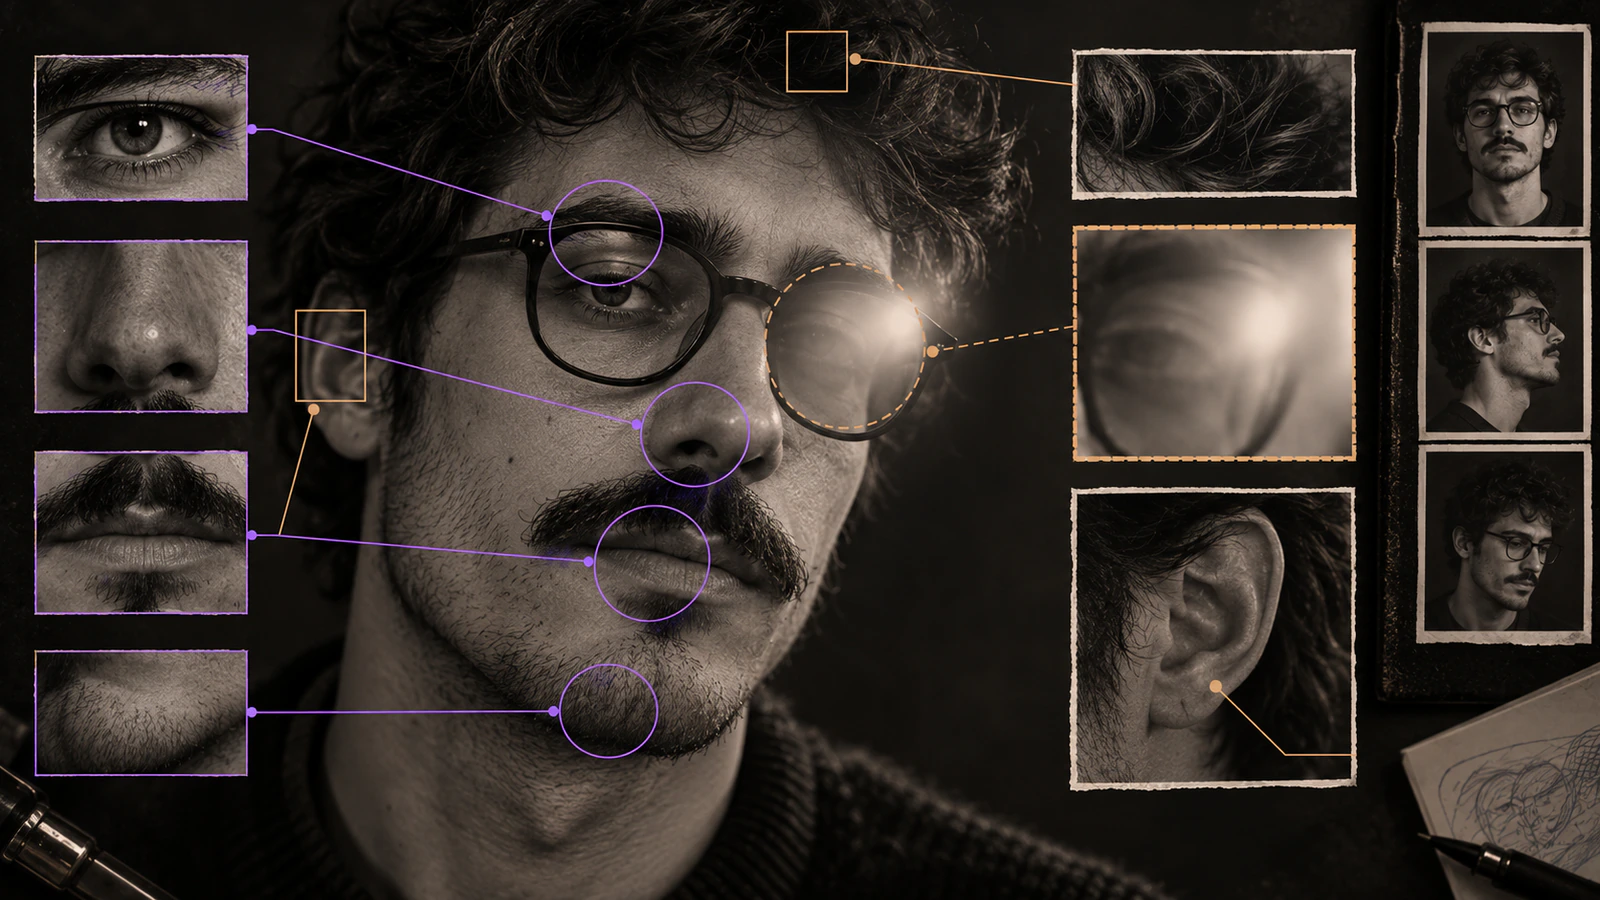
A clean line produced later does not erase the fact that the original source never established where that line belonged.
| | High certainty | Low certainty | |---|---|---| | High identity importance | Preserve closely | Resolve before conversion | | Low identity importance | Use selectively | Usually omit |
This is a source-preparation decision, not a facial-proportion template.
Give each reference a role
When several photographs exist, assign each one a job.
| Reference | Landmark certainty | Perspective | Expression relevance | Occlusion | Technical clarity | Role | |---|---|---|---|---|---|---| | A | strong | stable for desired pose | desired | none | moderate | Primary geometry source | | B | strong | different angle | neutral | none | strong | Secondary identity check | | C | uncertain around one eye | very close view | desired | partial | high | Not reliable for geometry |
The primary reference controls pose-specific geometry: head turn, visible widths, feature positions, expression, and silhouette.
Supporting references answer narrower questions. They can confirm eye shape, hairline, a scar, nose character, ear shape, or recurring asymmetry that is unclear in the primary image.
A third image may be useful only for hair, clothing, or texture. That does not make it a geometry source. For many files, the Tattoo Reference Board Maker can record Primary, Secondary, and Support roles.
Multiple references do not share one geometry
Two photographs of the same person can disagree without either being wrong. Head rotation, camera position, expression, age, lighting, distance, hairstyle, weight change, and perspective alter what is visible.
Do not take the eye from a frontal smile, the nose from a close three-quarter image, and the jaw from a neutral profile as though all coordinates belong to one pose.
Keep the primary reference in charge of the chosen pose. Use supporting images to answer specific questions about the person. If you intentionally reconstruct a new pose or composite several sources, that is an artistic design decision, not neutral source preparation.
A useful supporting question is specific: Does this other photo confirm that the left brow is characteristically higher?
Expression is geometry
A smile, squint, compressed lip, raised brow, or tense jaw changes facial relationships. Inspect eyelid opening, brow angle, cheek tension, mouth corners, lip shape, and jaw position.
If the tattoo should capture a specific smile, choose a source that actually contains it. Do not normalize the expression toward a generic anatomical face because the neutral version is easier to organize.
Preserve characteristic asymmetry, but verify its cause
Potentially identity-relevant asymmetries include one eye being more open, unequal brow height, different mouth corners, nose deviation, jaw asymmetry, uneven hairline, and ear-position differences.
Do not symmetrize them automatically. Also do not assume every visible difference is anatomy. A near/far eye difference may come from head turn; shadow can hide one mouth corner; blur can imitate another eyelid shape.
Ask: is this feature really visible in the reference, or is pose, light, blur, or perspective creating the difference?
Perspective can be sharp and still be misleading
A very close camera view can exaggerate nearer features relative to farther ones. Nose size, ear prominence, cheek width, and depth relationships can change even when the file is perfectly sharp.
Do not prescribe one focal length and do not reject phone photos by default. Compare candidate images and ask whether the reference shows plausible, stable relationships for the portrait the client actually wants.
A frontal image is not automatically better. A profile may depend heavily on forehead, nose, lip, chin, ear, jaw, and neck silhouette. A three-quarter view may depend more on near/far eye relationships, relative cheek widths, nose projection, mouth orientation, and foreshortening. Do not force either view toward a frontal template.
Lighting should reveal geometry, not dictate contours
Directional light can reveal planes while hiding one eye or merging jaw into neck. Flat light can preserve shape clearly while providing fewer plane cues. Neither is automatically superior.
Ask whether the lighting lets you locate the needed landmarks. Keep enough tonal context to distinguish an anatomical edge from a facial-plane transition, cast shadow, highlight, or surface texture.
A shadow edge is not automatically a contour. Do not hard-threshold or posterize the source before making that distinction. If critical information is genuinely lost in darkness, use the dark-reference diagnostic.
Start the crop wider than the final tattoo composition
A crop can make the face easier to inspect while deleting useful relationships. Preserve the whole head shape, hairline, ears when useful, jaw, chin, head tilt, neck relationship, and enough nearby context to explain overlaps or occlusion.
Cropping immediately to eyes, nose, and mouth can remove the structure needed to judge their proportions. Keep an uncropped original and make a separate working crop. The final artistic composition can become tighter later.
The broad photo-to-stencil guide covers source preparation across many subject types and continues into conversion decisions. This portrait stage stays focused on likeness-critical source information before that conversion begins.
Full-image resolution is not face resolution
A large group photograph can still contain a tiny face. Most pixels may describe the room, clothing, and other people rather than the person you need.
Judge the subject itself. Can you locate eyelids, nose base, mouth corners, jaw, and other critical landmarks? A tight crop only enlarges the samples already present. It does not create new detail.
For a group photo, also check overlap from other people, subject position near a wide-angle edge, compression damage in the small face, and whether the crop removes context needed to understand head angle. Ask for the original, uncropped file or a closer alternate when available, but do not reject a group image automatically if its identity structure remains trustworthy.
Screenshots and compressed copies can still work
A screenshot or social download can be usable. Inspect whether compression destroyed eyelid edges, nostril shape, mouth corners, jaw boundary, hairline, or distinctive marks.
Whenever possible, prefer the original camera file, original upload, higher-quality export, or client-provided original because it preserves more real information, not because screenshots are categorically invalid.
Edit for clarity, not beauty
Source preparation should make trustworthy detail easier to read. It should not make the person younger, smoother, more symmetric, more idealized, or generically cleaner.
These are design changes, not neutral cleanup:
- moving an eye;
- leveling both brows;
- straightening or narrowing the nose;
- reshaping the jaw;
- changing the smile;
- removing characteristic asymmetry;
- inventing an eyelid edge;
- rebuilding teeth that are not visible;
- replacing a hairline or ear with a generic clean version.
If artist and client intentionally want a change, treat it as a design decision. Do not let software labels such as "beautify" or "enhance" hide the change.
Keep the original beside every processed version
Rotation, a non-destructive working crop, moderate tonal normalization, scan-border removal, and distraction reduction can make the important source information easier to inspect. Keep the untouched source available throughout.
Compare any processed version back to the original. Did feature position change? Did asymmetry disappear? Did an uncertain edge become suspiciously definite? Did shadow become contour? Did teeth, lashes, iris detail, or hair appear without support?
If yes, the processed image has moved beyond neutral preparation.
Sharpening and AI enhancement do not prove detail
Sharpening can strengthen an existing transition, but aggressive settings can create halos, ringing, amplified noise, and false boundaries.
AI enhancement needs an even clearer distinction:
- Pixel enlargement: more pixels represent the image.
- Visual clarification: existing transitions may become easier to inspect.
- Plausible reconstruction: software creates detail that looks realistic.
- Confirmed identity detail: the feature is supported by the original or another trustworthy photograph of the person.
The first three do not automatically produce the fourth.
For memorial work, crisp AI-generated lashes, iris detail, teeth, hair strands, or an eyelid edge are hypotheses unless another source confirms them. Never discard the original after enhancement.
Old and memorial photos: recover what the photo really shows
Memorial work often has no technically clean source. A grainy, faded, low-contrast photograph can still be usable when identity relationships survive.
Use this order:
- Locate the best original available. Find the scan, print, camera file, uncropped family copy, or version before social compression.
- Collect alternate photographs. They can confirm stable features while the chosen image remains authoritative for pose and expression.
- Map what the primary actually shows. Head silhouette, eyes, nose, mouth, jaw, expression, and major asymmetry may survive when texture does not.
- Separate damage from anatomy. Scratches, fading, blur, compression, and shadow can imitate or erase edges.
- Use supporting photos to resolve critical uncertainty. Confirm a hairline, eye shape, scar, or stable feature without transplanting incompatible pose coordinates.
- Simplify unsupported texture rather than fabricating certainty. Grain and missing micro-detail do not need invented replacements.
- Make unresolved critical choices explicit. If an eye, mouth, or jaw boundary cannot be established, ask for another source or agree on an intentional reconstruction before conversion.
The client's emotionally preferred image can remain the main reference. A technically stronger alternate can help confirm specific features. That preserves the chosen memory without forcing unsupported guesses.
Keep source orientation deliberate
Rotate to natural viewing orientation and note whether the image has ever been mirrored. Left-right identity can matter for scars, facial asymmetry, hair parting, piercings, existing tattoos, and profile direction.
Do not mirror the portrait merely because the opposite direction fits a layout more neatly. If the later question is where to reverse the finished stencil for paper and transfer, use the mirror-for-printing workflow.
Run a landmark confidence pass, not a textbook proportion check
Before conversion, ask whether you can confidently locate the actual person's:
- head angle and silhouette;
- eye line, centers, eyelid shape, and openness;
- brow relationship;
- nose direction, base, and nostrils;
- mouth corners and lip posture;
- jaw path and chin;
- ears and hairline when relevant;
- characteristic asymmetry;
- expression cues that define the chosen image.
Do not compare the source to ideal facial ratios. Compare uncertain features with the rest of the same image and, when necessary, supporting photos of the same person. The Reference Grid Overlay can provide an artist-defined measurement aid without deciding which landmarks are trustworthy.
Five common source decisions
Moderate phone photo vs larger dramatic portrait: choose the moderate file when all identity landmarks are readable and the larger file hides one eye or jaw. Pixel count does not compensate for missing information.
Old memorial scan: keep it when head silhouette, eye placement, nose, mouth, and jaw survive, using another family photo only to confirm uncertain identity cues.
High-resolution close phone portrait: treat resolution and perspective separately if the nose or facial depth looks unusually dominant compared with other images.
Smiling frontal vs neutral three-quarter: keep the selected pose geometry in the primary. Use the other angle to understand the person, not to transplant coordinates.
AI-enhanced memorial eye: if the original is soft but the enhanced version invents crisp lashes and lid edges, treat those additions as suggestions until another source confirms them.
Know when to ask for another source
Request another photograph or original file when an unresolved region is both important and uncertain. Examples include motion-smeared eyes, a hidden mouth corner that defines expression, a jaw visible only as an ambiguous shadow, a group-photo face too small for landmarks, a screenshot that destroyed a key feature, or an AI-restored detail unsupported by any real photograph.
Do not require technical perfection. Require enough trustworthy information to make the identity decisions the portrait needs.
Reference ready? Use this checkpoint
The source is ready to enter stencil generation when:
- the primary reference was chosen deliberately for pose and likeness;
- supporting references have clear roles rather than acting as a silent geometry collage;
- pose, expression, perspective, and orientation are understood;
- identity-critical landmarks are sufficiently clear;
- important uncertainty is resolved with a supporting photo or an explicit decision;
- the crop preserves enough structural context;
- the useful subject region contains enough actual information;
- processed versions have not replaced the untouched original;
- sharpening or AI enhancement has not been mistaken for confirmed detail;
- characteristic asymmetry has been evaluated rather than automatically normalized;
- intended physical size is known well enough to inform the later simplification stage.
If the reference passes but likeness changes after generation, tracing, cleanup, or simplification, use the portrait likeness-loss diagnostic. If the source stays trustworthy but the eventual stencil carries too much information at the intended physical size, use the final-size detail diagnostic.
Do not convert too early into hard black-and-white, posterization, edge detection, or line art just to make the source feel more stencil-ready. Those are interpretation stages.
Prepare the portrait reference to preserve likeness-critical information, not to make the photograph prettier.
Now the reference is ready to become a stencil.
Related Collections
Jump from the guide to reviewed stencil examples
Related Guides
Keep reading from here
How to Make Tattoo Stencils From Photos That Stay Readable
Choose, crop, simplify, and review a photo so the resulting tattoo stencil stays readable at placement size, including blurry and low-resolution references.
tattoo stencil from photo · stencil workflow
Read guide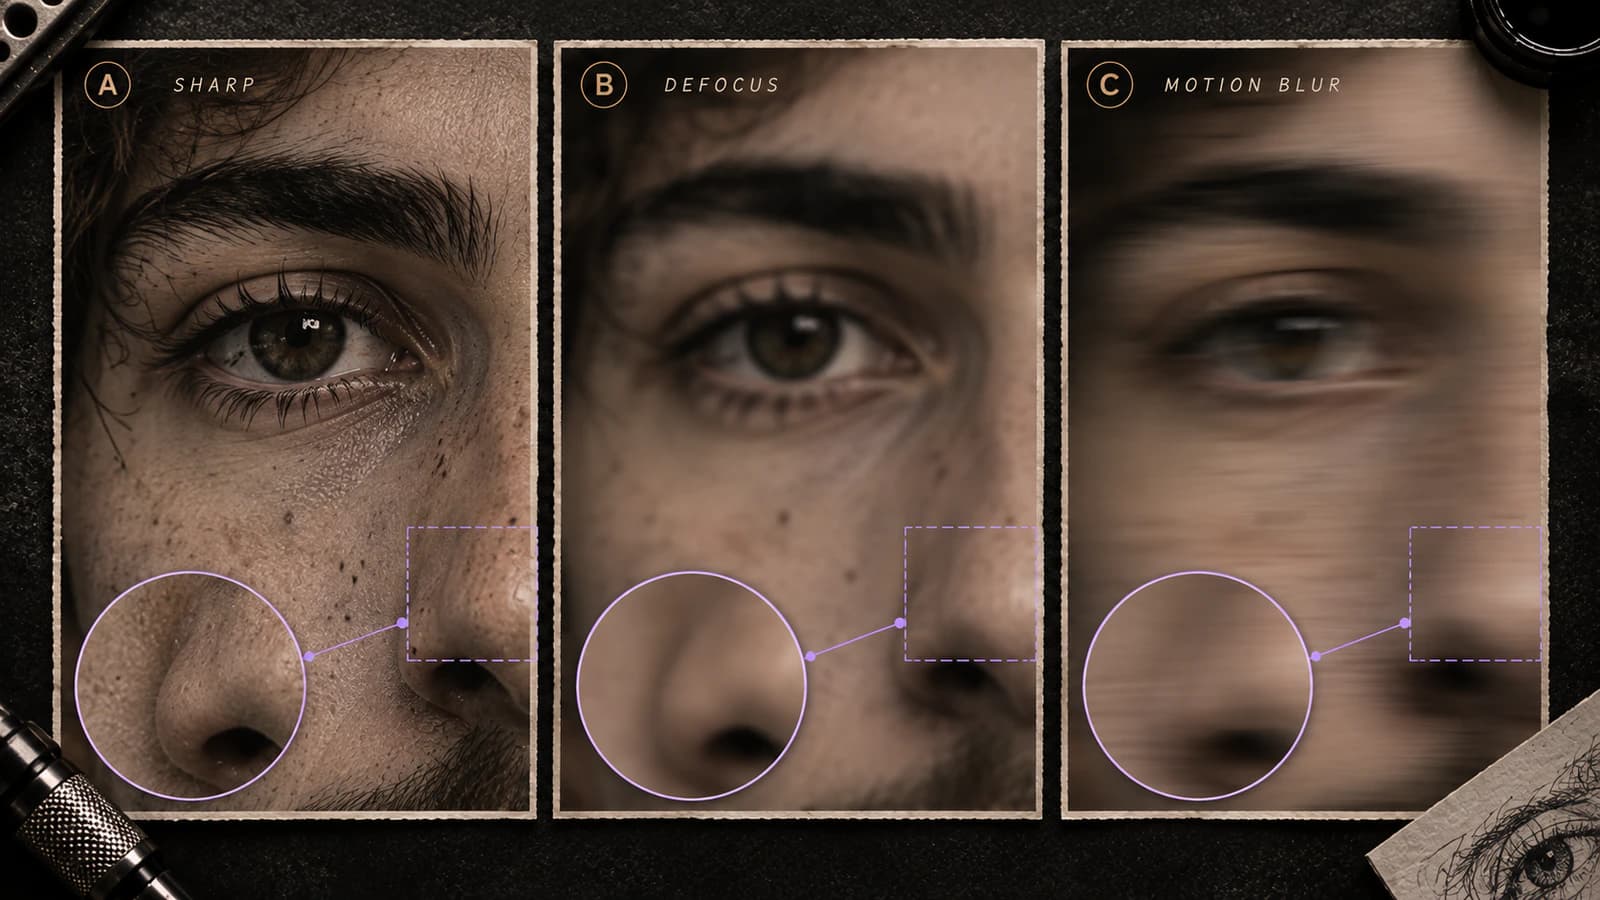
Blurry Tattoo Reference Photo: Is It Usable for a Stencil?
Diagnose a blurry tattoo reference before stencil prep. Separate recoverable softness from missing or uncertain structure, then decide whether to proceed, simplify, or request a better source.
blurry tattoo reference · tattoo reference photo blur
Read guide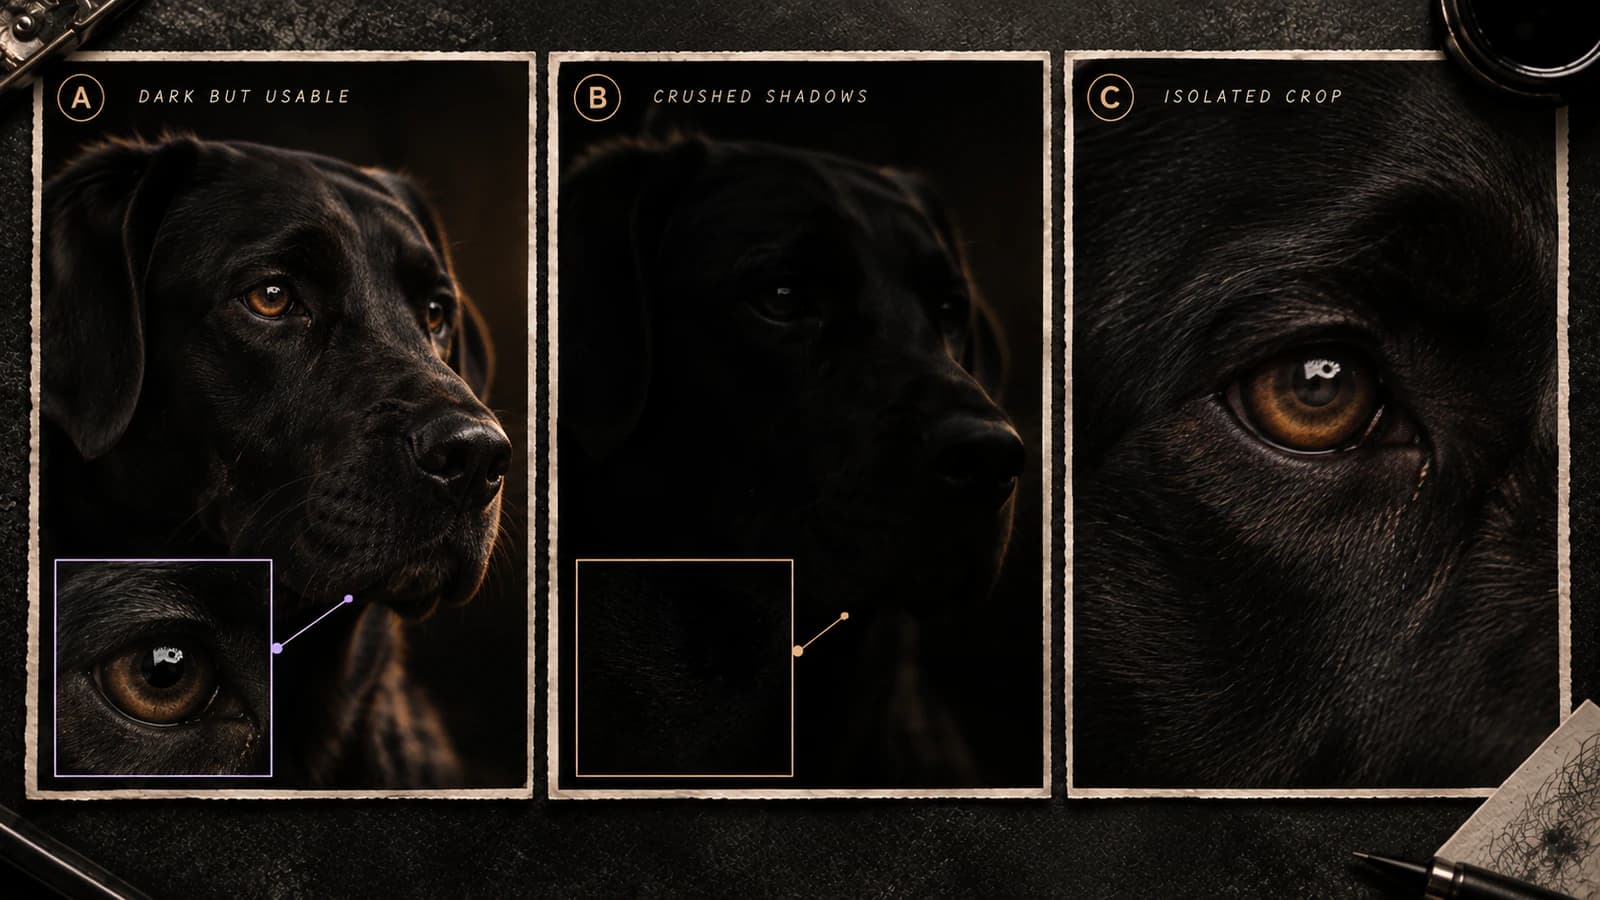
Is My Tattoo Reference Photo Too Dark?
Diagnose a dark tattoo reference before stencil prep. Separate usable dark tones from crushed shadows, weak local separation, and genuinely missing source detail.
dark tattoo reference · tattoo reference photo too dark
Read guideAuthor
Andrea Mezzadra
Founder and product builder at StencilStudio
Andrea builds StencilStudio and tests how the tools fit into real stencil prep, using real references and outputs to document what works, what changes, and where artist judgment still matters.
In the App
Ready to convert the approved portrait reference?
Use the portrait stencil workflow once the source, crop, orientation, and likeness-critical details are settled.