A
Sharp / strong
Geometry and strength both survive.


Troubleshooting
Diagnose faint tattoo stencil printer output when the stencil is visible on paper but weak. Compare file, final size, preview, paper, and a known test sheet.
tattoo stencil printer faint lines · tattoo stencil printer printing faint · thermal stencil printer faint output · tattoo stencil printer weak lines

Visible but weak on paper
Use this check when the stencil is visible but too faint. If the page is blank or nearly blank, start with the broader Printer Troubleshooter instead. If the geometry is still recognizable, compare the same mark from file to final size to print preview to paper.
NO
Treat this as blank or near-blank output, not faint output. Check the file, paper/feed, and printer or app path in the broader troubleshooter.
Open Printer TroubleshooterYES, BUT WEAK
The output exists. Find where the mark first loses strength, then compare against a known control before changing unrelated settings.
Five output patterns
A
Sharp / strong
Geometry and strength both survive.
B
Faint continuous
The line stays continuous, but the mark is weak.
C
Faint + broken
The mark loses both strength and continuity.
D
Missing detail
Strong structure remains, but specific information disappears.
E
Blank
No recognizable stencil geometry is present.
Find the first weak stage
01
Is the finished mark already pale, gray, soft, or intermittent?
02
Does the same mark become fragile only at the intended physical dimensions?
03
Does the prepared document or preview already show the loss?
04
Was the preview usable, but the physical mark becomes weak here?
Known control
The Test Sheet helps separate a client-file problem from a broader physical print problem. It does not prove one cause by itself.
Client stencil faint + Test Sheet sharp
Re-check the client file, final size, layout, and import path first. The same printer can reproduce the control geometry cleanly.
Client stencil faint + Test Sheet faint
Move the paper, printer, and feed path higher on the list because the fixed control weakens too.
Read the pattern
Global faintness
Most recognizable geometry is weak together.
Selective faintness
Only certain line families or regions are weak.
Continuous faint
The line survives but with low visual strength.
Faint + broken
The mark also loses continuity in segments.
Ten quick cases
If the stencil geometry is recognizable on the paper but the marks are pale, weak, or intermittently faint, this is the right problem.
Start with one question: can you see the stencil geometry on the paper?
Do not begin by turning several printer settings up. A faint paper stencil can begin upstream in the file, become fragile at final physical size, look weak in the print preview, or first become weak only on paper. Those are different failure boundaries.
Use the same contour, letter stroke, landmark, or detail at each checkpoint:
FILE → FINAL SIZE → PRINT PREVIEW → PAPER
Ask one question at every handoff: where does this exact mark first become weak?
If the mark is pale, gray, soft-edged, low-opacity, or already intermittent in the finished file, the physical printer is not the first mismatch.
Use the Tattoo Stencil Print Checker to inspect the finished stencil at its intended size. If the broader question is where faintness entered anywhere in the source-to-skin workflow, use the too-light stencil guide instead of treating this as a paper-only problem.
A line that looks obvious while enlarged can become physically tiny when the design is reduced. Fine texture, small isolated marks, narrow internal details, and tightly packed information may lose visual hierarchy before the printer adds any new failure.
Judge the exact intended physical size. Do not invent a universal millimetre threshold: different files, printer paths, papers, and design structures behave differently.
If physical size is still unsettled, use Tattoo Stencil Size & Print. If the question is whether the file contains fine or threshold-sensitive geometry at that size, use the Print Checker.
If the print preview or prepared document has already lost strength, stay upstream of the paper. Check the exact file being sent, final scale, import/export path, and any visible preview transformation before changing physical printer variables.
A preview is not proof of how paper will reproduce, but it is still a useful boundary: if the mark is already weak there, paper cannot be the first place it weakened.
This is the clearest faint-paper pattern: the same geometry is usable in the file and preview, then appears on paper with visibly less strength.
Keep the client file and size fixed. Compare the physical output, then use a known control before editing the artwork or changing several device variables.
Global faintness means most of the recognizable stencil is present but weak. Primary contours, secondary lines, and details all lose visual strength together or nearly together.
Selective faintness means some geometry reproduces strongly while another family is weak. For example:
Selective weakness makes final size, local file geometry, and the location of the failure more important evidence. It does not prove that one of those is the cause.
Do not hide a selective problem with a global correction before you know what changed. Making every surviving mark heavier can damage hierarchy while leaving the original mismatch unexplained.
A continuous pale line still preserves its path. A weak line that becomes dotted, intermittent, or broken has also lost continuity.
For a continuous but faint line, compare strength at the four checkpoints and then compare the same kind of mark on a known test sheet.
For a faint and broken line, use the broken-line continuity diagnostic to ask whether the gaps already exist in the file or preview, whether only very fine geometry breaks, and whether the break follows the feature or a physical output location.
The visual symptom narrows the investigation. It does not remotely diagnose a print head, roller, paper batch, battery, app, or file by itself.
The Tattoo Stencil Printer Test Sheet gives you fixed geometry that is independent of the client stencil. Use it as a comparison, not as a universal pass/fail test.
If the same known geometry is sharp on a control thermal medium but fails only after you switch to tattoo transfer paper, use the test-paper-versus-stencil-paper diagnostic before changing density or hardware. That comparison isolates the changed media condition and forces you to identify the exact paper family, product, preparation, loading, fit, and compatibility first.
Two comparisons are especially useful:
Client stencil faint + Test Sheet sharp
The failure follows the client path more than the known control. Re-check the finished file, intended physical size, prepared document, and import/print path first. The Print Checker is the right place for file-side evidence.
Client stencil faint + Test Sheet faint
A broader physical print-path category moves higher in the investigation because known geometry weakened too. Use the Printer Troubleshooter to route the next check, then follow the current manufacturer instructions for the exact printer, paper, app, loading, supported controls, and maintenance path.
Neither result proves one cause. The control only tells you whether the weakness appears to follow the client file or also affects fixed geometry.
A high-zoom screen view can make a tiny stroke look substantial because the interface magnifies it. The printer receives the geometry at the chosen physical size, not at your editing zoom.
That matters when:
If bold lines remain strong while fine lines become weak, do not immediately call the entire printer output faint. First inspect final-size geometry with the Print Checker and compare controlled fine marks on the Printer Test Sheet.
The tattoo stencil line-weight guide covers the separate design decision about Fine, Normal, and Bold treatment. A line can be dark enough yet geometrically too thin; that is not the same failure as a sufficiently wide mark that reproduces pale.
Use the paper itself as evidence:
These cases deliberately separate strength, continuity, geometry, and presence. Calling all four “faint” makes troubleshooting less precise.
Once you have identified the first mismatch, keep unrelated variables stable.
Do not change the file, final size, paper, app, device, and several printer controls in the same comparison. A better second print after six simultaneous changes tells you almost nothing about which change mattered.
A cleaner sequence is:
This is diagnostic discipline, not a promise that one test isolates every real-world variable.
There is no responsible universal value for heat, density, darkness, speed, pressure, or similar controls across tattoo stencil printers and their apps.
Paper orientation, supported media, loading sequence, power behavior, controls, cleaning procedures, firmware, and maintenance also vary by model and paper system.
Use the current instructions for the exact printer and compatible media you have. This guide does not tell you to open the machine, modify heating elements, bypass protections, make electrical changes, or use incompatible media. If the evidence points to a hardware or device-specific problem, use the manufacturer support path.
Blank output: no recognizable stencil geometry is present. That belongs in the broad Printer Troubleshooter, not this page.
Cross-stage faintness: you do not yet know whether the loss began in source, file, size, paper, or transfer. Start with Why Is My Tattoo Stencil Too Light or Faint?.
Visible but weak paper output: the geometry exists on paper, but its visual strength is poor. That is the problem covered here.
Broken but dark paper output: the surviving segments may be strong, but empty intervals interrupt one intended path. Use the broken-line continuity diagnostic.
Dark but physically thin output: the mark has enough visual strength but its reproduced geometry is too narrow for the intended job. Inspect final-size geometry and line-weight decisions.
Specific information missing: the main stencil may remain strong while particular details do not appear. Use the focused missing-detail print diagnostic to find the first checkpoint where the same feature becomes absent or broken, then use the known-control comparison to decide whether to stay upstream or investigate the physical path.
The useful distinction is simple: this diagnosis begins only after you can recognize the stencil on paper. From there, compare the same mark through FILE → FINAL SIZE → PRINT PREVIEW → PAPER and let the first mismatch decide what to inspect next.
Related Guides
Find where stencil lines first become faint or disappear, from the source file and final size to printing and paper-to-skin transfer.
tattoo stencil too light · faint tattoo stencil
Read guide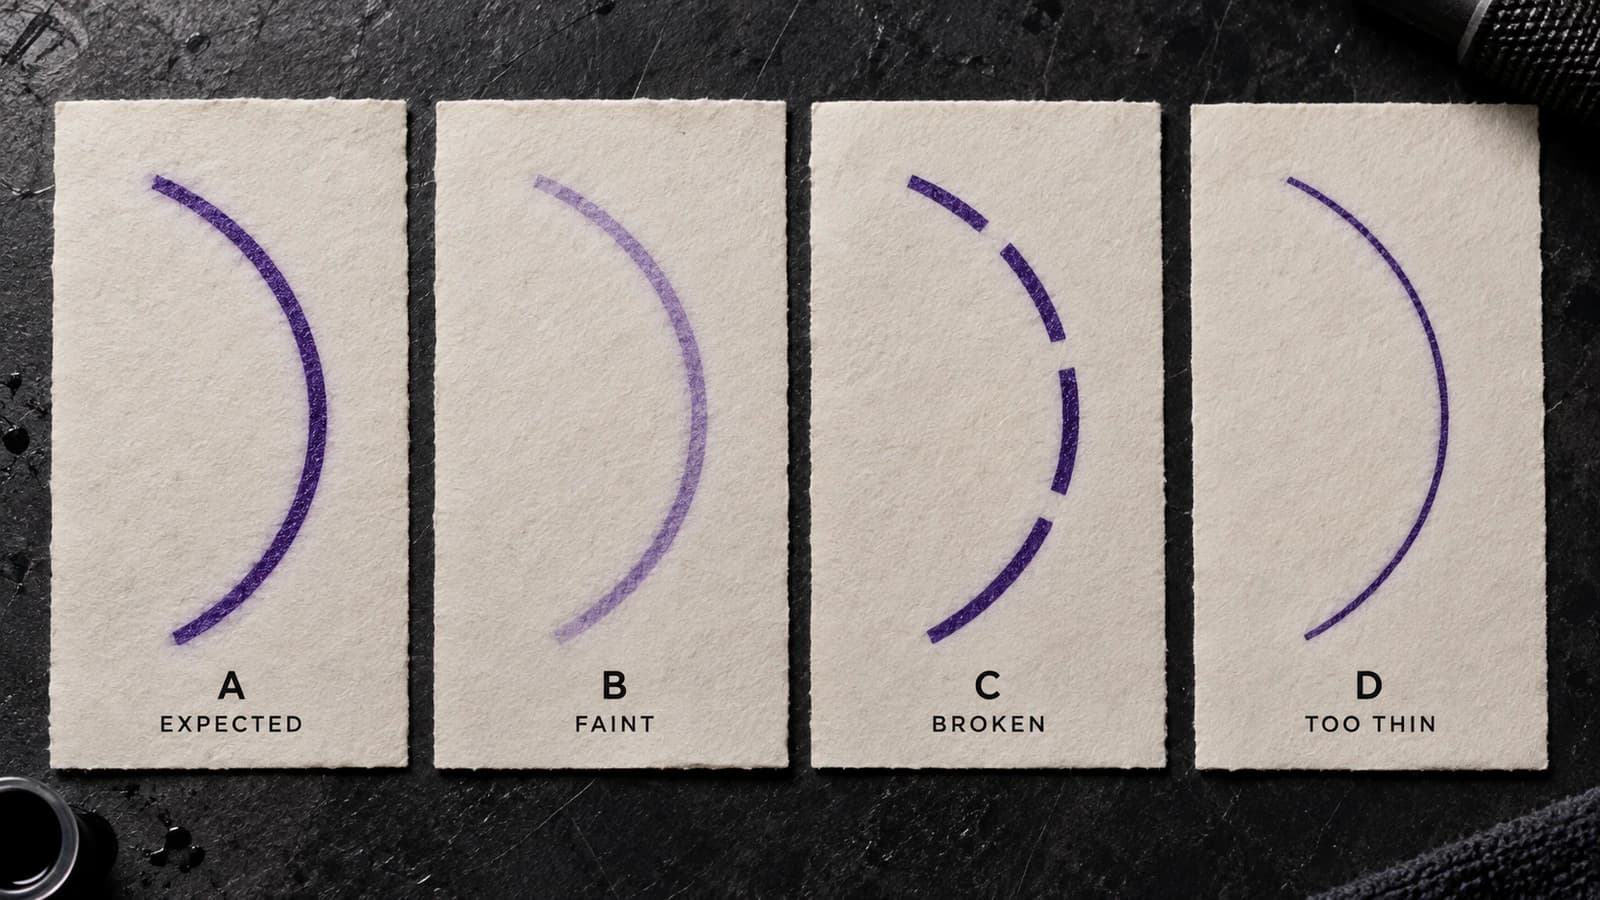
Your tattoo stencil lines are dark enough but print with gaps, dots, or missing segments. Follow one line through file, final size, preview, control, and paper to find where continuity fails.
tattoo stencil printer broken lines · tattoo stencil printer dotted lines
Read guideCompare the same tattoo stencil detail from final-size digital file through print preview and paper to find whether it disappeared before printing or in physical reproduction.
tattoo stencil print missing detail · tattoo stencil printer missing lines
Read guideAuthor
Founder and product builder at StencilStudio
Andrea builds StencilStudio and tests how the tools fit into real stencil prep, using real references and outputs to document what works, what changes, and where artist judgment still matters.
In the App
Use the Printer Troubleshooter when you need to move from the visible symptom into file, layout, paper/feed, or model-specific printer/app checks.