AExpected
Continuous path with stable strength.


Troubleshooting
Your tattoo stencil lines are dark enough but print with gaps, dots, or missing segments. Follow one line through file, final size, preview, control, and paper to find where continuity fails.
tattoo stencil printer broken lines · tattoo stencil printer dotted lines · tattoo stencil printer choppy lines · thermal stencil printer missing segments
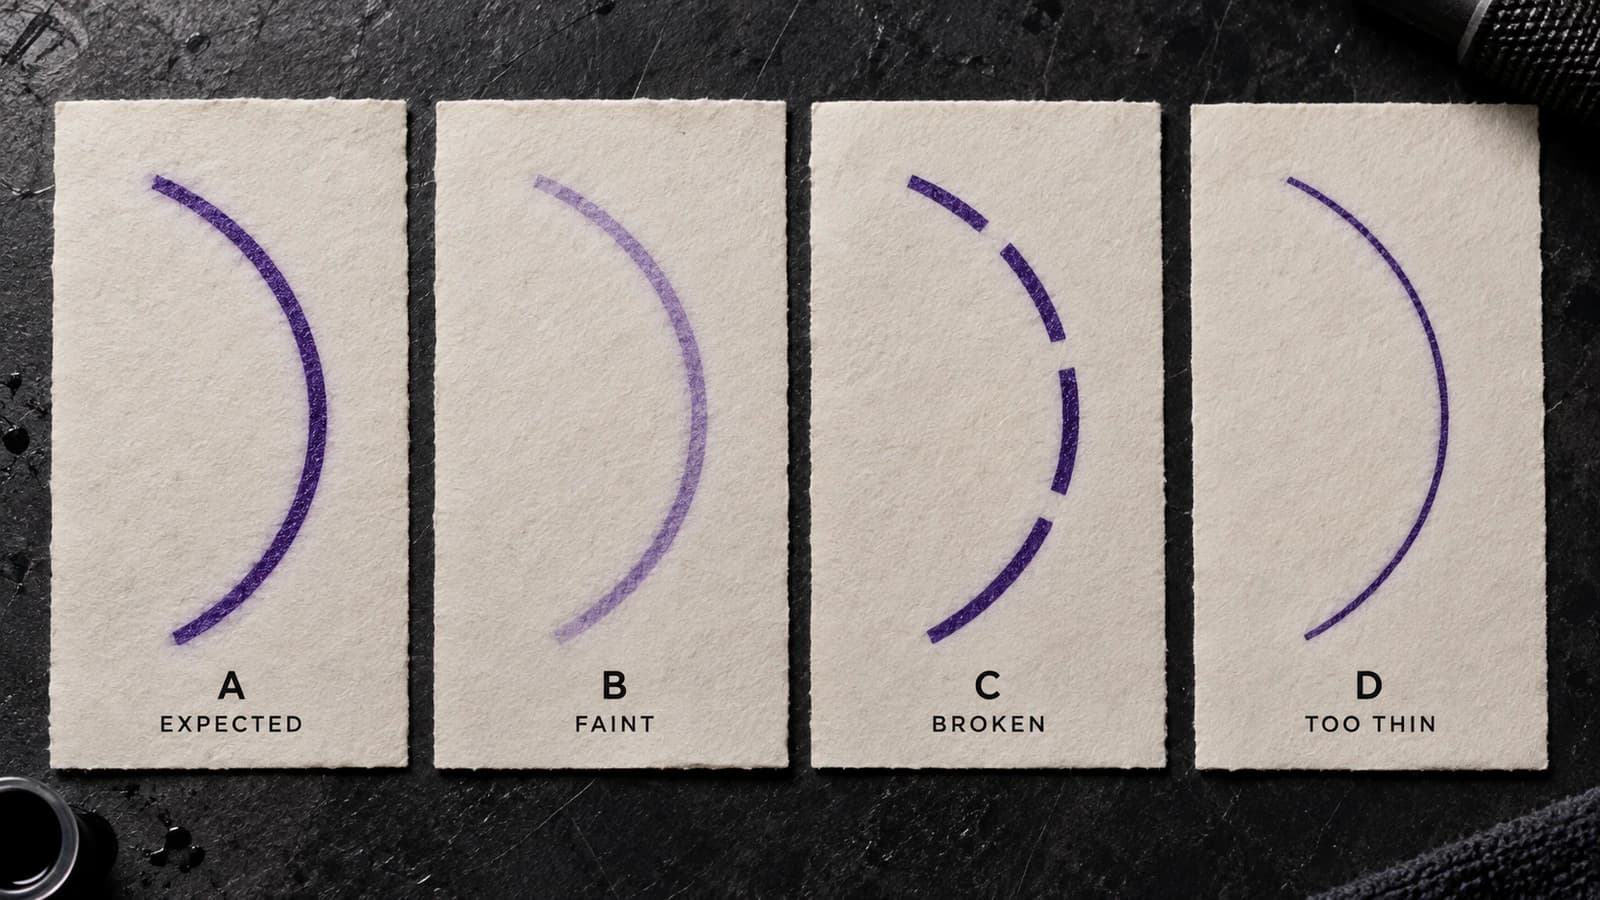
Line continuity diagnostic
Pick one contour that should be continuous. Compare strength, width, and presence separately. Broken output means sections of that intended path are absent, even when the surviving sections are dark and correctly positioned.
Continuous path with stable strength.
The path stays continuous but loses visual strength.
Surviving segments are strong, but sections of the path are absent.
The path is continuous and dark, but its physical width is narrow.
What does the break follow?
The feature
The same contour breaks in the same geometric place even after you move it on the page.
Client-file, final-size, export, or feature-specific reproduction evidence moves higher.
The line class
Fine lines break across the design while stronger contours stay continuous.
Inspect final-size fine geometry, then compare similar fine control lines on the same print path.
The page location
Unrelated lines break whenever they cross the same physical strip of output.
The physical reproduction path becomes more relevant. The pattern still does not identify a component.
No stable location
Breaks move between repeats and do not stay attached to one feature or one paper region.
Treat it as broader intermittent behavior and continue with controlled printer diagnostics.
Move-the-control test
Use a tiny controlled sample when a repeat is justified. Keep the geometry, scale, paper, and supported printer settings stable, but place the same line at a different page position. The result is evidence about location, not proof of a damaged part.
Print 1
Mark the exact line gap and the physical strip of paper it crosses.
Print 2, line moved lower
If the break moves with the feature, client-path evidence increases. If unrelated geometry still fails at the same physical output band, investigate the physical reproduction path.
Known geometry
Compare long-line continuity on the Printer Test Sheet.
A fixed control helps separate a client-specific break from a failure that also affects independent geometry.
Open the Test SheetPhysical-path evidence
Route device, paper, feed, and model-specific checks only after the pattern points there.
Use the broad printer diagnostic when the client line and known control both show physical-output failures.
Open Printer TroubleshooterIf a tattoo stencil line prints dark where it appears but then stops, leaves a gap, and resumes, you have a broken-line problem.
Do not make the whole stencil darker or thicker yet. Pick one broken contour and ask three questions:
Those three checks usually tell you whether to stay with the file, inspect final-size fine geometry, or move into printer/paper troubleshooting.
| What you see | Main problem | Next step | |---|---|---| | Line is continuous but pale | Faintness | Printer faint-lines guide | | Line is dark where present but has gaps | Continuity | Stay on this page | | An entire small feature is absent | Missing detail | Missing-detail guide | | Line is continuous and dark but narrower than intended | Line weight | Line-weight guide | | Whole edge or large page region is absent | Layout, clipping, or interrupted job | Printer Troubleshooter | | Broad stripe crosses many marks | Wider print artifact | Printer Troubleshooter |
A line can be both faint and broken. If the surviving parts are barely visible, diagnose faintness first. If the surviving parts are strong and the problem is the empty gap between them, continuity is the better starting point.
Use the same contour at every checkpoint:
finished file -> intended physical size -> print document / preview -> paper
If the gap is already in the exported stencil, the printer did not create it.
Look for a real interruption in the path. Cleanup, masking, erasing, export, resampling, or another file step may have removed a small section.
Fix the digital line before changing printer variables.
A fine curve can look perfectly smooth when enlarged and become fragile when the entire stencil is reduced to its actual physical dimensions.
Ask:
Use the Tattoo Stencil Print Checker for the finished file and Tattoo Stencil Size & Print if the intended physical dimensions are not locked yet.
If the line is already marginal digitally at final size, do not call it a printer fault yet.
If the gap appears in the PDF, document, app import, or print preview, stay upstream of the paper.
Check the actual file placed in the document, its scale, and any visible conversion step.
A preview cannot promise perfect paper output, but if the line is already broken there, paper was not the first place it failed.
If the file and preview show one continuous path but the printed stencil contains an empty interval, the break first becomes visible on paper.
Now stop editing the tattoo and ask what the paper gap follows.
Suppose the same jaw contour, script stroke, or ornamental curve breaks at the same point each time.
First recheck that exact geometry in the final-size file and print document.
If those are clean, move the same geometry to a different part of the page for one small comparison, or compare it with an independent long line on the Printer Test Sheet.
If the line moves on the page and the break moves with it, inspect the client-specific file path again:
That does not prove the file is wrong, but it makes the specific artwork more relevant than a fixed physical printer location.
If the artwork moves but the break remains in roughly the same physical strip of paper, the printer/paper path deserves more attention.
Use the Printer Troubleshooter and current instructions for the exact printer rather than trying to redraw every stencil around that strip.
A common pattern is:
Check in this order:
If only the client stencil's fine lines break while similar test lines stay continuous, inspect the client file and its final-size geometry first.
If fine test lines also break, the physical print setup becomes more relevant.
Do not thicken the entire stencil to rescue a few fragile marks. That can close counters, merge ornamental gaps, alter script joins, and make portrait guidance too heavy.
This is one of the most useful patterns.
Imagine several unrelated contours. They belong to different parts of the artwork, but all of them develop gaps when they cross the same physical band of paper.
That makes the location more important than the tattoo geometry.
It still does not tell you which internal component is responsible. Printer designs differ, and similar-looking bands can have different causes.
Use a known test sheet to confirm the location pattern, then follow the exact printer's supported paper, loading, cleaning, power, firmware, and service instructions as appropriate.
A gap that appears in one place on one print and somewhere else on the next is different from a stable feature-locked or location-locked break.
Keep the artwork and setup fixed. Use one controlled repeat and one known test line.
Do not keep editing the design every time the gap moves. An inconsistent paper result points away from one stable digital defect, but it still does not identify a specific hardware cause remotely.
When a gap repeats enough to investigate:
Print 1: keep the line in its normal page position and note the gap.
Print 2: move the same line higher or lower on the page without changing its geometry, scale, paper, or supported printer settings.
Then read the result:
You do not need to print a full client stencil for this comparison.
The Tattoo Stencil Printer Test Sheet contains long continuous lines and fine-line patterns that are useful here.
Go back to the client-specific path:
The result does not prove the client file is bad. It shows that the same physical setup can reproduce at least some known continuous geometry.
Now printer/paper troubleshooting becomes more relevant because independent geometry shows the same kind of failure.
Check the exact model's supported paper, loading, power, app/driver, cleaning, firmware, and service guidance rather than applying a generic hardware fix.
That gives you a location pattern without relying on client artwork. Use the broader Printer Troubleshooter and model-specific support path.
If only extremely fine lines break, final-size representation still deserves close inspection.
If substantial contours also contain gaps, check:
If the sheet is physically damaged, route that first through Printer Creasing Paper.
A strong digital line that repeatedly breaks only on paper is a good reason to investigate the printer path. It is not enough to diagnose a particular component from a web article.
Use the distinction that helps you act.
The question is whether the main problem is a feature disappearing or a continuous path becoming discontinuous.
A faint line preserves the path. You can still follow it continuously even though it is weak.
A broken line has empty intervals. The surviving sections can be dark.
Increasing darkness may strengthen those surviving sections without reconnecting the missing segment, while also making other parts of the stencil too heavy.
Use the faint-lines guide when strength is the main failure.
A thin line can still be continuous and dark. That is a line-weight issue.
A broken line is interrupted by empty sections.
If the line exists continuously but its printed width is wrong, use the Print Checker and line-weight guide instead.
If the paper was folded, creased, wrinkled, caught, or jammed while printing, the physical sheet changed during the run.
Treat the feed problem first. A line interrupted exactly where the paper folded is not a clean test of line continuity.
Likewise, if an entire page edge or rectangular region is missing, check clipping, printable area, page fit, or an interrupted job rather than treating every absent line as an individual gap.
A global darkness increase can:
If the paper contains a truly empty interval, first find where that interval appears in the workflow.
A model-supported darkness change may be a useful later test. It is not the first answer.
Suppose a jaw contour prints strongly from the ear toward the chin, disappears for a short section, then resumes at normal strength.
Check:
If an entire jaw landmark disappears, Missing Detail may be the better route. If the defining symptom is one strong line with empty intervals, continuity is the right problem to follow.
A script word can remain readable while one continuous stroke breaks into pieces.
Follow that exact stroke through file, real size, preview, and paper before making the whole word heavier.
If an entire isolated dot, punctuation mark, or crossbar disappears, switch to the missing-detail workflow instead.
Repeated geometry is useful because several similar curves appear in the same design.
Do not conclude more than the pattern shows.
The goal is not to guess which printer part is bad. It is to find where a continuous line first became broken and fix that stage without making the rest of the stencil worse.
Related Guides

Diagnose faint tattoo stencil printer output when the stencil is visible on paper but weak. Compare file, final size, preview, paper, and a known test sheet.
tattoo stencil printer faint lines · tattoo stencil printer printing faint
Read guideCompare the same tattoo stencil detail from final-size digital file through print preview and paper to find whether it disappeared before printing or in physical reproduction.
tattoo stencil print missing detail · tattoo stencil printer missing lines
Read guide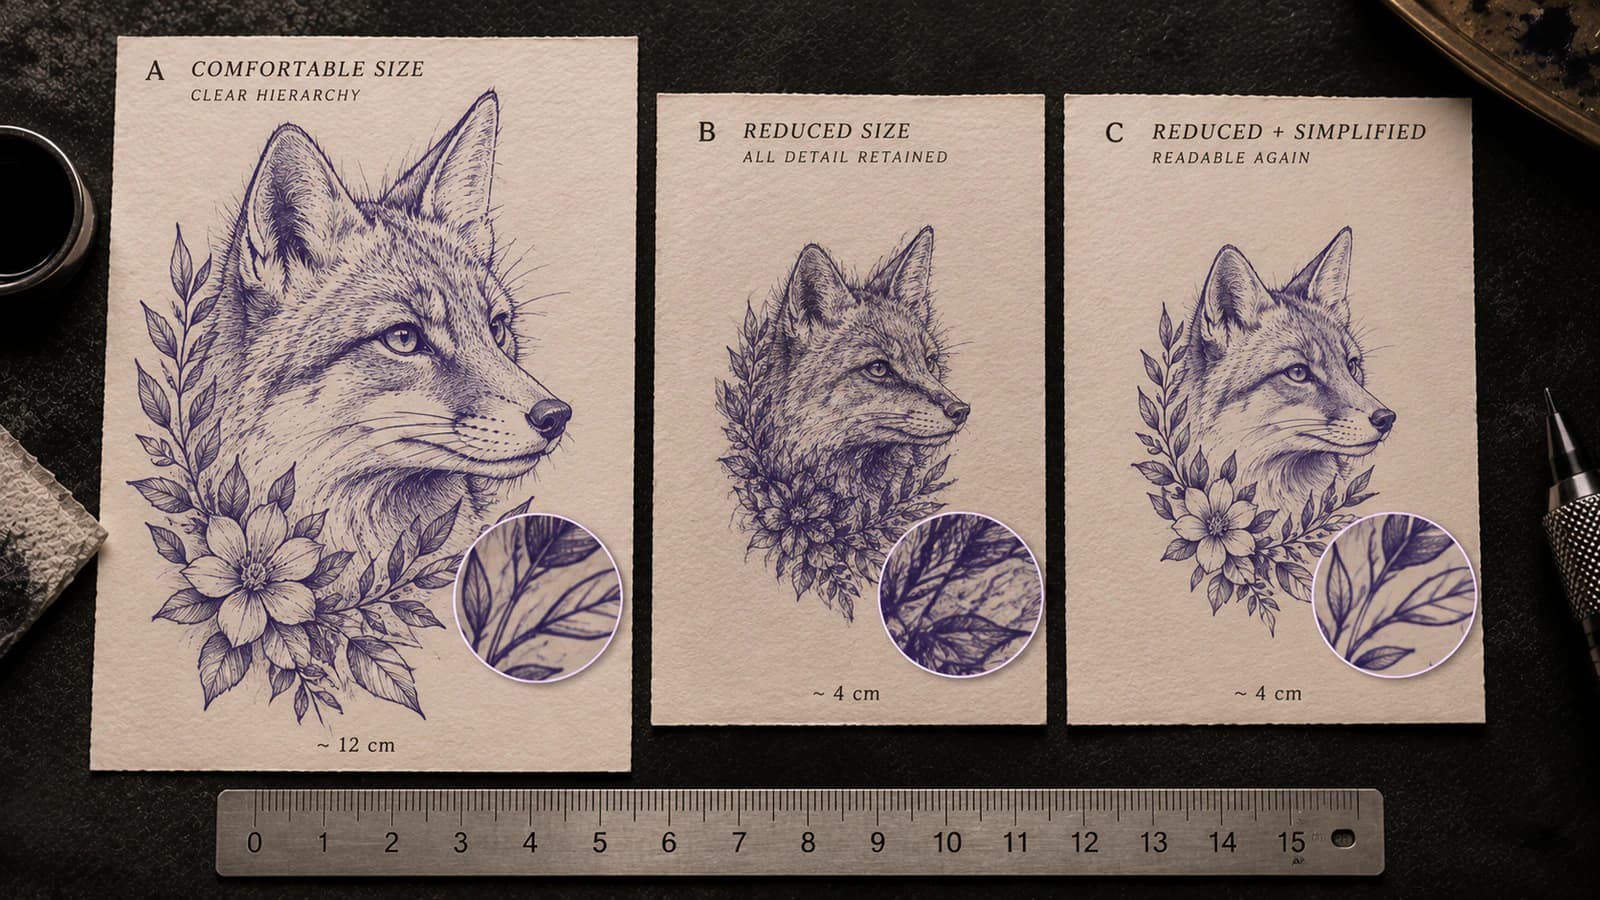
Tell whether a tattoo stencil has too much information for its intended physical size by checking line separation, gaps, landmarks, and texture before printing.
tattoo stencil too detailed · final size readability
Read guideAuthor
Founder and product builder at StencilStudio
Andrea builds StencilStudio and tests how the tools fit into real stencil prep, using real references and outputs to document what works, what changes, and where artist judgment still matters.
In the App
Use the Printer Test Sheet to see whether long and fine control lines stay continuous through the same physical print path.