

Troubleshooting
Why Is My Tattoo Stencil Printer Creasing the Paper?
Transfer paper comes out creased, wrinkled, folded or physically marked after printing? Check the damage shape, paper preparation, loading and feed path before changing the stencil file.
tattoo stencil printer creasing paper · tattoo stencil printer wrinkled paper · tattoo transfer paper wrinkles · stencil printer feed damage
- August 23, 2026
- 10 min
If tattoo transfer paper comes out creased, wrinkled, folded, buckled, or physically indented, check the paper and feed path before you change the artwork.
A stencil file cannot physically fold a sheet. Making the lines darker, thicker, simpler, or more detailed is therefore usually the wrong first fix.
Start with the damaged paper itself:
Where did it bend, what shape is the damage, and does the same physical area fail again?
If the printer stops completely and the sheet has to be removed, treat that as a jam or interrupted feed first and follow the safe jam instructions for your exact model.
Inspect the sheet before changing settings
Put the damaged sheet beside an unused sheet from the same pack and check:
- Was the corner, curl, or wrinkle already there before loading?
- Where does the damage begin?
- Does it start at an edge or corner?
- Is it one crease, a local buckle, or several compressed folds?
- Can you see the deformation when the sheet is tilted under light?
- Can you feel a physical ridge or indentation?
- Is only one transfer-paper layer distorted, or the whole stack?
- Is the printed artwork shifted or distorted near the crease?
- Did the sheet enter and travel straight?
- Has the same physical part of the paper been damaged more than once?
Do not jump straight to a specific roller, guide, spring, sensor, or print head. The shape can tell you what to inspect next, but it usually cannot identify an internal component by itself.
Classify the deformation by shape
Different damage patterns suggest different checks.
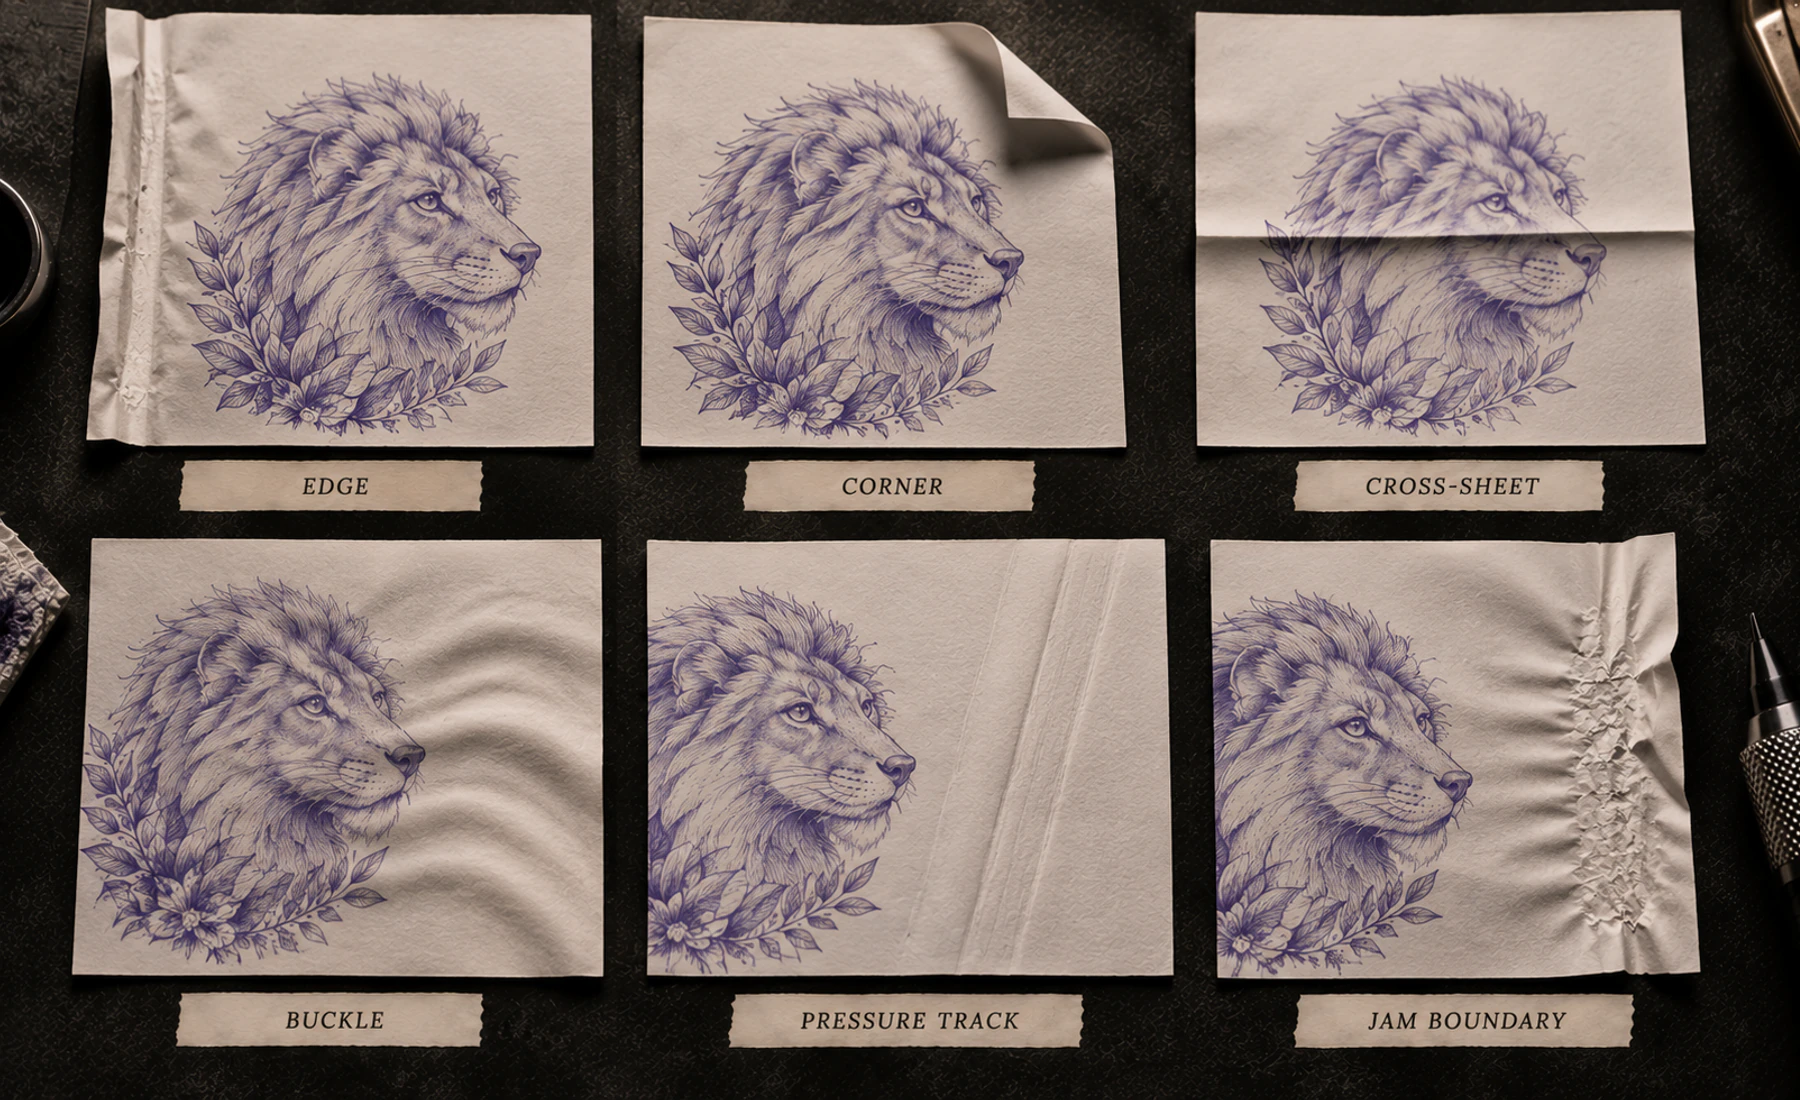
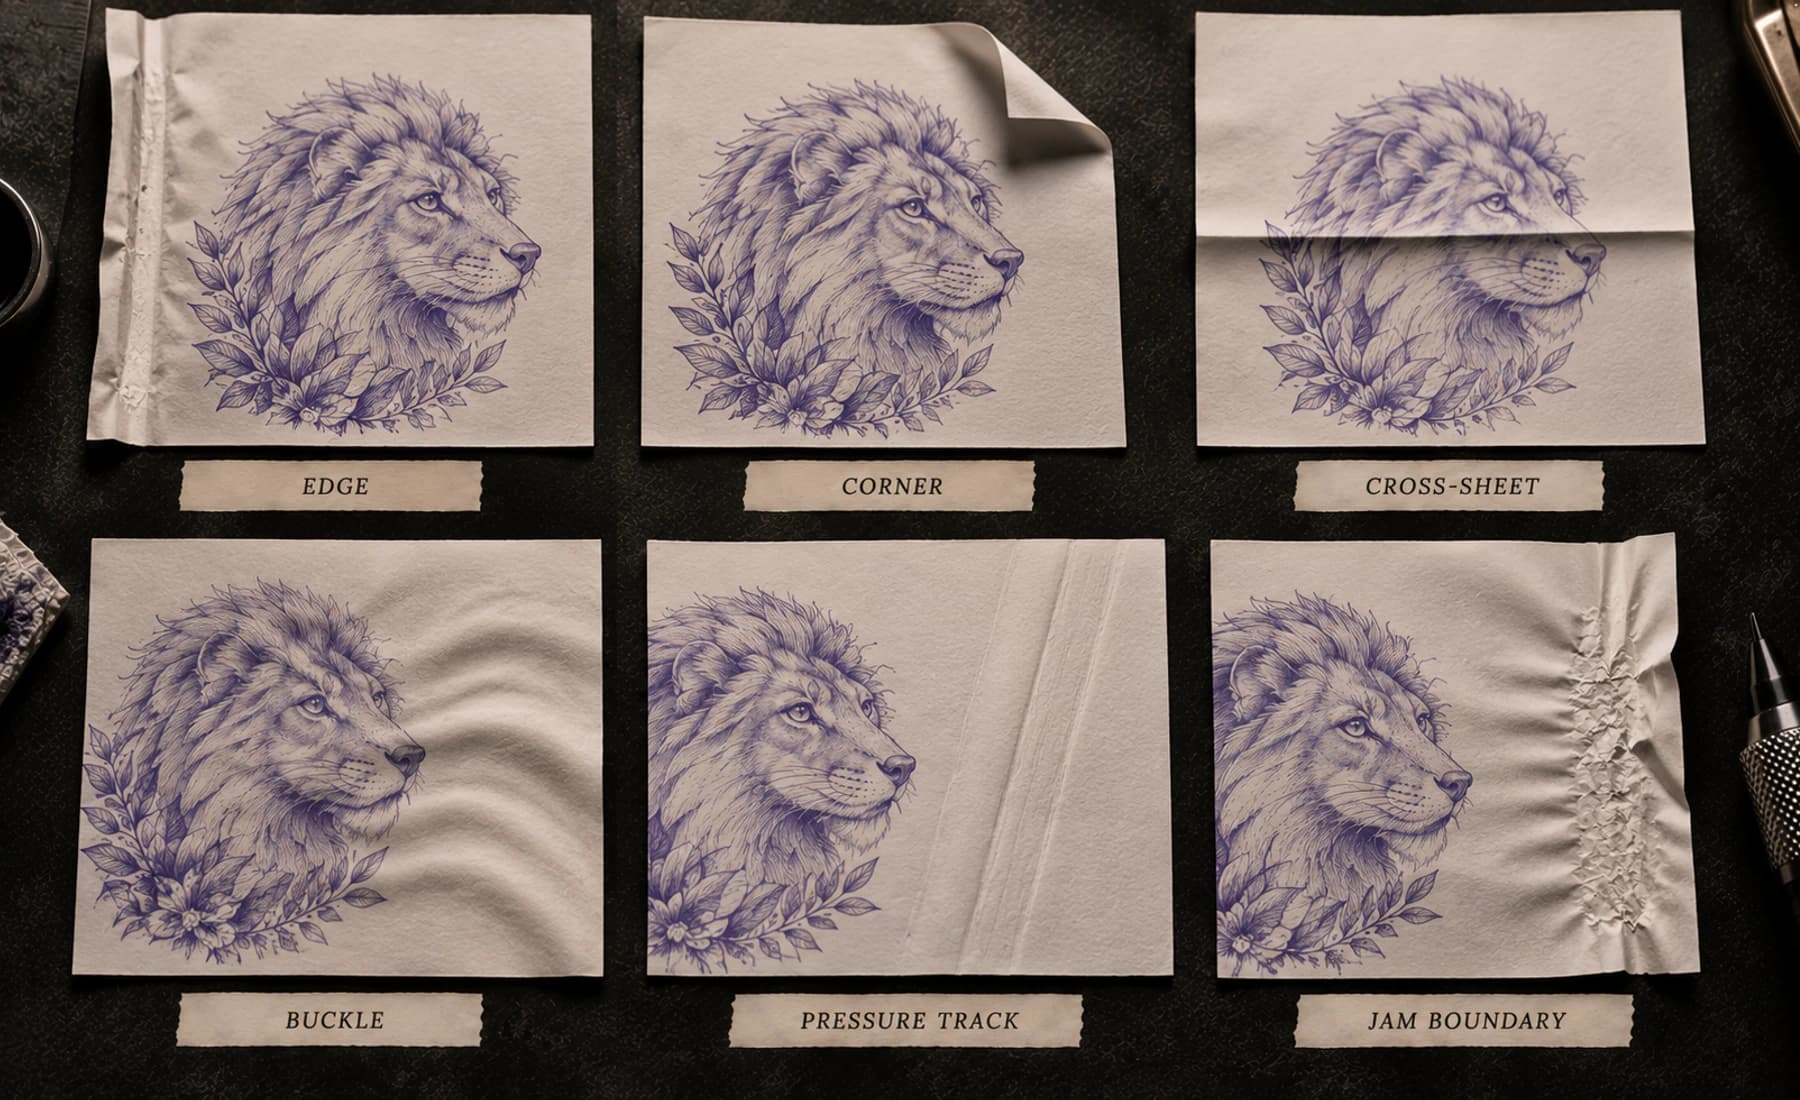
| What the paper looks like | Check next | |---|---| | Edge crease | Entry alignment, sheet squareness, paper size, retained-layer alignment, and whether the same edge repeats | | Folded corner / dog-ear | Corner condition before loading, cut quality, entry alignment, and whether the same side catches again | | Crease across much of the sheet | Its physical position and whether unrelated sheets develop the same line at the same feed point | | Local buckle or ripple | Paper curl, layer alignment, storage condition, and whether the buckle follows the sheet or a fixed printer location | | Several compressed wrinkles | Stop repeated runs if the feed is progressing toward a jam; recheck preparation and loading | | Straight pressure track or indentation | Confirm it is physically in the paper, then check whether it repeats in the same place | | Crease after a visible hesitation | Note where the catch happens and whether it repeats | | Paper stops completely | Treat as a jam/interrupted feed and use model-specific guidance |
The goal is not to guess the failed part. It is to decide whether the problem follows the sheet, the loading attempt, or the same physical path through the printer.
Make sure it is really a crease
A visible stripe in the print is not automatically physical paper damage.
Check the affected area three ways:
Look
Tilt the sheet under good light. Is it actually bent, rippled, folded, raised, or indented?
Feel
With normal clean handling, can you feel a ridge or channel?
Compare the print
Does the printed artwork also become lighter, broken, shifted, or distorted along the physical damage?
Use the result to route the problem:
- Paper is flat but a light stripe is visible: investigate print output, not creasing.
- Paper is indented and the print changes in the same strip: keep checking the physical feed path.
- Paper is folded and the artwork shifts with it: do not edit the design to compensate.
- Paper is flat but the whole image is diagonal: treat skew or alignment as the main symptom.
If you cannot see or feel a physical deformation, this is probably not the right diagnostic.
Check whether the damage repeats in the same physical place
The tattoo design can move around the page. A mechanical crease often stays tied to the paper path.
Note the damage relative to the sheet, for example:
- near the leading-right corner;
- 15 to 20 mm from the left edge;
- across the page at roughly the same feed distance;
- a narrow track that repeats on one side.
You do not need laboratory measurements. You only need enough consistency to answer: is this happening in the same physical place?
Same place on repeated sheets
If correctly prepared, unrelated sheets repeatedly crease along the same physical track, the tattoo artwork becomes less likely to be the cause.
At that point, use the exact printer's maintenance/support documentation rather than guessing which internal part is responsible.
Different place each time
Recheck variables that can change from one loading attempt to another:
- curled or bent paper;
- corner condition;
- entry alignment;
- transfer-paper layer alignment;
- sheet size and cut edge;
- paper brand or construction;
- whether the sheet was pushed, pulled, or constrained during feed.
Change one obvious variable at a time.
Move the artwork as a quick check
If you want to know whether the crease follows the design, move the same artwork to a different position on the page while keeping the paper preparation and loading method unchanged.
If the artwork moves but the crease stays in the same physical strip, the paper damage is not following the stencil geometry.
That does not tell you which printer component is responsible. It tells you not to waste time redrawing the tattoo.
Separate crease, skew, and jam
These problems can overlap, but the first major failure determines what to do next.
| What happens | Treat it as | |---|---| | Sheet exits but is physically creased, folded, buckled, or indented | Creasing / physical deformation | | Sheet tracks diagonally but stays physically flat | Skew / alignment | | Sheet enters off-track and then folds | Feed/alignment problem with physical deformation | | Feed hesitates and the sheet exits damaged | Catch / feed issue | | Sheet stops and cannot complete the feed | Jam / interrupted feed | | Paper stays flat but lines are faint, broken, clipped, or too heavy | Print-output problem |
A jam can leave a wrinkled sheet behind. If the printer stopped, follow the jam procedure first.
Check the transfer-paper layers for your exact setup
Tattoo transfer papers do not all use the same layer preparation, and printers do not all expect the same stack.
Before another run, check the instructions for the exact paper and printer combination:
- Which protective or interleaving sheets should be removed?
- Which layers stay together during printing?
- Which side faces the required direction?
- Are the retained layers aligned at the leading edge?
- Has one layer shifted or curled relative to the others?
- Is the paper size supported by the printer?
For example, MUNBYN publishes model-specific ITP05 preparation and loading instructions, while other printers use different workflows. Do not copy one paper-layer recipe across every thermal stencil printer.
If only one layer wrinkles while the rest stay flat, note that. If the complete stack folds together, note that too. Both observations are useful, but neither proves an internal hardware fault on its own.
For the broader paper-selection question, use How to Choose Tattoo Stencil Paper.
Inspect the paper before blaming the printer
Before a controlled retry, check the sheet for:
- existing folds;
- bent or crushed corners;
- stored curl;
- wrinkles;
- uneven or damaged cut edges;
- shifted layers;
- contamination or adhesive where it should not be;
- dimensions outside the printer's documented media range.
General printer guidance also commonly warns against loading curled or wrinkled media or forcing sheets into the feed. Apply the current loading instructions for your exact tattoo printer rather than borrowing a rule from a different device.
If the problem began immediately after changing paper brand, sheet size, or layer preparation, compare that change first. Do not conclude from one sheet that the paper brand is bad.
Compare the last setup that worked with the current one
If the printer previously fed cleanly, write down what changed.
Possible differences include:
- paper brand or paper type;
- retained layers;
- sheet dimensions;
- storage/curl condition;
- cut edge;
- loading orientation;
- printer or companion app;
- a model-specific media setting.
Then test the most plausible difference first.
Do not change paper, layer preparation, printer settings, artwork size, loading method, and app in one attempt. If the next sheet works, you will not know which change mattered.
Observe entry and exit without touching the moving sheet
From outside the printer, watch whether the first visible deformation appears:
- as the paper enters;
- after it has travelled some distance;
- near the exit;
- immediately after a hesitation.
Do not put fingers or tools into a powered feed path, remove covers during printing, or improvise internal adjustments.
If a visibly flat sheet enters correctly and repeatedly comes out with the same physical track, move toward model-specific support rather than continuing to sacrifice transfer paper.
One controlled retry is more useful than a stack of failed sheets
After correcting an obvious loading or paper problem, repeat once with:
- the same simple print file;
- the same physical size;
- the documented paper preparation;
- the same supported printer settings;
- the same loading method.
Ask one question:
Does a flat, correctly prepared sheet develop the same damage in the same place and direction?
If yes, the repeated physical pattern matters. If no, inspect the paper/loading variable you changed before running several more sheets.
The Tattoo Stencil Printer Test Sheet can provide simple known geometry when you also want to see whether print quality changes along the damaged strip.
Do not edit the tattoo to solve folded paper
If the sheet itself creases, these are poor first fixes:
- thickening the linework;
- increasing contrast;
- simplifying or regenerating the stencil;
- adding detail;
- moving important geometry away from the damaged strip.
Artwork changes can hide a printing problem. They do not make a folded sheet flat.
Some printers advertise anti-wrinkle or paper-control features, which confirms that creasing and jams can be genuine feed problems, but the implementation is model-specific. Phomemo, for example, currently markets an anti-wrinkle system on the M08F Plus. That is not a universal diagnosis for another printer.
Five quick reads from a damaged sheet
One corner folds and the image distorts there
Check the corner before loading, entry alignment, sheet dimensions, and whether the same physical side catches again.
A straight indentation crosses the sheet and the print is lighter there
First confirm that the line is physically in the paper. Then note its location and compare one controlled repeat.
One paper setup feeds cleanly and another wrinkles
Compare paper construction, retained layers, dimensions, edge condition, and the documented loading method before blaming either the printer or the paper brand.
The paper is flat but the image is diagonal
That is not a crease problem. Check skew and alignment instead.
The paper stops halfway
Treat it as a jam or interrupted feed. Follow the exact printer's safe jam instructions rather than pulling the sheet through by force.
When to stop testing and use model-specific support
Stop experimenting with client artwork when:
- the sheet is flat before loading;
- paper preparation matches the documented workflow;
- loading is correct;
- the same problem repeats with simple or unrelated artwork;
- the deformation appears in the same physical location or pattern;
- changing the obvious paper/loading variable does not remove it.
At that point, the problem is no longer behaving like tattoo-artwork geometry. Use the printer manufacturer's inspection, maintenance, or service guidance.
Do not open the casing, bend guides, shim rollers, alter springs or internal pressure, bypass sensors, add lubricant, or improvise internal repairs from a generic article.
Quick decision map
Paper comes out physically damaged:
- Was it already curled, bent, or wrinkled? Fix the material/preparation first.
- Did the sheet stop? Follow jam guidance.
- Is the paper actually deformed, or is it only a printed stripe?
- What shape is the damage: edge, corner, cross-sheet crease, buckle, repeated wrinkles, or pressure track?
- Does it repeat in the same physical place?
- Does a known-working paper/setup still feed cleanly?
- If the pattern keeps repeating with correct preparation, move to model-specific printer support.
Manufacturer references
- Phomemo M08F Plus: current product material describes an anti-wrinkle system intended to reduce jams and paper creases.
- MUNBYN ITP05 paper installation: use its current model-specific layer and loading instructions if that is your printer.
- Brother paper-loading guidance: general printer guidance reinforces checking that paper is flat and not curled or wrinkled before loading; use your tattoo printer's own documentation for the actual procedure.
Related Guides
Keep reading from here
How to Use a Tattoo Thermal Stencil Printer Without Losing the Stencil
Use a tattoo thermal stencil printer with a repeatable file-to-paper workflow: control size and mirror, load transfer paper correctly, test output, and diagnose blank, faint, blurry, merged, skewed, or missing lines.
tattoo thermal stencil printer · tattoo stencil printer workflow
Read guide
Tattoo Stencil Paper: Choose the Right Media for Your Workflow
Choose the right tattoo stencil or transfer paper for thermal printers, freehand tracing, portable printers, and inkjet stencil systems.
tattoo stencil paper · tattoo transfer paper
Read guide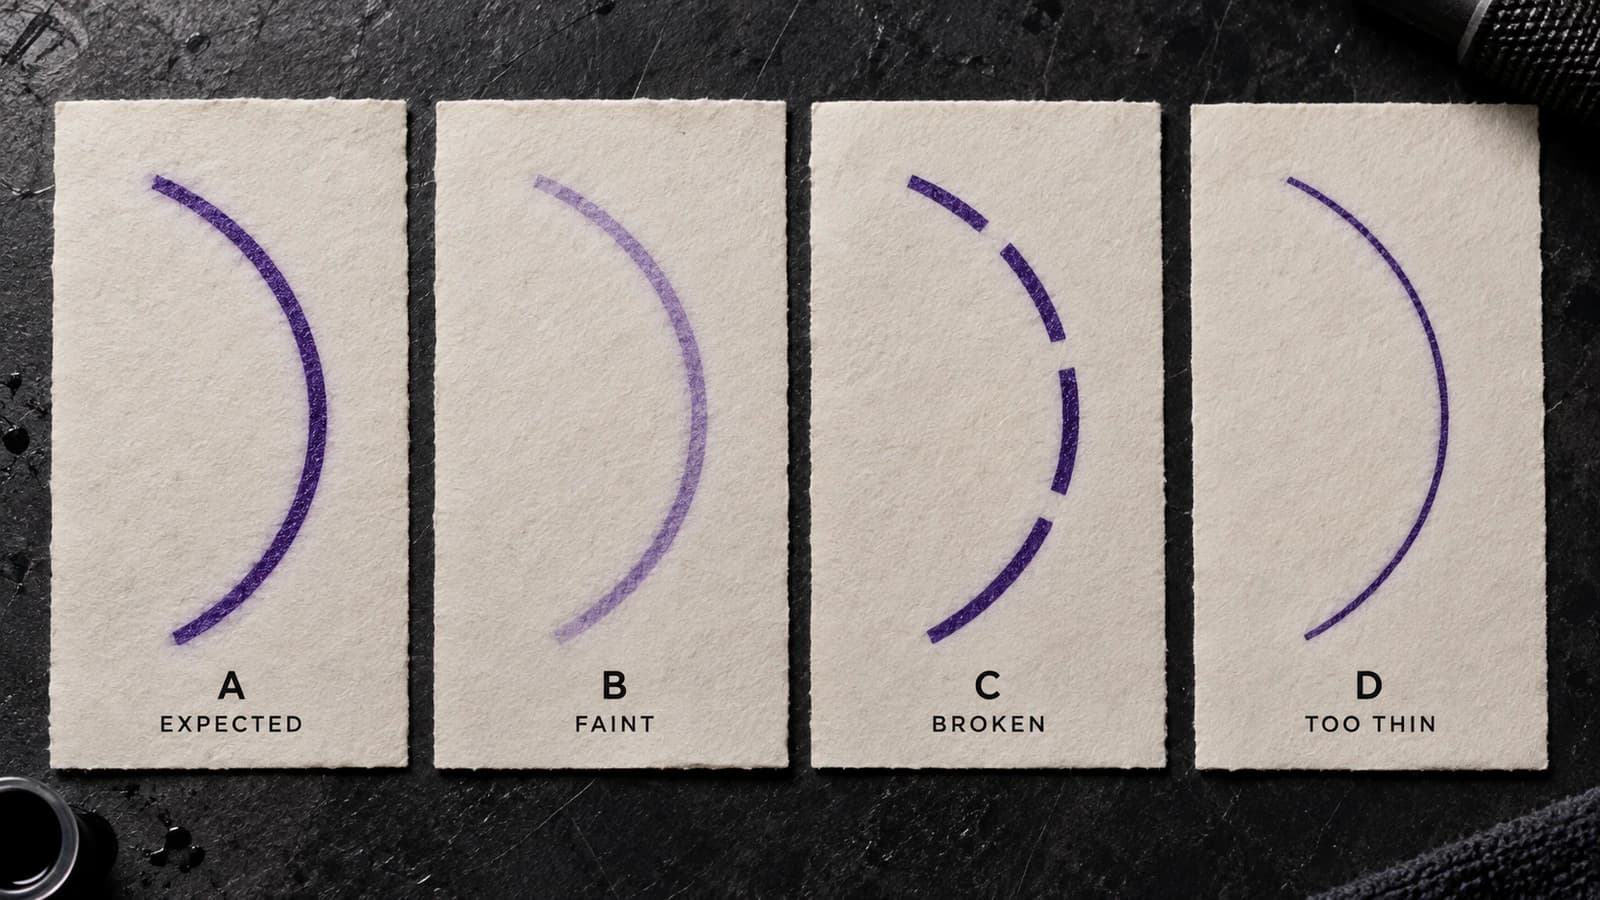
Tattoo Stencil Printer Broken Lines: Find What the Break Follows
Your tattoo stencil lines are dark enough but print with gaps, dots, or missing segments. Follow one line through file, final size, preview, control, and paper to find where continuity fails.
tattoo stencil printer broken lines · tattoo stencil printer dotted lines
Read guideAuthor
Andrea Mezzadra
Founder and product builder at StencilStudio
Andrea builds StencilStudio and tests how the tools fit into real stencil prep, using real references and outputs to document what works, what changes, and where artist judgment still matters.
In the App
Route the symptom before changing the stencil file
Use the Printer Troubleshooter when the damaged sheet points to paper, feed, device or another print-output problem that needs a broader diagnostic path.