

Phoenix Tattoo Stencil Ideas
This collection vets the phoenix as a transfer job, not as inspiration. The rebirth idea is simple: a firebird rising from flames. The stencil problem is harder: wings,…
- 6
- Practical
- Artist-first
This collection vets the phoenix as a transfer job, not as inspiration. The rebirth idea is simple: a firebird rising from flames. The stencil problem is harder: wings, flame-feather layers, and a long tail must stay separable at the size you will actually tattoo. Use this page to choose a rebirth direction (rising, perched, or circular), rank flame-feather hierarchy before transfer, and run open-gap, symmetry, and final-size checks so dense plumage does not merge on skin.
The gallery reuses reviewed bird, flame, and wing stencil studies as structural analogues. Each one teaches a specific phoenix transfer lesson, and each caption says which lesson it carries. They are vetting references, not finished phoenix flash.
Choose a Rebirth Direction: Rising, Perched, or Circular
Every phoenix here succeeds for a different reason. Decide which large structure should carry your design first, then let flames and feathers support it.
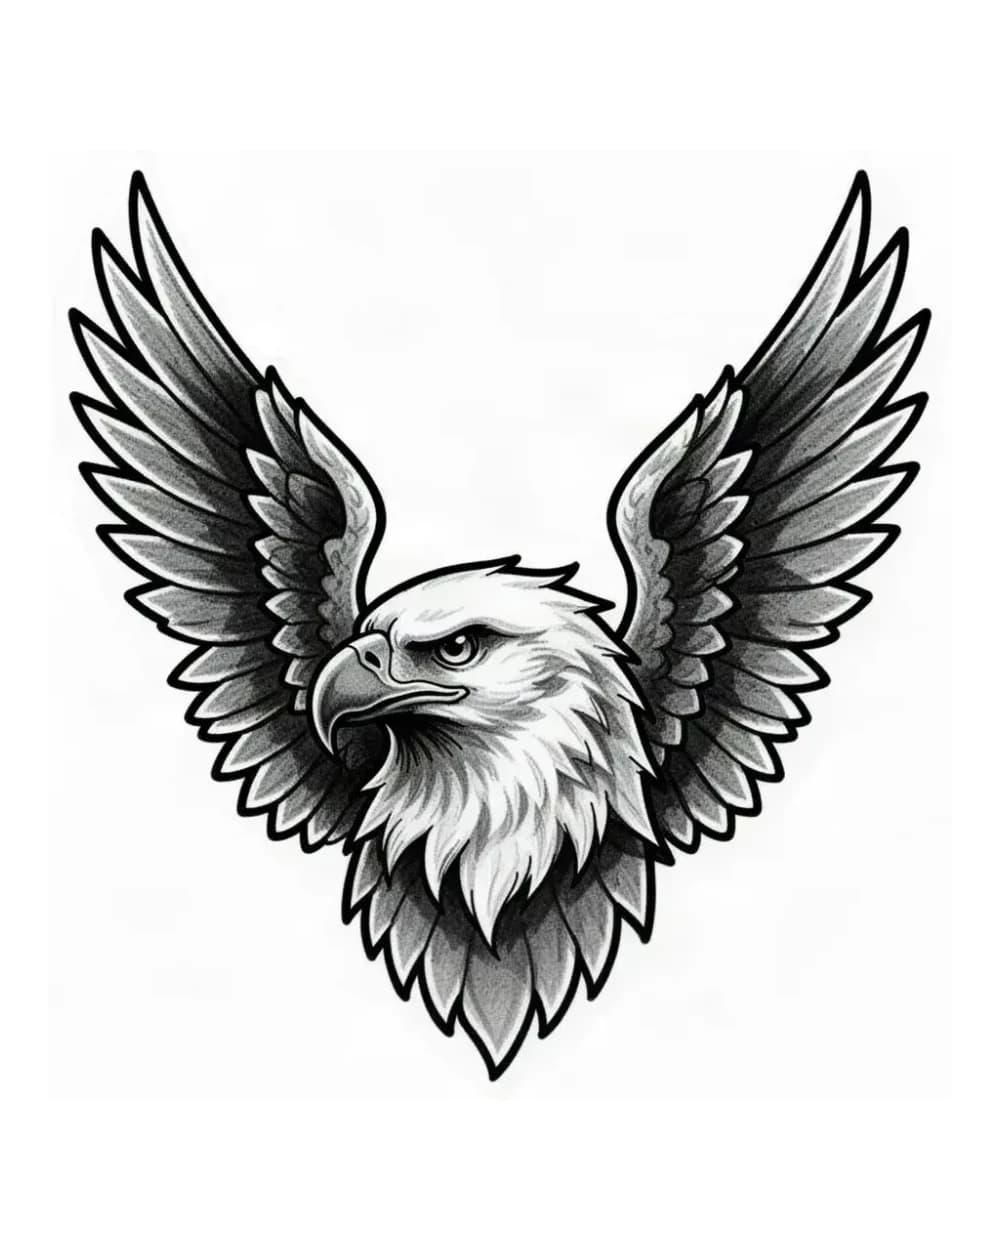
- Rising with lifted wings: the spread-wing raptor and wing-forward hummingbird studies show this direction. Recognition comes from the head and beak plus the full wing span. Choose it for back, chest, thigh, and upper-arm placements where the wings have room to lift without folding back onto the body. It needs the most width, because span is the identity. If the wings cannot open at the planned size, the design stops reading as a phoenix and becomes a generic bird.
- Perched in a vertical column: the front-facing owl study shows this direction. Recognition comes from the head, eye relationship, and torso silhouette with the tail falling below. Choose it for forearm, calf, spine, and sternum placements where a tall narrow zone favors a stacked bird over a wide one. It survives smaller widths than rising, but only when the perch, tail plumes, and flame accents stay outside the torso contour instead of crossing it.
- Circular with a ring or moon frame: the owl and crescent moon study shows this direction. Recognition comes from the bird plus one clean open gap between the bird and the ring. Choose it for shoulder caps, knees, elbows, and back-of-neck placements where a compact round composition fits the anatomy. The ring must stay secondary. The moment the circle carries as much line weight as the bird, rebirth symbolism collapses into decoration.
If you are comparing across mythical creatures rather than within phoenix structure, browse the broader fantasy stencil collection to see how dragons, kitsune, winged deer, and other mythic subjects handle silhouette and detail control. For choosing among real bird species instead, use the bird stencil owner, which holds flying-versus-perched comparison with beak, foot, and feather-row simplification.
Rank Flame-Feather, Wing-Span, and Tail-Plume Hierarchy
Phoenix detail fails when flames and feathers are treated as equals. A transferable phoenix always ranks structure in the same order:
- Keep the outer body contour and head shape continuous and dominant.
- Keep the wing-span edge or the perched torso edge as the second read, with real negative space between wing and body.
- Keep flame tongues and tail plumes as directional flow that points away from the body, never crossing the head, eye, or wing edge.
- Add interior feather splits and flame texture last, as rhythm that follows the wing and tail rather than as uniform fill.
Two concrete failure patterns dominate. First, flame tips drawn with the same pointed shape as feather tips: the lower half of the design becomes unreadable because the eye cannot separate fire from plumage. Give flames and feathers different jobs by varying their width, spacing, or curvature so each layer has its own visual signature. Second, tail plumes that touch the wing edge or a supporting flower, moon, or cloud: the touching point becomes one dark mass at transfer size. The sacred-heart flame study demonstrates the fix: the central emblem stays dominant while flames expand outward instead of cutting across the primary shape. Apply the same outward-only rule to every phoenix flame.
When the question is which close lines will merge first, use the line weight guide as the owner for line-weight judgment. When the whole design feels dense at the intended width, use the final-size detail diagnostic before redrawing anything structural.
Run Open-Gap, Symmetry, and Final-Size Checks
Do not judge a phoenix zoomed in. Reduce the finished stencil to the intended physical width and inspect the tightest clusters first.
- Open gaps: name every channel that must stay skin-colored: beak gap, eye separation, gaps between wing and body, gaps between tail plumes, gaps between flame tongues, and the gap between the bird and any ring, moon, or support element. Close any one of these and the surrounding detail fuses. The circular study proves the point: the moon gap is the composition, and chest stipple near it must be simplified before the gap is narrowed.
- Symmetry: rising and frontal phoenix designs usually promise mirrored wings. Mirror the stencil and inspect it flipped. Uneven feather density makes the whole bird look tilted even when each wing is well drawn. Compare feather group counts side to side, lighten the heavier wing first, and never add detail to the lighter wing to catch up. The winged hourglass study shows the target: matched feather rhythm around a stable center.
- Final size: print or preview at 1:1 scale and check feather splits near the wing edge, flame-tip clusters, tail-plume separations, and any support intersections. Simplify the first cluster that closes, which usually means removing small flame licks, secondary feather splits, or stipple dots before touching head, contour, or span. Re-check after every pass. A dense phoenix often needs two rounds: one for the tightest texture, then one for the next competing layer.
For exact width, page layout, and a true-size PDF, use the Tattoo Stencil Size and Print Calculator to inspect the finished stencil at real physical size before printing.
Fit the Direction to Placement and Size
A phoenix that looks good flat can still fail on the body when the composition fights the anatomy. Match the direction to the zone, then adjust flow before generation.
- Back and chest: accept the largest rising compositions with full span and layered flame wraps. Keep wingtips clear of the shoulder blades and neck edge, and keep the tail flow above the waistband line so clothing does not cut the read.
- Thigh and upper arm: accept rising or tall perched designs with moderate flame support. Let the head sit near the wider end of the muscle, keep the body axis along the limb, and check the wrap from two viewing angles so the far wing does not disappear behind the limb.
- Forearm and calf: favor perched columns or compact rising studies running along the limb. Keep the S-curve gentle, avoid sharp bends where feather rows stack, and protect tail-plume separation where the limb curves.
- Shoulder cap, knee, and back of neck: favor circular compositions that fit round anatomy. Confirm the ring stays concentric on the curve and the bird keeps its gap from the ring at every viewing angle.
- Wrist, ankle, hand, and behind ear: reserve for the most compact rising or perched studies with almost no flame texture. If beak, eye, or wing-edge gaps start to close at the test size, the design needs a larger placement or a simpler silhouette, not finer lines.
For the reasoning behind wrap, taper, rotation, and body-line checks, use the placement guide as the owner for body fit.
Transfer-Ready Checklist Before You Print
Work through this list at the exact physical width, in order. Stop at the first failure, fix it, then restart the list.
- Chosen direction is named (rising, perched, or circular) with a placement reason, not a mood reason.
- Head, beak gap, and eye separation stay open and dominant over all flame and feather texture.
- Wing span or torso edge reads second, with real negative space between wing and body.
- Every flame tongue and tail plume points away from the body and never crosses the head, eye, or wing edge.
- Flame tips and feather tips use different shapes or spacing so fire and plumage stay distinguishable.
- All support elements (ring, moon, branch, flower, cloud) sit outside the bird contour and stay lighter than the primary structure.
- Mirrored wings carry matched feather density on both sides, checked on a flipped preview.
- The tightest gap and the densest repeated-detail cluster are identified at 1:1 scale and simplified before any structural line is weakened.
- Reference images show clear bird structure with separated flame and feather layers, not just color or mood.
These are curated phoenix vetting studies for visual comparison, not a phoenix generator. When your direction is settled, prepare your own reference with the photo-to-stencil workflow, then generate one stencil online when the source is ready. If you are still building basic stencil skills, the beginner stencil guide owns that workflow and this page does not repeat it.
Continue Into Flash and Print Without Relearning Basics
Once a direction passes the checklist, move to execution through the owners that hold that depth. Browse finished pieces in the flash stencil collection when you want broad flash context, or lay out a sheet in the flash sheet maker when the phoenix needs to sit with companion designs. Paper, size, and print mechanics stay with their owners; this page holds the phoenix direction and hierarchy decision only.
FAQ
Which rebirth direction suits my placement and size?
Rising suits wide zones such as back, chest, and thigh where the wing span can open fully. Perched suits tall narrow zones such as forearm, calf, spine, and sternum where a stacked bird fits the anatomy. Circular suits round zones such as shoulder caps, knees, and the back of the neck where a ring frames the bird compactly. When two directions both fit, keep the one whose head, span or torso edge, and support gaps stay separable at the exact width you plan to tattoo.
How do I structure flame-feather hierarchy so it transfers cleanly?
Rank head and outer contour first, wing span or torso edge second, flame and tail-plume flow third, and interior feather splits last. Keep flames pointing outward without crossing the head or wing edge, give flame tips a different shape or spacing than feather tips, and simplify the tightest flame or feather cluster at final size before weakening any structural line.
How do I keep dense plumage and flames readable at final size?
Preview at 1:1 scale, find the smallest gap and the densest repeated-detail cluster, and simplify secondary marks there first. Protect the beak gap, eye separation, wing-to-body channels, tail-plume separations, and the bird-to-ring gap. Remove small flame licks, secondary feather splits, and stipple dots before touching the head, contour, or span, and re-check after every simplification pass.
What dense-detail pitfalls must I avoid before print or transfer?
Equal-weight flame tips and feather tips that fuse into one pointed mass, tail plumes touching the wing edge or a support element, a ring or moon drawn as heavy as the bird, mirrored wings with uneven feather density, and support flowers or branches crossing the head or torso. Each of these reads fine zoomed in and fails at transfer size.
Where do I go next for flash, sheet building, or tools without relearning basics here?
Use the flash collection for broad flash browsing, the flash sheet maker to lay out a sheet, the photo-to-stencil workflow to prepare your own reference, and the size calculator for true-size layout and print. This page owns only the phoenix direction choice and transfer hierarchy; generation, sizing, paper, and beginner technique stay with their owners.
How is this different from the fantasy collection and the bird owner?
The fantasy collection compares across mythical creatures to show how different subjects handle silhouette and detail control. The bird owner compares real species with flying-versus-perched logic and feather-row simplification. This page stays inside the phoenix transfer job: rising versus perched versus circular direction choice, flame-feather hierarchy, and open-gap, symmetry, and final-size vetting adapted to firebird density.
Examples
Phoenix stencil examples
Compare the linework, spacing and detail choices that make each stencil read differently.
Rising-direction study: a spread-wing eagle where the profile head, full span, and feather layering show how a rising phoenix must rank span first and interior feather splits second.
Explore more animal tattoo stencil gallery stencils
- The raptor reads first through the profile head and beak plus the full wing span, with feather layering sitting inside that span. That ranking is the same hierarchy a rising phoenix needs.
- Artists planning a rising phoenix with lifted wings who need to confirm the outer span survives before flame-feather texture is kept.
- Interior feather splits near the wing edge close before the span does, which is exactly how dense phoenix flame-feather rows fail. Protect the head and beak gap plus the outer wing edge first, then simplify the tightest feather cluster at final size.
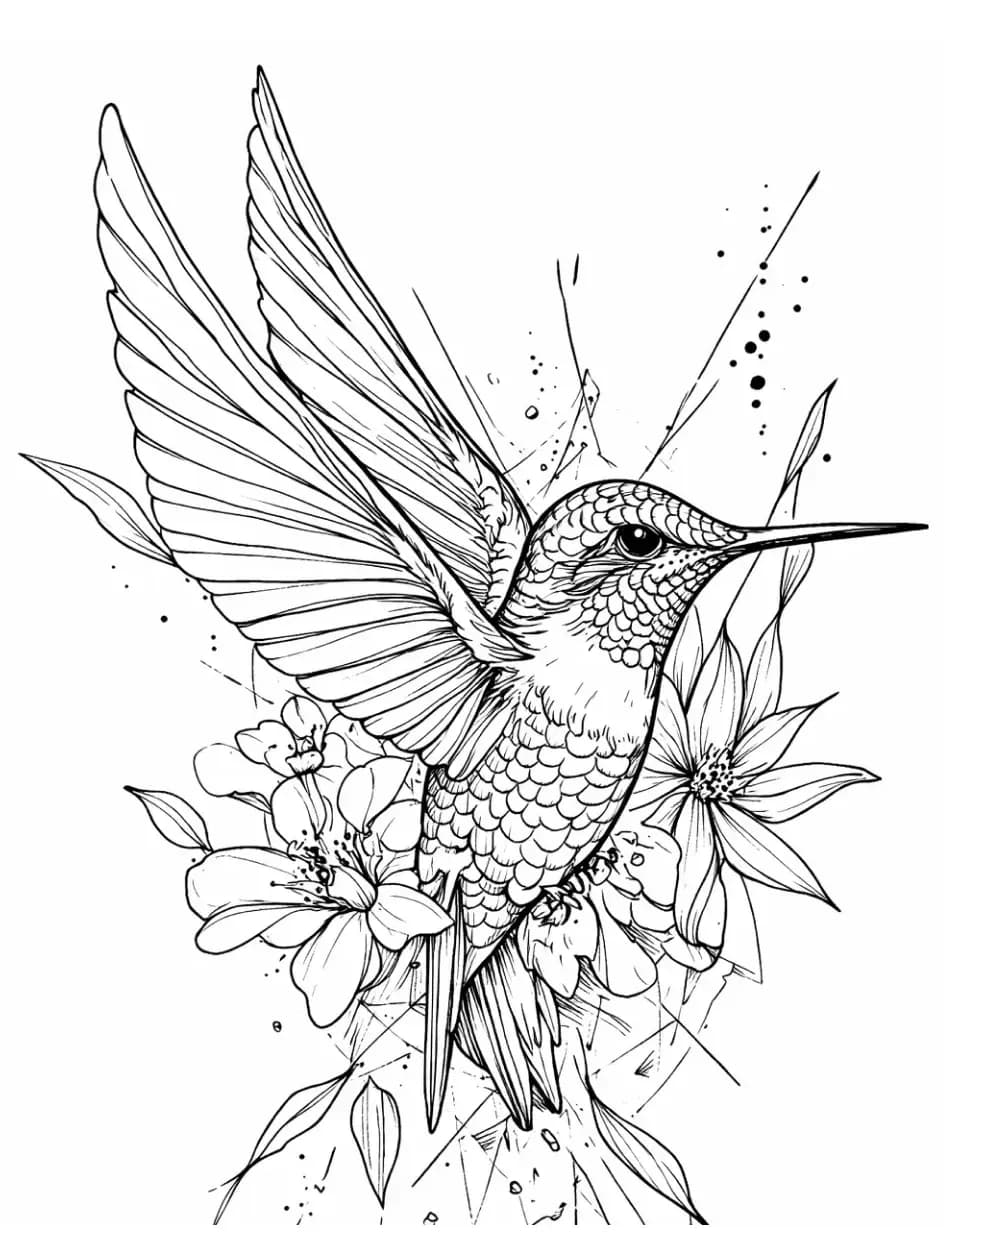
Compact rising study: a wing-forward hummingbird where beak direction and the raised wing edge show how a small rising phoenix must keep flight posture ahead of botanical or flame support.
Explore more animal tattoo stencil gallery stencils
- The bird reads first through beak direction and the raised wing edge, with floral accents held outside the outer contour. That outside-or-inside discipline is what keeps a small phoenix from becoming texture.
- Artists testing a compact rising phoenix for forearm, shoulder cap, or calf placements where the flight posture must land in one glance.
- Petal veins and fine wing micro-lines merge with the wing edge when reduced, the same failure that erases small phoenix flame tips. Keep the beak gap and wing outline stronger than any supporting veins or flame splits.
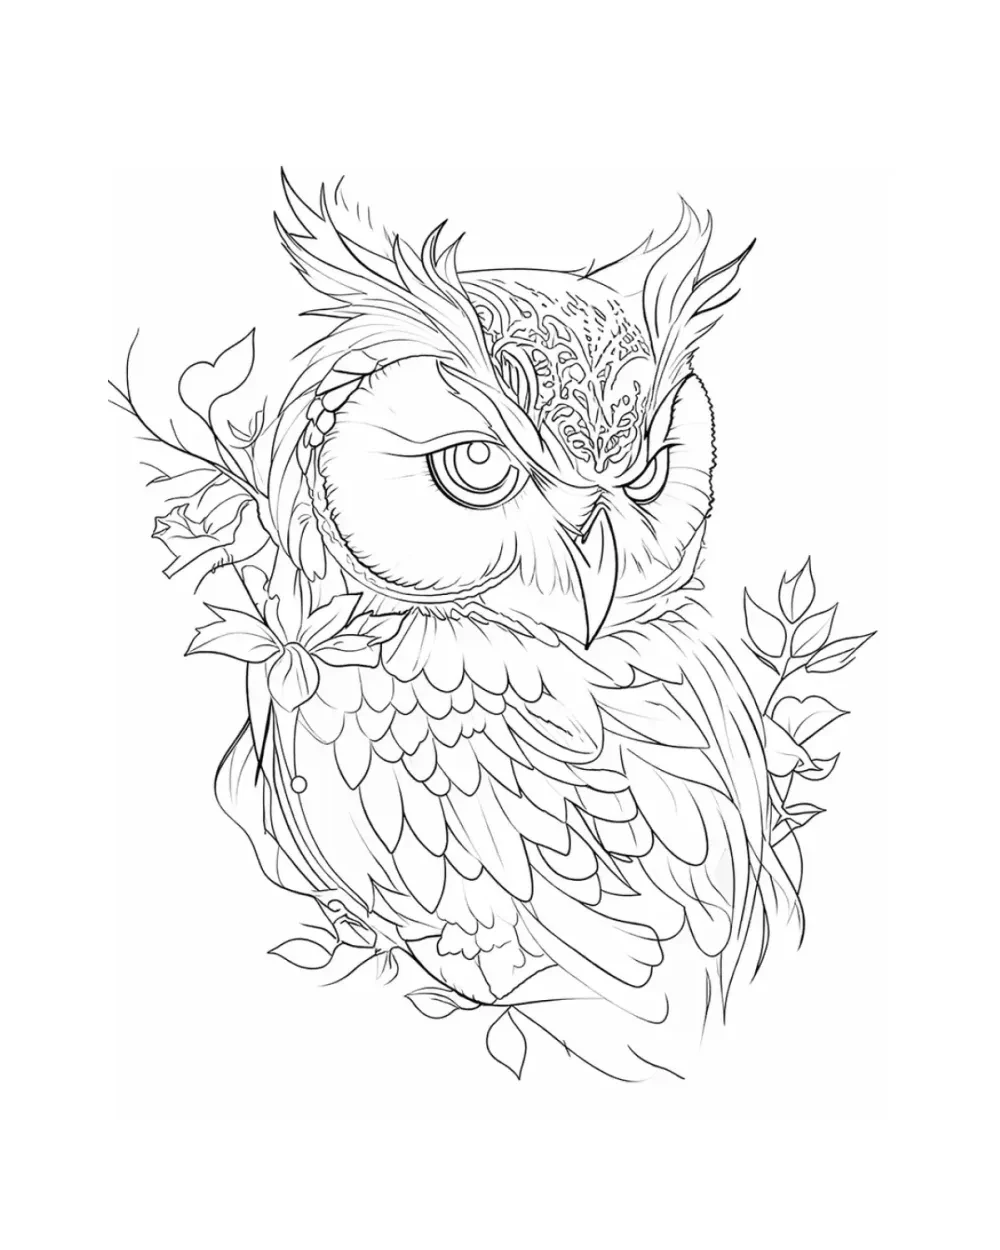
Perched-direction study: a front-facing owl where the facial discs and body silhouette show how a perched phoenix must establish the head and torso before tail-plume or flame detail.
Explore more animal tattoo stencil gallery stencils
- The owl stays recognizable because the face and outer body silhouette are established before the supporting branch and interior feather structure enter the composition.
- Artists planning a perched or column-style phoenix where the head and torso carry the rebirth read without a lifted wing span.
- Feather divisions, leaves, and branch intersections merge into one texture field at transfer size, which mirrors how perched-phoenix tail plumes fuse with perch detail. Protect the face, head contour, and outer body edge before interior feather work.
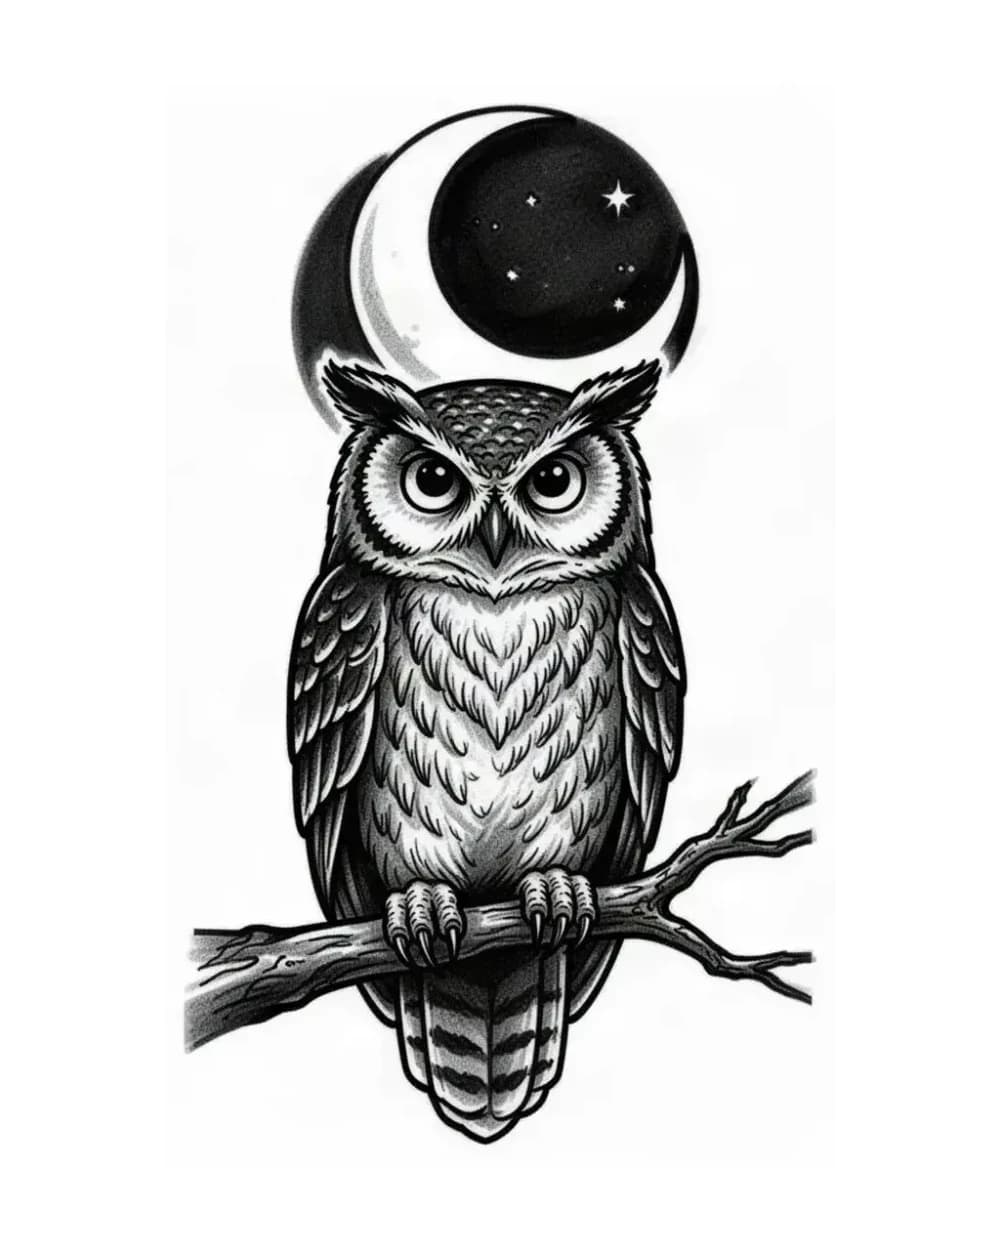
Circular-direction study: a perched owl paired with a crescent moon where the clean gap between bird and moon shows how a circular phoenix must keep its ring open and secondary to the firebird.
Explore more animal tattoo stencil gallery stencils
- The pairing reads first because the perched owl keeps its facial discs and body silhouette while the crescent holds a clean gap beside it. That gap discipline is the whole circular phoenix job.
- Artists planning a circular or ouroboros-style phoenix where the ring frames rebirth without competing with the bird.
- Feathered chest stipple and small branch intersections fill before the moon gap does, which is how circular phoenix rings collapse into the bird. Keep the facial discs and the ring separation open first, then simplify stipple.
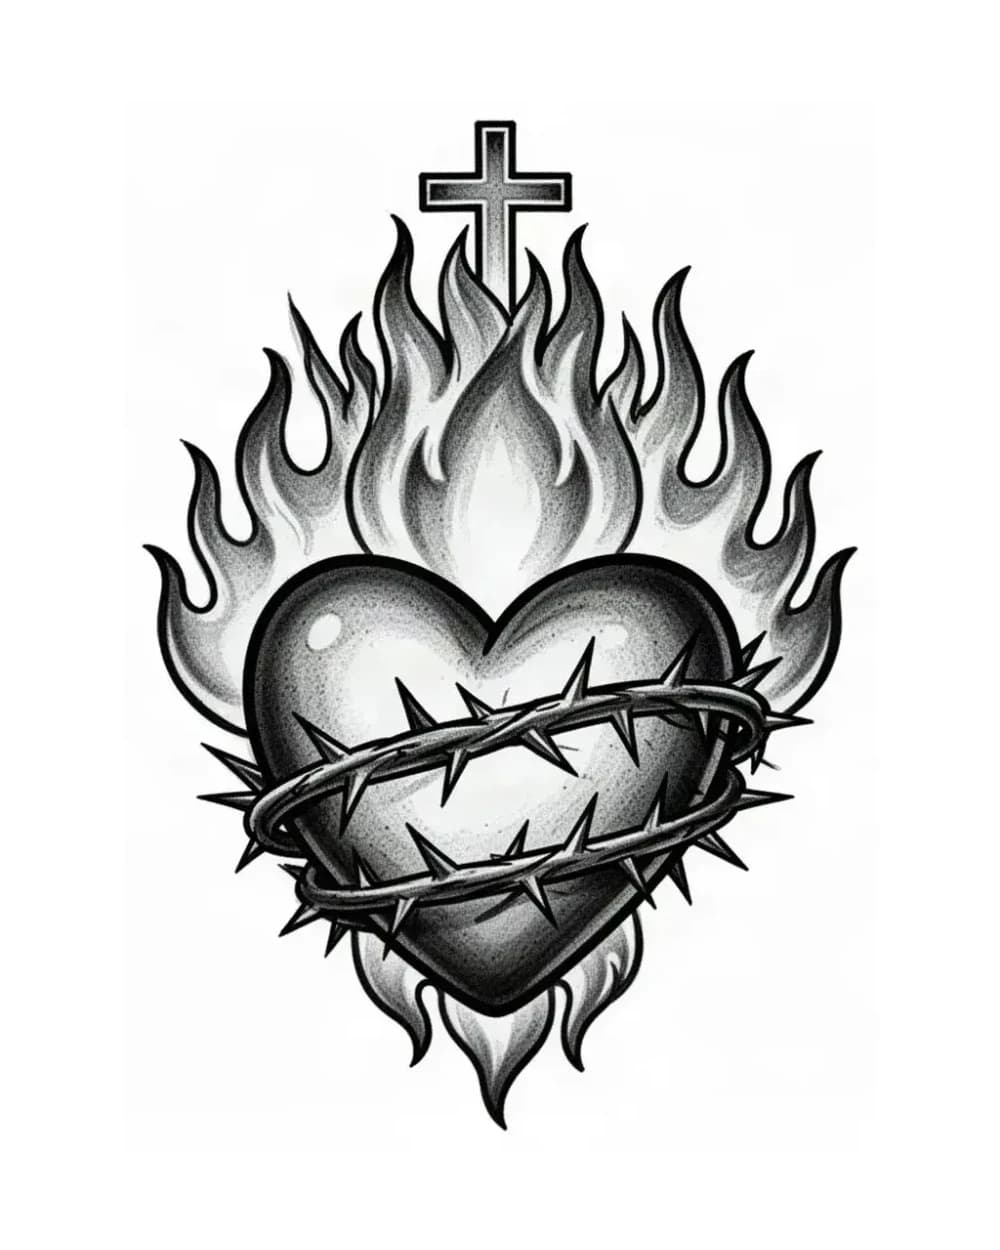
Flame-hierarchy study: a flame crown where the heart stays dominant and every flame lick stays subordinate, showing how phoenix flames must support feather structure instead of replacing it.
Explore more heart tattoo stencils stencils
- The composition keeps its first read through the central emblem while the flame crown expands outward rather than cutting across the primary shape. Phoenix flames must obey the same outward-only rule.
- Artists checking whether their phoenix flame layer is decoration or competition, especially on back, chest, and thigh pieces with heavy flame wraps.
- Thorn crossings and small flame licks merge first at transfer size, the same way phoenix flame tips fuse with feather tips. Reduce the number of flame tongues and thorn crossings before shrinking the central subject.
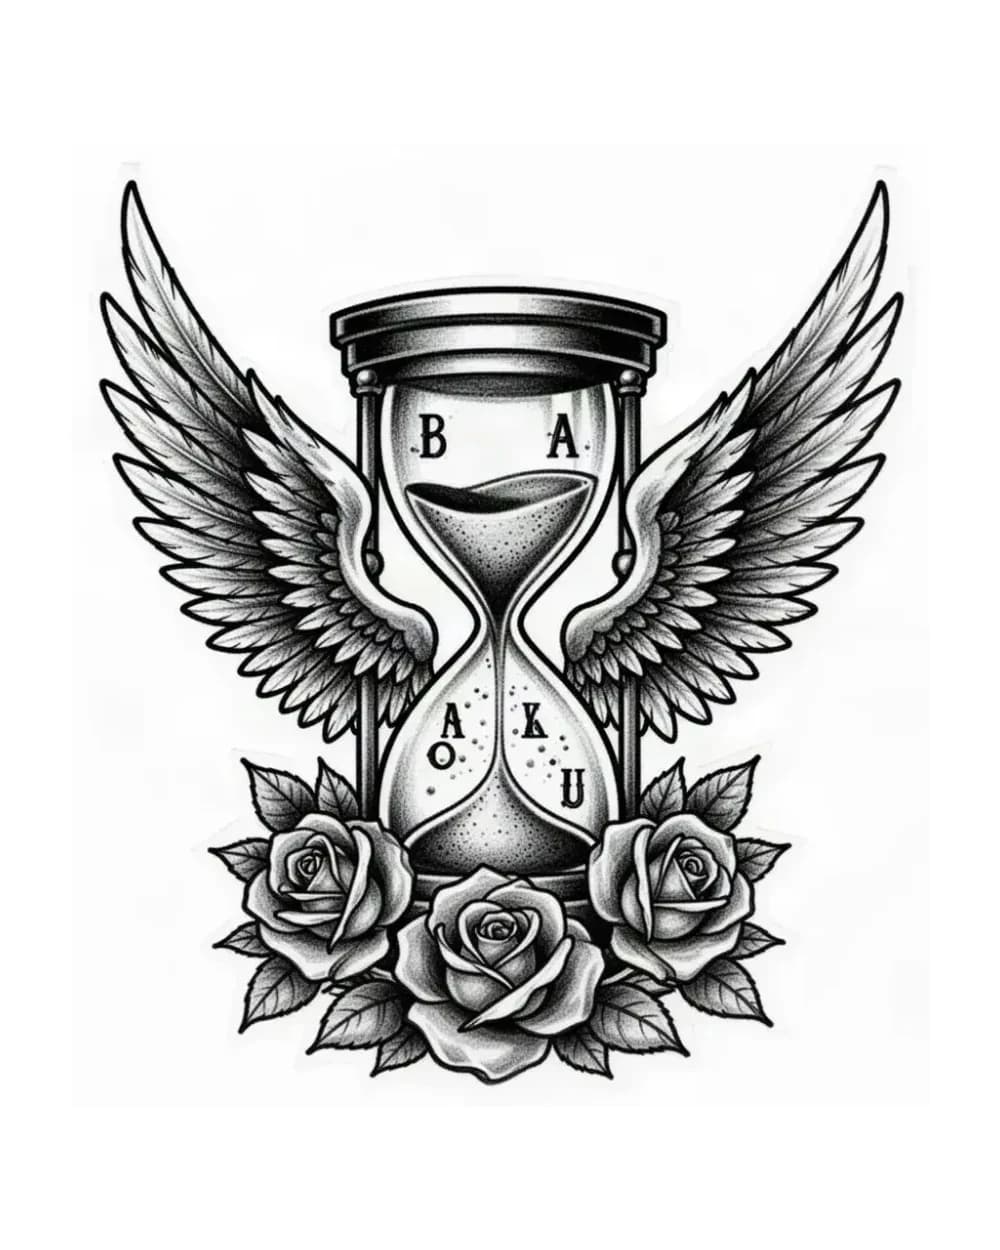
Symmetry study: a winged hourglass where mirrored feathered wings show how a frontal or rising phoenix must balance both wings without letting one side go heavier.
Explore more tattoo symbol stencils stencils
- The wings read as a matched pair because both sides share the same feather grouping rhythm around a stable central body. That matched rhythm is what a symmetrical phoenix must prove at final size.
- Artists planning a symmetrical frontal or back-piece phoenix who need to check wing balance before committing to mirrored feather detail.
- Mirrored wings hide uneven weight until transfer: one denser wing reads as the whole bird leaning. Mirror the stencil, compare feather density side to side, and lighten the heavier wing before adding more detail to the lighter one.
Related galleries
Keep browsing nearby stencil ideas.
Browse more animal tattoo stencil gallery stencil examples and compare different compositions.
Browse more heart tattoo stencils stencil examples and compare different compositions.
Browse more tattoo symbol stencils stencil examples and compare different compositions.
FAQ
Quick questions about phoenix stencils.
Rising suits wide zones such as back, chest, and thigh where the wing span can open fully. Perched suits tall narrow zones such as forearm, calf, spine, and sternum where a stacked bird fits the anatomy. Circular suits round zones such as shoulder caps, knees, and the back of the neck where a ring frames the bird compactly. When two directions both fit, keep the one whose head, span or torso edge, and support gaps stay separable at the exact width you plan to tattoo.
Next step
Turn your own reference into a clean stencil draft.
Use what reads clearly here as direction, then start from your own reference.