

Stencil Gallery

Chicano Tattoo Stencil Reference

Use this reference to judge whether a chicano portrait, script lettering, payasa clown or religious composition will survive as a stencil. It maps the style landmarks to line hierarchy, black-and-grey simplification and final-size readability, plus photo selection and placement checks, so you can reject unsuitable references before print or transfer.

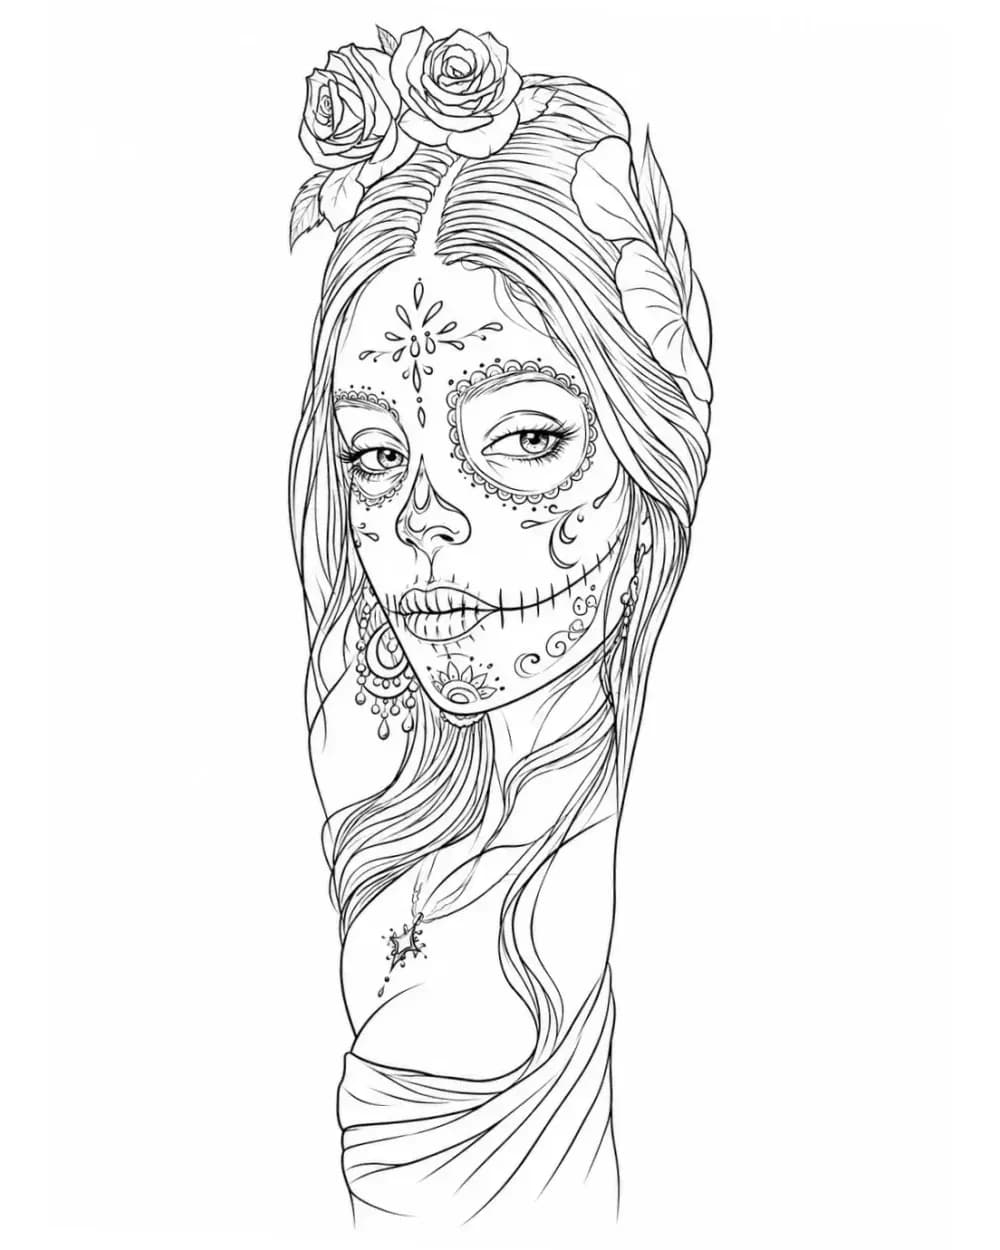
Calavera-inspired woman portrait stencil with rose crown used to illustrate ornamental face density for chicano planning
4
Checklists
Final size

Chicano stencil landmarks

Check chicano landmarks against transfer readability.

Four existing catalog structures illustrate the stencil constraints behind chicano portraits, payasa layering, fine-line landmarks and the theater-mask boundary. They are illustrative comparisons with owner links, not a chicano flash library. Use them to vet your own reference before print.

These four panels reuse existing reviewed catalog assets to make chicano transfer decisions concrete. They show what to protect at final size and where payasa portraiture ends and paired theater-mask emblems begin.

Calavera-inspired woman portrait stencil with rose crown used to illustrate ornamental face density for chicano planning

Existing catalog portrait used to illustrate ornamental face density. Roses and face markings must stay subordinate to eyes, nose, mouth and jaw at final size.

See portrait stencil references

The frontal face provides a stable scaffold, so the rose crown and ornamental markings can be judged as secondary density rather than primary structure.
Checking whether an ornamental chicano portrait keeps its face readable when decorative density rises.
Rose centers and small face-paint motifs close first. Protect the main facial landmarks and larger floral shapes before keeping micro-detail.
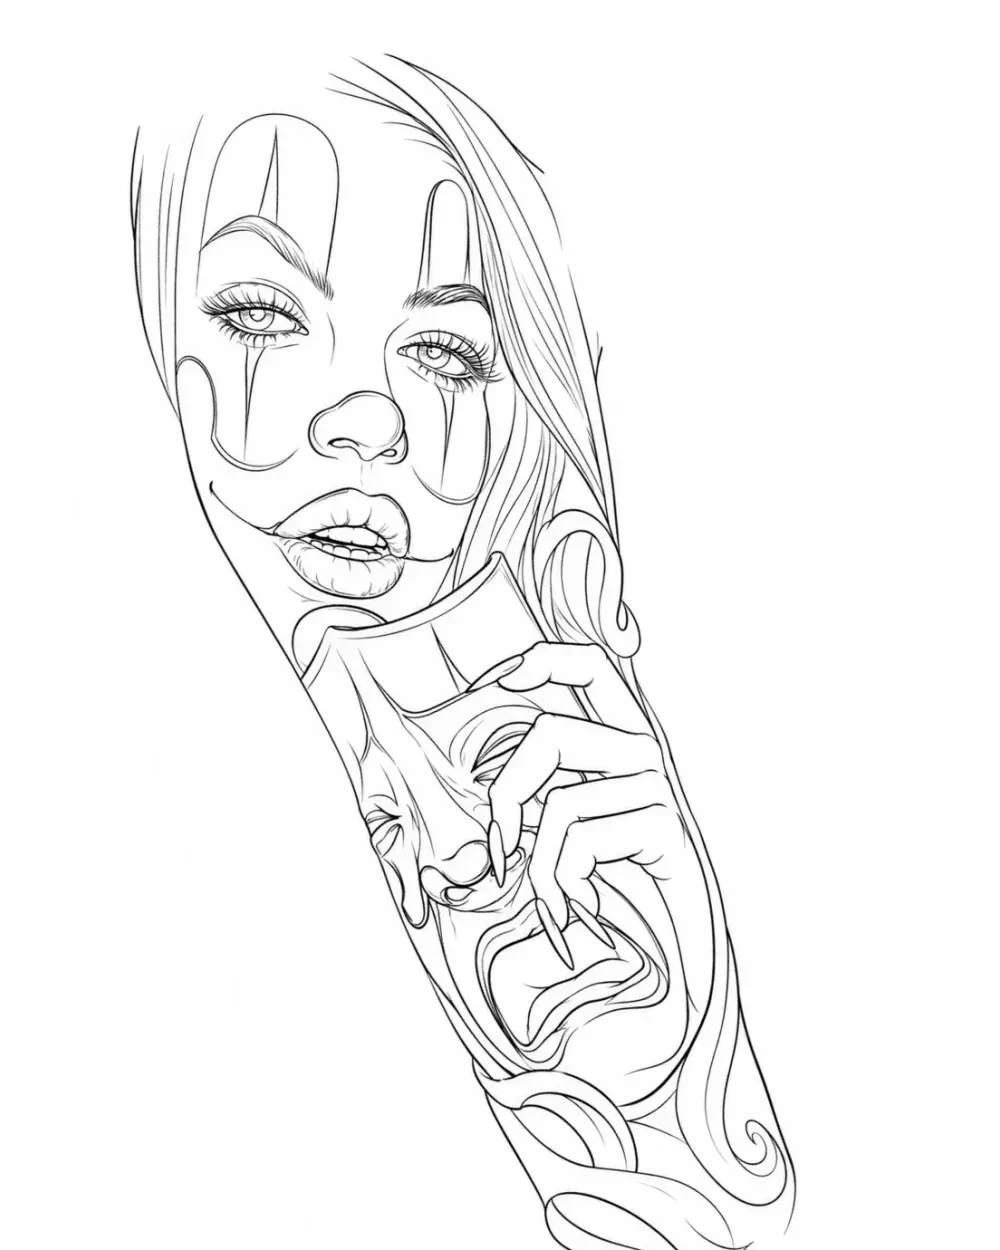
Clown-makeup woman portrait with held mask used to illustrate payasa layering and separation for chicano planning

Existing catalog portrait used to illustrate payasa-adjacent layering. Face, hand and held mask must remain separate readable layers with distinct gaps.

See portrait stencil references

Portrait, hand and mask form separate layers, which makes it possible to judge where chicano payasa makeup should stay distinct from facial landmarks.
Planning a payasa composition where makeup character must not obscure eyes, nose, mouth or jaw.
Fingers, makeup marks and mask features create competing small structures. Simplify secondary marks before the hand-to-mask relationship turns ambiguous.
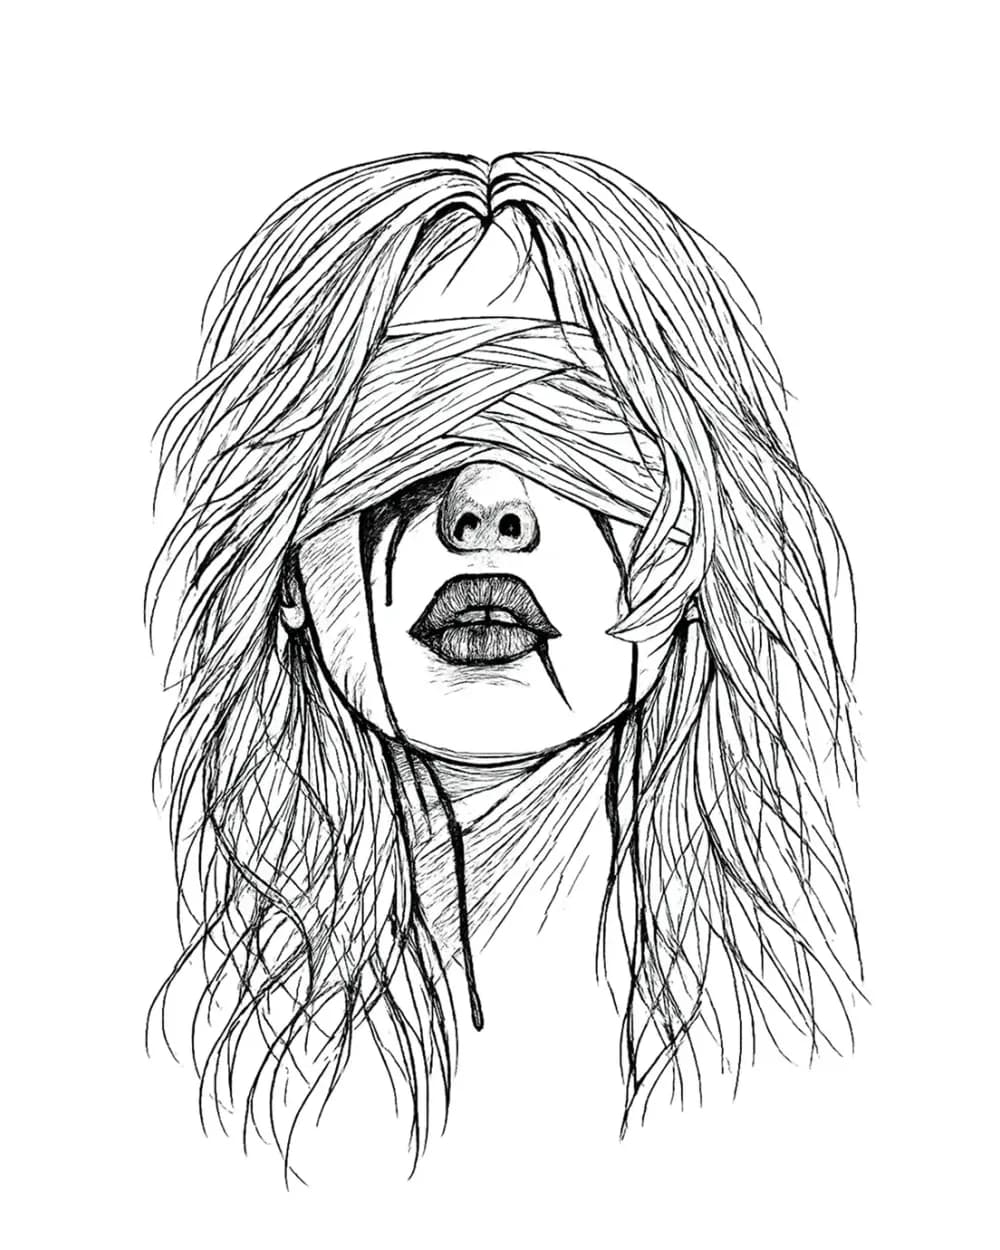
Blindfolded woman portrait stencil used to illustrate fine-line landmark preservation for chicano planning

Existing catalog portrait used to illustrate fine-line landmark preservation. Mouth, nose, jaw and face contour must carry the read when detail is reduced.

See portrait stencil references

The blindfold changes the eye area without erasing the nose, mouth, jaw and outer face structure that keep a chicano portrait coherent.
Vetting a chicano portrait photo where part of the face is covered and remaining landmarks must do more work.
Blindfold edges and hair can form a dense band if given equal weight to facial landmarks. Keep accessory boundaries distinct at final size.
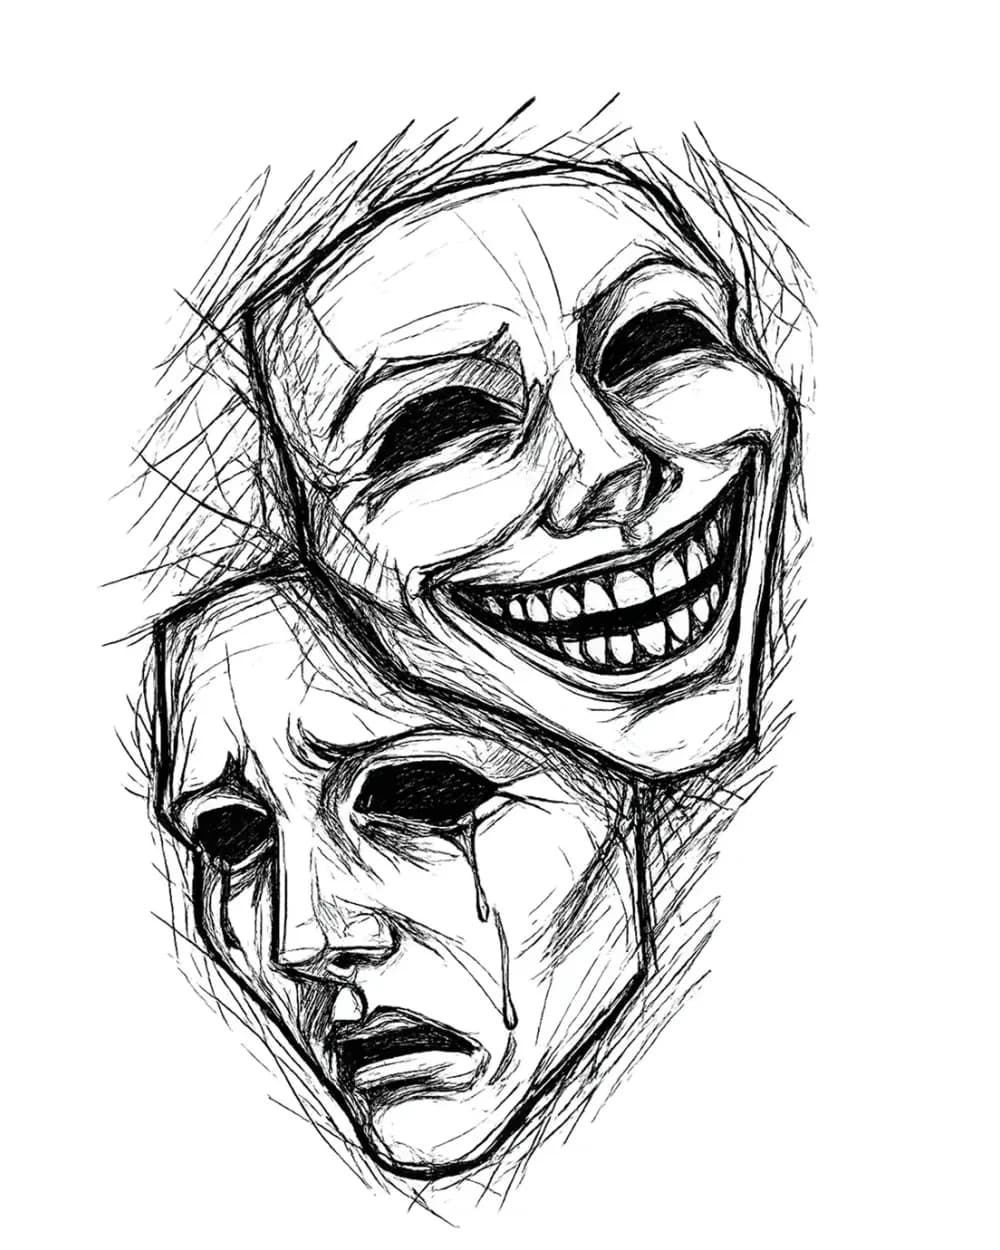
Expressive theater-mask pair shown as contrast to chicano payasa portraiture, not as a chicano definition

Contrast example only. This paired comedy and tragedy emblem belongs to theater-mask framing and must not be relabeled as a chicano payasa definition.

See symbol stencil references

The two masks read as one paired emblem through large eye and mouth shapes, which is useful contrast when deciding whether a reference is truly a single-face payasa portrait.
Confirming the boundary: use theater-mask resources for paired emblems and this chicano guide for single-face payasa portraiture.
Teeth, tears and overlap zones merge quickly at small sizes. Do not import this paired-emblem logic into a payasa stencil without rechecking separation.

Chicano preparation notes

Keep landmarks ahead of wash and ornament.

Use these notes after the illustrative comparisons: chicano portraits, script, payasa and religious work share fine-line density, but each has different landmarks that must survive simplification and final-size reduction.

What makes a reference chicano-correct for stencil work

A chicano-correct stencil reference usually combines fine-line black-and-grey rendering with one or more of these landmarks: a portrait with calm gaze and controlled facial modeling, script lettering with generous spacing and a steady baseline, a payasa clown face with teardrop, glossy lips and headscarf or bandana framing, or respectful religious iconography such as the Virgin Mary, praying hands, crucifix, sacred heart or rosary. Lowrider culture, roses, playing cards and commemorative dates often support the composition but should stay secondary to the main face, wording or sacred subject. A payasa is a single clown portrait with makeup and emotion, which is a different job from the paired comedy and tragedy theater-mask emblem owned by the theater-masks subject. When the reference needs cultural context you do not have, confirm wording, dates, names and religious details with the client before converting.

Keep fine-line density readable at final size

Set the intended physical size first, then protect primary contours before secondary decoration. For portraits, the face oval, eye line, nose direction, mouth shape, jaw and neck flow lead, while hair masses, roses, jewelry and background script stay subordinate. For lettering, cap height, baseline, letter spacing and open counters lead, while swashes, shading and background texture stay subordinate. For payasa work, the eye shapes, tear line, nose, lips and headscarf edge lead, while makeup hatching, hair strands and accessory detail stay subordinate. For religious work, the face or hands, halo or cross silhouette and rosary path lead, while folds, beads texture and background rays stay subordinate. Group hair into larger directional masses, keep clean gaps between portrait and surrounding shapes, and simplify the densest cluster rather than weakening the landmarks that carry recognition.

Simplify black-and-grey wash so the transfer stays legible

Chicano shading reads through smooth grey transitions and reserved skin breaks, not through filling every shadow equally. Keep the lightest skin highlights on the cheek plane, nose bridge, lip edge and forehead, and let one mid-grey carry most modeling before the darkest accents define eyes, nostrils, lip separation and letter edges. As a planning example only, many artists sketch with three to four wash values on paper before committing, then adjust to their own machines and inks. Protect the highlight reserves around tears, eye corners, rosary beads, rose centers and letter counters, because those small light gaps close first when a piece is reduced. Reduce stipple, crosshatch and repeated texture inside the densest area, such as the payasa eye and tear zone or an ornamental portrait crown, before reducing the primary face or wording.

Choose photo references and placement for clean transfer

Strong chicano photos share a few traits: one clear light source, visible eye and lip separation, an uncluttered background that does not merge with hair or headscarf edges, and enough facial area that landmarks do not depend on a single pixel row. Reject photos with motion blur across the eyes, deep shadow hiding one side of the mouth or jaw, heavy beauty smoothing that erases pores into flat plastic, or busy patterns behind the head. For lettering, start from exact wording with confirmed spelling, then check spacing and baseline on a straight proof before adding curves or background. Place portraits and script on smooth, relatively flat areas such as the outer forearm, thigh, upper back or chest when the design is dense, and allow more size on curved or high-movement areas. Lettering needs a straight baseline path, so avoid strong curvature unless the spacing is opened up. Religious compositions usually need vertical flow, so give halos, crosses and rosary paths room to stay separate. Use the placement reasoning guide and the final-size print check linked below before committing to paper.

Run the transfer-readability check before print

Confirm the physical width and height, then inspect the same stencil at that size rather than at screen zoom. Check that the smallest important gap is still open: eye corners, nostril edge, lip separation, letter counters, bead gaps and the channel between face and frame. Check that the payasa tear and makeup lines remain distinct from the eye and lip, and that rosary beads read as separate units instead of one chain. Check that secondary roses, rays, cards and background script stay lighter than the main face or wording. If any cluster merges, simplify that cluster first and recheck. After the structure passes, move to paper selection, exact-size print layout and skin application through the linked owners, which keep the generic print and transfer mechanics this page does not duplicate.

FAQ

Chicano stencil questions.

A chicano-correct reference pairs fine-line black-and-grey modeling with clear style landmarks: a readable portrait, spaced script lettering, a payasa clown face with tear and headscarf framing, or respectful religious iconography such as the Virgin Mary, praying hands, crucifix or rosary. Confirm names, dates, wording and sacred details with the client, and keep a payasa single-face portrait distinct from a paired comedy and tragedy theater-mask emblem.

Next step

Turn your vetted chicano direction into a stencil draft

After you approve the portrait landmarks, lettering spacing and iconography hierarchy at final size, generate from your own approved reference.