Monarch-specific reference vetting

Vet the monarch before it becomes a stencil

Any butterfly stencil will not read as a monarch. Choose open-wing dorsal or closed-wing reference for your placement, protect the black border and white spot rows, simplify the orange-field veins, then verify transfer readiness at final size.

Built for working artists preparing monarch pieces where species identity matters. This page covers monarch view choice, border and spot retention, and monarch vein simplification only. Generic comparison, pairing, and converter depth belong to the owners linked below.

Why monarch vetting is its own job

A monarch reads through border, spots, and veins together.

Generic butterfly advice protects symmetry and vein fans. Monarch work adds a stricter frame: a heavy spotted margin plus an orange field cut by black veins. Lose any one of the three and the species read collapses.

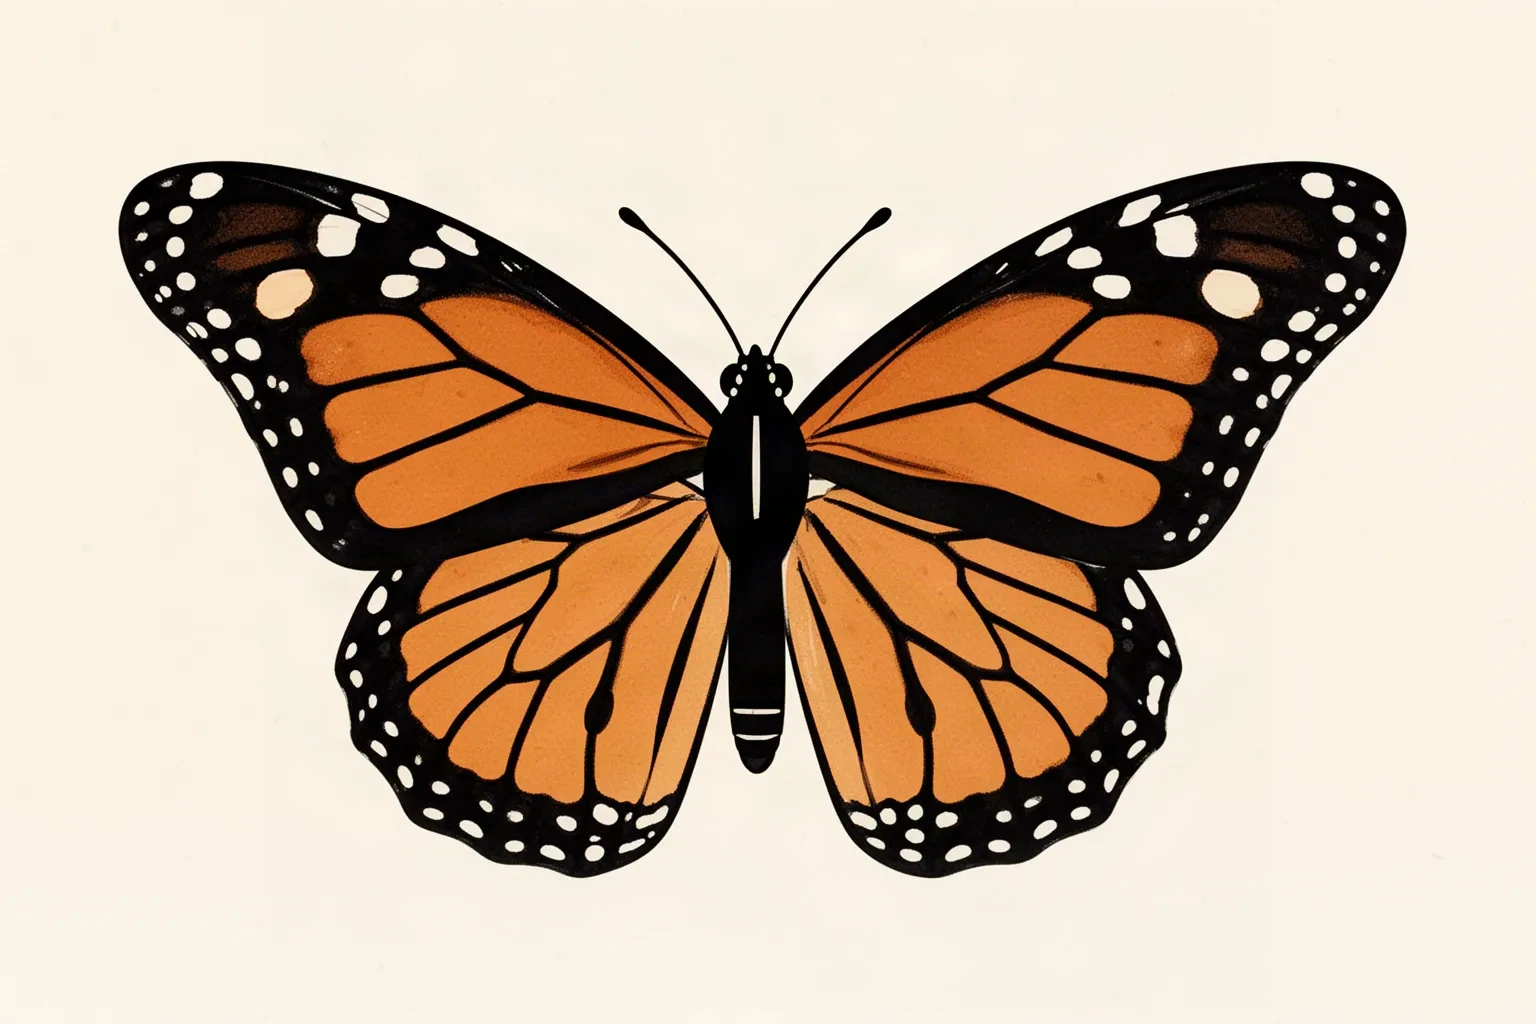
Editorial illustration of a monarch butterfly in dorsal spread, showing the heavy black spotted wing border, orange wing fields divided by black vein forks, and mirrored upper and lower wing pairs.
The three anchors to check against your reference: a continuous spotted black border, open orange fields cut by vein forks, and mirrored upper and lower wing pairs. Original editorial illustration, not a StencilStudio stencil file or app output.

Thick black border with white spots

A heavy dark margin rings every wing edge and carries rows of white spots. This margin is the monarch outline system: it defines the full silhouette and the outer read at distance.

Check: Trace the full margin at 1:1. If the margin breaks, thins into the orange field, or loses its spot row, the read shifts to a generic orange butterfly.

Orange fields cut by black veins

Broad orange cells sit between strong black veins that run from the body to the border. The vein fan is the internal structure that keeps large orange areas from reading as one flat fill.

Check: Follow each vein from base to border. If a vein dead-ends inside orange or two veins merge into one band at true size, simplify the fan before print.

Mirrored upper and lower wing pair

Elongated upper wings plus rounder lower wings mirror across the body axis. The two-pair rhythm (long uppers, round lowers) separates a monarch from single-lobe decorative butterflies.

Check: Fold through the body bar and compare upper tips, lower lobes, and border widths side to side. Fix outline drift before judging veins or spots.

General wing symmetry and decorative vein comparison stay with the butterfly subject owner. Small-size hold method stays with the small-butterfly owner. This page judges only whether the monarch architecture survives at the size you will print.

Open-wing vs closed-wing decision

Pick the view that fits the field and the brief.

Dorsal spread shows the full monarch pattern but exposes the maximum border length. Closed side fits narrow fields but hides the orange display. Decide view first, because it changes every retention check below.

Open-wing dorsal reference

Both wing pairs spread flat, showing the vivid orange upper surface with full black veins, heavy borders, and white spot rows. Best when the brief needs instant monarch recognition: the orange, black, and white architecture is all visible at once.

Check: Choose dorsal when the placement offers a flat field at least as wide as the full spread. Confirm every border segment and every spot gap survives at 1:1, because the spread exposes the maximum border length to fill-in.

Closed-wing side reference

Wings folded upright, showing the duller underside with muted orange, softer vein contrast, and a narrower visible border. Best when the placement is narrow and tall (ankle, wrist edge, behind the ear) or when the brief wants a resting monarch rather than a display pose.

Check: Choose closed-wing when width is constrained but height is available. Confirm the stacked wing edges do not merge into one dark bar and that the body bar keeps clear skin on both sides.

Three-quarter tilt reference

One wing pair foreshortened, showing dorsal pattern with mild perspective. Best for curved placements where a flat spread would wrap and crowd the far lobe tips. Use only when the reference keeps the border continuous through the tilt.

Check: Choose tilt only when open-wing fails the wrap check and closed-wing loses the recognition the client wants. Confirm the foreshortened border keeps the same visual weight as the near border, or simplify the far spots first.

HOLDS AT STATED SIZE

Open-wing dorsal monarch with open spot gaps at 8 cm

Intended width 80 mm

Source
Full dorsal spread with heavy black margins, two white spot rows along the outer border, black vein fans across orange fields, mirrored upper and lower wings, and a plain dark body bar.
Protect
The full border ring with its spot rows, the three strongest vein forks per upper wing, and the upper-to-lower lobe separation on each side.
Fix
Shorten only the single vein fork nearest the border if its channel narrows at 1:1. Keep border weight, spot count, and wing mirror unchanged.
Candidate stencil
Same monarch with view locked, border held as one band, spot rings reopened, veins reduced outward from the body, and protected contours kept at transferable mass.
Final-size verdict
Holds at 8 cm. Border, spots, and vein channels each keep open separation, so the piece reads as monarch from silhouette plus pattern together.


SIMPLIFY VEINS FIRST

Dorsal monarch with dense vein net crowding orange cells at 6 cm

Intended width 60 mm

Source
Accurate dorsal reference with full secondary veins, fine cross branches near the border, and orange cells under one millimeter between forks at final width.
Protect
The outer border with spot rows and the three main vein forks per upper wing that carry the monarch rhythm.
Fix
Keep three forks per upper wing, merge lower-wing veins into open orange lobes with one central fork each, and remove cross branches and secondary splits. Recheck every surviving channel for continuous open skin.
Candidate stencil
Same monarch with view locked, border held as one band, spot rings reopened, veins reduced outward from the body, and protected contours kept at transferable mass.
Final-size verdict
Simplify first. If the orange cells still read as texture rather than clean fields at true size, remove one more fork per wing before touching the border.

THICKEN BORDER AND REOPEN SPOTS

Closed-wing monarch with thin margins and plugged spots at 5 cm

Intended width 50 mm

Source
Side-view reference with narrow folded wings, thin border lines, white spots drawn as pinpricks touching the border edges, and a body bar touching one wing edge.
Protect
The stacked wing silhouette direction and the body bar position.
Fix
Rebuild the border as one continuous band with spots fully enclosed by dark margin on all sides, enlarge the smallest spots until each keeps a dark ring at 1:1, and reopen both body side gaps. Drop the smallest spot row if rings cannot hold.
Candidate stencil
Same monarch with view locked, border held as one band, spot rings reopened, veins reduced outward from the body, and protected contours kept at transferable mass.
Final-size verdict
Not stencil-ready until the margin reads as a band, not a line. Spots that touch orange or skin at true size will plug on transfer.

RECROP OR ENLARGE

Highly detailed monarch with double spot rows and full vein fans at 4 cm

Intended width 40 mm

Source
Museum-grade reference with two complete white spot rows, fine vein splits to the border, and scalloped edge detail, all accurate on screen but with most separations closed at final width.
Protect
The spread direction and the stronger wing pair, either the upper pair or the lower pair.
Fix
Recrop to the upper wing pair with one spot row, or enlarge past the width where one spot row plus three vein forks keep open channels. Do not thin the border to rescue a second spot row at this size.
Candidate stencil
Same monarch with view locked, border held as one band, spot rings reopened, veins reduced outward from the body, and protected contours kept at transferable mass.
Final-size verdict
At 4 cm the full monarch inventory functions as one mass. One legible wing pair with clean border and spots beats a complete but bridged insect.

Skull and floral pairing construction stays out of this framework. A monarch paired with blossoms is judged by the butterfly and floral owner, and a monarch paired with a skull is judged by the butterfly and skull owner, once the monarch itself passes the checks on this page.

Border, spots, and veins at final size

Judge every monarch mark at the width you will print.

Screens forgive crowding that paper and skin do not. Set the width first, then inspect each feature below at true physical size with scaling off.

Monarch retention checks by size band
FeatureAbout 5 cm and belowAbout 8 cm and above
Black border weightHold one continuous band around every wing edge with no breaks or feathering. At widths near 5 cm and below, carry the border heavier than the reference photo suggests so it survives print and transfer as a band, not a hairline.The band can sit closer to reference proportions, but it must still read as the heaviest mark on the stencil. Border weight leads, vein weight follows.
White spot gapsKeep one spot row maximum. Every spot must sit fully inside the dark band with a visible dark ring on all sides at 1:1. Merge the second row out rather than shrinking spots into pinpricks.A second row can stay only when each spot in both rows keeps its own dark ring with open separation between neighbors. One plugged row fails the whole margin.
Orange-field veinsCarry at most three short forks per upper wing with plain lower lobes. No cross branches, no secondary splits, no vein-to-border touching. Judge channels, not count: one pinched fork fails the wing.A fuller fan can work when every fork keeps open orange along its full length from body to border. Remove the fork nearest the border first when channels narrow.
Body bar and wing rootsKeep one plain body bar with clear skin on both sides and short plain antennae. Wing roots must not touch the body bar or each other at true size.One restrained accent such as short antennae tips can stay when fully clear of the nearest vein root. Body side gaps stay non-negotiable at every width.

Monarch transfer failure points

  • Border fill-in: a thin or broken black margin closes into the orange field and erases the monarch frame.
  • Spot plugging: white spots touching orange, skin, or each other read as smudges instead of the monarch row.
  • Vein bridging: full vein fans with cross branches close orange cells into one dark wing on transfer.
  • Lobe contact: upper and lower wings sharing one edge erase the two-pair monarch rhythm.
  • Body bridging: a body bar touching either wing root turns wings plus body into one solid mass.
  • Tilt foreshorten miss: a foreshortened border drawn at hairline weight vanishes next to the near border.

Reference to clean stencil

Lock the view, then reopen spots outward from the body.

Work in this order so one change at a time can be judged at the same width. Stop when view, mirror, border, spots, veins, and gaps each read correctly.

  1. 01

    Lock width, placement, and view first

    State the intended width in millimeters, the named body area, and the chosen view (open-wing dorsal, closed-wing side, or tilt) in one sentence before judging detail. A dorsal spread that holds at 8 cm on a flat forearm can fail at 5 cm on a curved ankle with no line being wrong on its own. Use the size calculator when target dimensions are still open.

  2. 02

    Prove mirror, then border continuity

    Fold the reference through the body axis and compare upper tips, lower lobes, and border widths side to side. Then trace the full black margin as one unbroken band. Fix outline drift and border breaks before judging veins or spots: no vein simplification rescues a lopsided or broken monarch frame.

  3. 03

    Reopen spot rings at true size

    Inspect every white spot at 1:1 with scaling off. Each spot needs a dark ring on all sides and open separation from its neighbors. Enlarge spots, merge the second row out, or drop the smallest spots, in that order. Never thin the border to make room for more spots.

  4. 04

    Simplify orange-field veins outward from the body

    Reduce vein forks from the border inward: keep the strong base forks, remove cross branches and secondary splits first, then merge lower-wing veins into open lobes. Keep open orange channels along every surviving fork, then run a squint check: step back until vein detail disappears and confirm the piece still reads as monarch from border plus spot rhythm.

  5. 05

    Verify print and transfer path

    Export a true-size PDF with no fit-to-page scaling, inspect the narrowest border segment, the tightest spot ring, and the narrowest vein channel on plain paper, then measure the physical print with a ruler. If the digital file passes and only paper fails, move to print-stage evidence instead of simplifying again.

Placement and size decisions

Monarch spreads want flat skin that preserves the margin

A monarch is a wide bordered mark on a short body bar. Flat placements preserve border, spot, and vein separations with little compensation, while wrapped placements demand a view change to one clean read.

Outer forearm and calf

Flat fields where full dorsal spreads hold best. Border length is the risk, not curvature.

Check: Align the body axis with the limb line and confirm every border segment and spot ring at 1:1 before print.

Shoulder, thigh, and upper back

Broad panels with room for a full dorsal spread plus a second spot row. The most forgiving monarch field.

Check: Spend extra room on spot-ring separation and vein-channel continuity first. Forgiving placement does not rescue plugged spots.

Wrist edge, ankle, and behind the ear

Narrow curved fields where a full spread wraps fast and crowds the far lobe border. Closed-wing or recropped upper-pair builds survive here.

Check: Recrop to one view that fits the field, keep one spot row, and preview wrap before print so far-lobe borders do not bridge on the curve.

Sternum, spine, and ribs

Centered or breathing fields where symmetry errors and border wobble show fastest.

Check: Lay out midline alignment on skin before locking the file and keep vein counts low near the midline. Preview the full spread on a body photo.

Stencil-ready checklist

Approve the monarch only when every line passes

Run this short sequence with scaling off and a ruler in hand. One failed line means fix, enlarge, reselect the view, or move to a neighboring owner before transfer.

  • Confirm intended width in millimeters, named placement, and chosen view in one sentence.
  • Confirm wings mirror through the body axis and the black border runs unbroken at 1:1.
  • Confirm every white spot sits fully inside the dark band with a dark ring on all sides.
  • Confirm every surviving vein channel keeps open orange along its full length.
  • Confirm both body side gaps and both upper-to-lower lobe separations stay open at true size.
  • Export a true-size PDF with scaling off and measure the physical print.
View first, detail second Verify rings and channels at 1:1 Border plus spots plus veins

FAQ

Monarch stencil decisions, answered

Short answers for the view, border, spot, vein, generic-workflow, and print checks that recur when a monarch reference moves toward transfer-ready output.

Use open-wing dorsal when the brief needs instant monarch recognition and the placement offers a flat field at least as wide as the full spread, because the vivid upper surface shows orange, black veins, borders, and spot rows all at once. Use closed-wing side when width is constrained but height is available, or when the brief wants a resting pose, and confirm the stacked wing edges do not merge into one dark bar. Use a three-quarter tilt only when a flat spread fails the wrap check and the side view loses the recognition the client wants.

Next steps

Use the neighboring owners for adjacent jobs.

This guide covers monarch view choice, border and spot retention, orange-field vein simplification, placement checks, and transfer proof. Use the links below for related jobs such as sizing, print checks, pairing depth, and conversion.

Generic butterfly comparison, small-size print mechanics, photo conversion steps, and floral or skull pairing construction stay in their specialist owners. The links above hand off instead of repeating that detail.

From vetted monarch to working stencil

Turn the approved monarch into a stencil draft.

Start from the monarch that passed the view, border, spot, and vein checks, then continue on iPhone for body fit, exact-size print, mirror and professional export.