Wave construction vetting

Vet the wave before it becomes the stencil

Any Japanese wave reference can be judged in three passes: crest shape that survives reduction, foam gaps that stay open at transfer size, and repeating bands that follow one current. Decide band count, flow direction, and pairing restraint here, then print with confidence.

Built for working artists vetting wave water at final size. This page covers crest choice, foam retention, band spacing and flow alignment, pairing restraint, and wave-specific transfer prep. Direction comparison stays with the Japanese hub, koi rendering with the koi owner, and bodysuit sequencing with the yakuza owner.

Wave vetting first

Crest, foam, and one current.

Waves fail as construction before they fail as art. These three pillars predict whether any wave reference survives simplification, print, and transfer at its real size.

Crest shape carries the read

A wave reads as Japanese through its crest: the breaking lip, the finger curls beneath it, and the ranked foam row under the lip. Inner spray dots and gradient wash never rescue a crest whose outer edge has merged into the body of water. Judge crest, fingers, and lip as silhouette first, decoration second.

Check: Cover all inner foam and spray. If the outer crest edge plus the finger curls still read as breaking water from the intended viewing distance, the crest is sound. If the whole mass becomes one dark slab, reshape or enlarge before touching foam.

Foam gaps are the transfer structure

Open skin between the lip and the fingers, between adjacent fingers, and inside seigaiha arc rows is what keeps a wave from filling in. Foam channels close first at inner corners and between parallel arcs. Screens forgive crowding that paper and skin do not.

Check: Print at 100 percent with scaling off and confirm the narrowest foam channel stays visibly open at arm's length. If a channel closes, remove a finger row or widen the channel rather than thinning the crest line.

Bands obey one current

Repeating wave bands only work when every crest, foam gap, and flow line serves one named current direction. A filler field with two opposing currents, or a paired koi panel where water fights the fish, reads as chop instead of motion. Direction first, band count second.

Check: Draw one arrow for the current before counting bands. If every crest tilts the same way and foam rows step consistently along that arrow, flow holds. If two arrows are needed, delete or reverse one set.

Crest choice

Three wave builds, three different stencil jobs.

Each build below names its construction, its strengths, its constraints, and the placement plus size test that selects it. Choose one before counting bands, because each build fails in a different place.

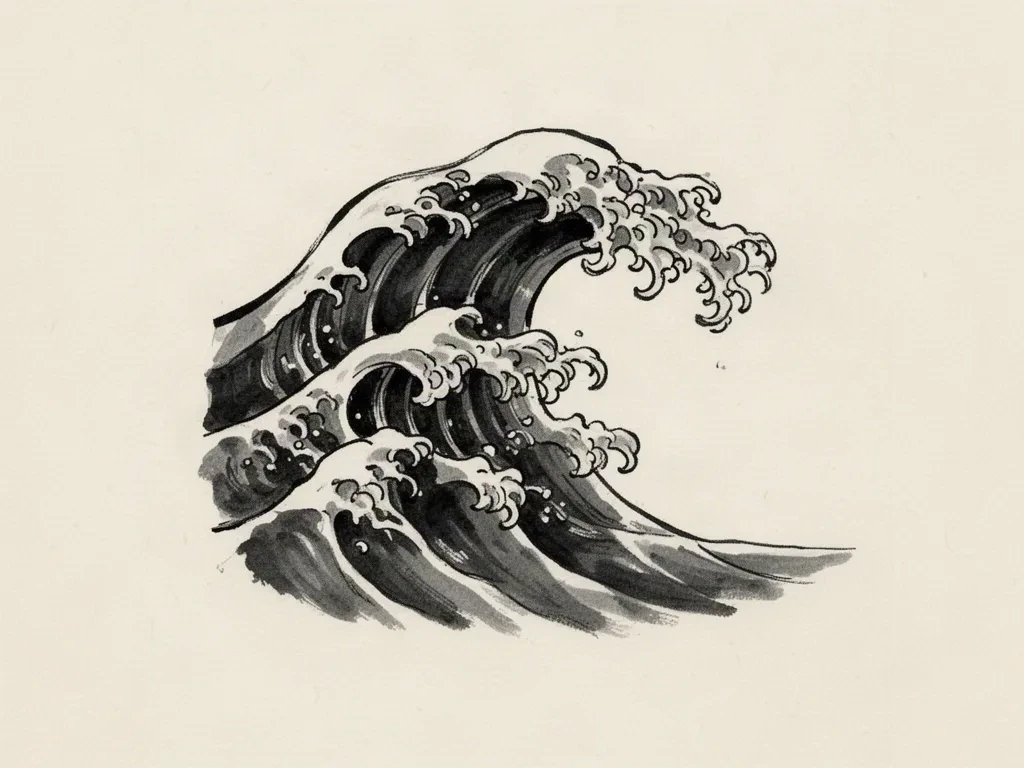
Finger-wave crest

Ink brush illustration of a Japanese breaking wave face with a heavy lip and repeated ranked finger curls separated by open paper channels

Original construction illustration of finger curls and open foam channels. Synthetic artwork, not app output, not a printed stencil.

A breaking lip with two to four ranked finger curls beneath it, each finger separated by an open foam channel. The classic irezumi background-water unit and the most common filler around koi and figures.

Strengths: Strongest filler unit for sleeves, back panels, and thigh runs. Fingers wrap limbs naturally and the ranked curls give motion without a second focal.

Constraints: Finger count is the failure point: four or more tight fingers merge first at small widths. Each finger needs its own channel at 1:1 or it seals into a solid band.

Choose when: Choose it when the brief needs background water or gap filler around an anchor, and the width keeps every finger channel open at true size.

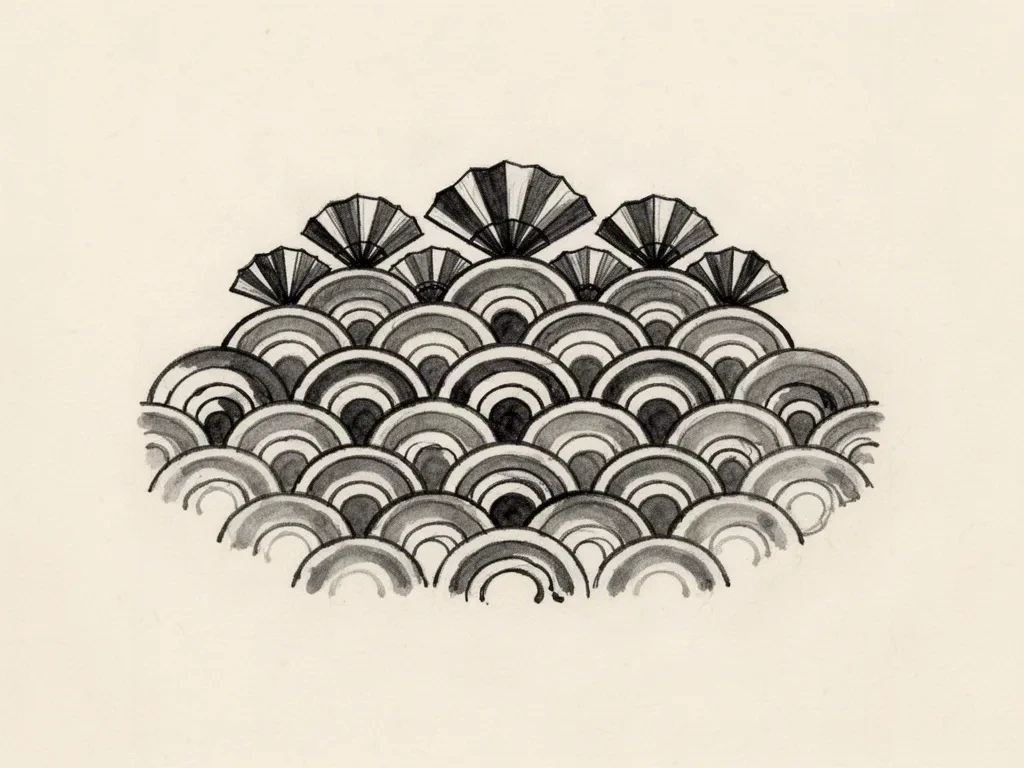
Seigaiha arc bands

Ink brush illustration of a seigaiha wave field with rows of offset concentric arcs and open paper between arcs and rows

Original construction illustration of half-offset arc rows. Synthetic artwork, not app output, not a printed stencil.

Overlapping rows of concentric arcs, each row offset by half a unit so the fan tops peek from behind the row above. A geometric repeating field rather than a breaking wave.

Strengths: Cleanest repeating filler for bands, chest panels, and sleeve gaps. The half-offset grid makes spacing decisions mechanical: uniform radius, uniform offset, uniform channels.

Constraints: Arc rows packed without channel discipline become wallpaper stripes. Mixed radii in one panel read as clutter, and arc rows touching an anchor silhouette erase the separation both need.

Choose when: Choose it when the brief needs an even repeating field (band filler, sleeve continuity, background texture) rather than one dramatic breaking crest.

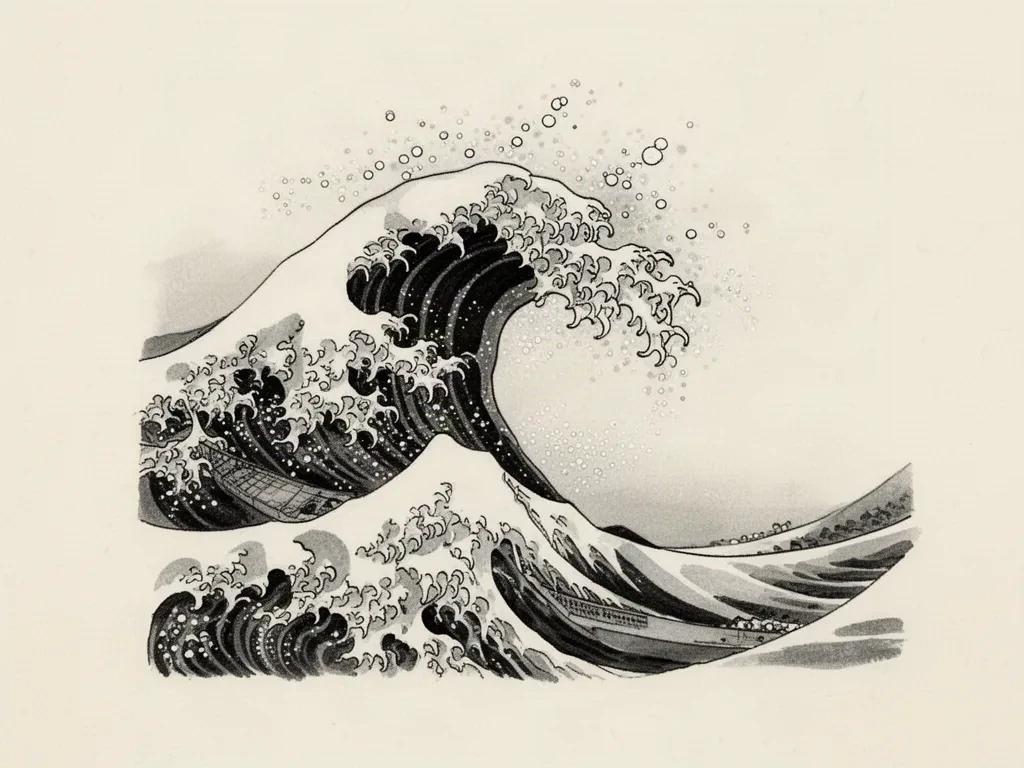
Curling crest with spray

Ink brush illustration of one large curling Japanese wave with a heavy lip, clawing foam fingers, and a separated spray field above the break

Original construction illustration of a focal curling crest and spray. Synthetic artwork, not app output, not a printed stencil.

One large breaking curl in the Hokusai manner: a heavy lip, claw-like foam fingers reaching forward, and a spray field above the break. A focal wave rather than a texture.

Strengths: Carries a standalone forearm, calf, or shoulder piece where the wave itself is the hero. One curl at good size holds drama no repeating field can match.

Constraints: The most line-dense single wave. Spray dots, inner foam flecks, and secondary curls merge first, and the curl needs full compositional room: no second hero at equal weight in the same panel.

Choose when: Choose it when the wave is the anchor and the size keeps lip, fingers, and spray each separated at 1:1. For support-only water, use finger-wave or seigaiha instead.

Final-size readability rule: judge every crest with inner foam covered at the exact millimeter width. Seigaiha rows are the most forgiving at small widths because their geometry is uniform; curling crests demand the most room because lip, fingers, and spray each need separation. When a crest cannot hold its silhouette with foam covered, enlarge, recrop, or switch builds instead of shrinking linework.


Foam retention at final size

Protect the skin-breaks that keep water open.

Foam channels are the structure, not decoration. Judge each channel below on a measured 1:1 print with scaling off, and cut the finger, arc, or fleck that closes it.

Foam channels: retention rule and failure mode
ChannelRetention rule at final sizeFailure mode
Lip-to-finger channelKeep one continuous open channel between the breaking lip and the top finger row at true size. This channel sets the whole wave read.Lip fuses to the finger row and the crest becomes a solid cap.
Finger-to-finger channelsCap finger rows at two to three countable curls per crest, each with its own visible separation. Remove the weakest finger before narrowing every channel.Three or four tight fingers print as one dark band with no motion.
Seigaiha arc channelsOne arc radius and one row offset per panel, with open skin between adjacent arcs and between rows. Mixed radii in one field are decoration and go.Mixed-scale arcs plus touching rows read as fill-in texture at transfer size.
Spray and foam flecksTreat spray as removable first: keep the outer lip plus two to three anchor droplet marks, and hold every fleck clear of the lip edge at 1:1.Dense spray touching the lip edge closes the crest silhouette into the sky around it.

The simplification order is fixed: remove spray flecks first, remove the weakest finger or arc row second, and widen the surviving channels third. Touch crest linework last. A useful control is the corridor check: trace every reserved skin path from open skin to open skin at true size. If a foam mark pinches that path shut, remove the mark, not the corridor.

Band framework

Filler fields and paired water are different jobs.

Use the framework below to set band count, spacing, and flow for your placement. One table for the decision, one checklist for the current.

Filler use

Two to five bands depending on gap width

Spacing: Uniform band pitch with one channel width family across the field; every crest tilts with the single current arrow.

Flow: Follow the limb: crests round a forearm or calf the way water moves, and band pitch tightens only where the limb narrows. Never run bands flat across a joint like wallpaper.

Paired use with koi or anchor

One to three bands, ranked below the anchor in mass

Spacing: Wave mass stays clearly subordinate: bands end with open skin before the koi body arc, fins, tail, or face, and never cross the swimming line.

Flow: Lock the koi swimming direction first, then set water to serve it: upstream struggle and downstream drift are different stories told by the same current.

Flow alignment

One arrow governs every band

Run this sequence before print. One failed line means fix, narrow, or reselect before transfer prep.

  • One current arrow is drawn for the whole panel before any band is placed.
  • Every crest tilts the same way along that arrow, with no opposing set at a joint.
  • Filler bands keep uniform pitch; paired bands step down in mass near the anchor.
  • Wave direction agrees with any wind or cloud family in the same zone, or the competing family is removed.
  • The current rounds the limb instead of lying flat across it.

Pairing restraint

Keep the wave below the anchor

Waves serve the composition; they rarely lead it. Judge each combination below by silhouette protection and shared direction.

Wave with koi

Strong when the current is single

The water is the koi story: one current, one swimming direction, open skin between every band and the body arc. Fin, tail, and whisker separation detail stays with the koi owner linked below.

Wave as sleeve or panel filler

Strong at subordinate mass

Two to five even bands fill gaps between anchors with motion that adds no new focal. Bands pass behind anchors with open skin to every figure edge.

Wave with blossom or maple accents

Support only, capped well below wave mass

A small accent softens a wave edge, but petal clusters touching a crest silhouette erase both. Keep accents off the lip and finger channels.

Wave plus wind bars plus clouds in one gap

Restructure before print

Three background families filling the same gap merge at transfer size. Keep one weather system per zone: the comparison stays with the Japanese hub linked below.

Transfer-ready prep

Approve the wave only when every line passes

Run this sequence with scaling off and a ruler in hand. One failed line means fix, enlarge, or reselect before transfer.

  • One crest variant is named (finger-wave, seigaiha, or curling crest) with placement and millimeter dimensions written down.
  • Every foam channel stays visibly open on a measured 1:1 paper print with scaling off.
  • Band count, pitch, and the single current arrow are written on the proof before print.
  • Filler bands keep uniform pitch; paired bands stay subordinate with open skin to the anchor.
  • No wave mark touches a koi body arc, face, mask contour, claw, or blade path.
  • The piece passes the arm's-length squint test: crest, fingers, and bands read as separate marks.
One current direction Open foam at 1:1 Wave below the anchor

FAQ

Wave construction decisions, answered

Short answers for the crest, foam, band, pairing, and prep checks that recur when a wave reference moves toward transfer-ready output.

Cover all inner foam and spray, then trace the outer crest edge plus the finger curls at the exact physical size. Finger-wave crests need two to three countable curls with an open channel between each; seigaiha fields need one uniform arc radius with open skin between arcs and rows; curling-crest focals need the lip, fingers, and spray each separated at 1:1. If the mass becomes one dark slab with detail covered, reshape or enlarge rather than thinning lines.

Next steps

Use the neighboring owners for adjacent jobs.

This guide covers wave crest choice, foam retention, band spacing and flow, pairing restraint, and wave-specific prep. Use the links below for related jobs held elsewhere.

Direction comparison, koi rendering, bodysuit sequencing, cloud construction, board organization, photo-quality scoring, generic conversion steps, and print mechanics stay in their specialist owners. The links above hand off instead of repeating that detail.

From vetted wave to working stencil

Turn the approved wave plan into a stencil draft.

Start from the crest and band plan that passed the foam, flow, and pairing checks, then continue on iPhone for body fit, exact-size print, mirror and professional export.