Bandana stencil evaluation

Judge any bandana print before it becomes a stencil

Bandana prints live or die on repeat rhythm, the border-to-field channel, and fold discipline. Check the paisley construction, the density at your exact size, and the knot and fold placement, then prepare a clean stencil that transfers as one readable piece of fabric print.

Built for working artists preparing bandana pieces. This page covers bandana construction vetting (paisley repeat, border band versus field, knot and fold placement) and transfer-ready prep only, not tattoo application or healing advice. Generic symmetric ornament, radial mandala method, and broad gallery browsing stay with their owners.

Bandana construction first

Name the construction before vetting it.

A bandana is a textile print system, not a generic decorative panel. Match your reference to one row below, then judge tip rhythm, channel separation, and fold placement inside that construction.

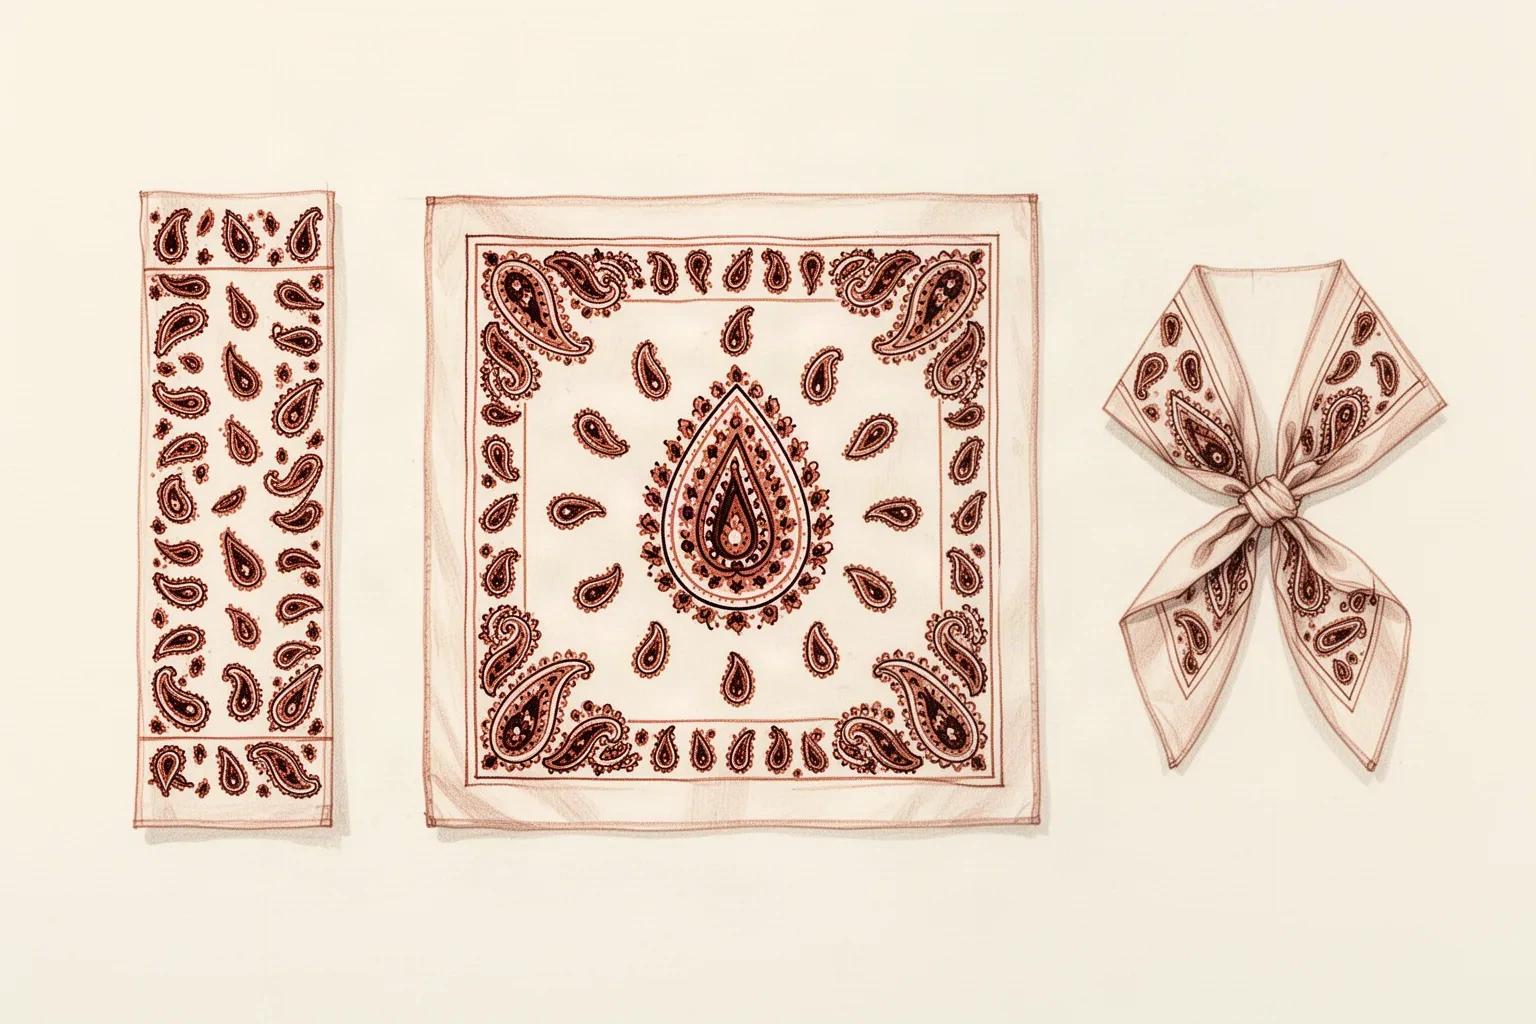
Editorial illustration of three bandana constructions: a folded strip with a repeating border band of small paisley drops, an unfolded square field with a central paisley medallion inside a border frame, and a tied corner knot with radiating pleats and surviving paisley print on either side
Synthetic editorial illustration, not a stencil file or app output. Left to right: folded border-band strip, unfolded field with a central paisley medallion, tied corner knot with radiating pleats. Use it to recognize which construction your reference belongs to before judging repeat rhythm, band channel, and fold placement.

Border-band construction

A square scarf read from the outside in: one wide printed border band carries a repeating motif row, corner blocks anchor the turns, and the band frames whatever sits inside. Common band motifs are small paisley drops, dots, and short floral ticks in tight repeat.

Choose when: Choose border-band when the brief is a folded bandana strip, a neckerchief wrap, an armband, or a leg band where the client points at the edge pattern. Judge band rhythm, corner turns, and fold placement, not field depth.

Field construction

The center square of the scarf: a large paisley teardrop medallion or a grid of repeated paisley drops surrounded by open ground, small sprigs, and dot fill. The field carries the paisley identity while the band acts only as a frame.

Choose when: Choose field when the brief is an unfolded scarf panel, a back piece, a thigh panel, or a chest piece where the client points at the big central paisley. Judge medallion contour, repeat spacing, and interior-gap retention at final size.

Knot and fold placement

Where the scarf gathers, ties, or drapes: a knot mass with radiating pleats, a diagonal fold line across the square, or soft drape shadows between anchor points. Folds interrupt the print and hide part of the repeat.

Choose when: Judge knot and fold placement whenever the design shows a tied bandana, a draped scarf, or a folded strip. Decide which print survives on each side of the fold and which shadow lines become transfer lines versus shading left off the stencil.

Bandana versus neighboring categories

Keep textile print, ornament, and mandala apart.

Miscategorization is the first failure. Match your brief to one row, then vet it with that owner's framework.

Bandana (this page)

Textile print system built from a paisley teardrop repeat with a border band around a field, plus knot and fold placement.

Choose when: Choose bandana when the brief names a bandana print, paisley scarf, neckerchief, or folded band pattern that must read as fabric.

Ornament

Symmetric decorative centerpiece or frame built from mixed bands, scrolls, dots, and a focal medallion around one axis.

Choose when: Use the ornament owner when the piece is a standalone symmetric jewel-like composition with no paisley repeat or fabric fold logic. This page hands off axis and band vetting instead of repeating it.

Mandala

Circular center-out construction with radial repetition, ring hierarchy, and dotwork gradients around one stable center.

Choose when: Use the mandala owner when the piece is a flat disc with repeating radial segments. This page hands off center and repetition method instead of repeating it.

What makes bandana stencil-viable

Repeat, channels, and folds decide the result.

A bandana is a paisley teardrop repeat with a border band around a field, worn as folded or tied fabric. These three pillars predict whether that system survives reduction, print, and transfer.

Paisley repeat discipline

A bandana reads first as a teardrop repeat with one hooked tip direction, one contour weight family, and open ground between drops. Fabric references show dozens of drops with hooked tips, inner-dot rows, and sprig fill competing at once. Transfer needs countable drops with one tip direction and one interior treatment, never mixed tip angles plus dot rows plus sprig fill in the same band. When tips point in two directions or interiors mix dots with sprigs, the stencil reads as generic texture at transfer size.

Check: Cover all interior dots and sprig fill. If the teardrop outlines plus their tip direction still read as paisley on their own at a glance, the repeat is sound. If removing interiors leaves plain drops or commas, lock tip direction and outline rhythm before touching interior detail.

Density and gap retention at final size

Bandana prints fail as merged gray bands, not as lines. The white separations between the border band and the field, between neighboring paisley drops, and inside each teardrop are the structural material that must survive print and transfer. Interior-dot rows close first, then drop-to-drop ground, then the band-to-field channel.

Check: Print at 100 percent with scaling off and confirm each must-keep gap stays visibly open at arm's length. As a practical starting point, many artists test close parallel detail at about 2 mm separation and allow more room on high-movement areas. If a channel closes on paper, remove one interior row or enlarge the piece rather than thinning outlines.

Fold-shadow simplification

Fabric photos show drape shadows, knot pleats, and diagonal fold creases as soft gray modeling across the print. A stencil cannot carry soft shadow and printed motif in the same line family. Transfer needs a decision per shadow: keep it as one clean fold contour, convert it to spaced stipple, or remove it so the print reads flat. Fold lines crossing a paisley outline without a skin break print as one merged scar.

Check: Trace each fold or pleat line from edge to edge at true size. If it crosses a paisley contour or a band edge without open skin on both sides, that shadow needs conversion to stipple, shortening to a hint, or removal before print.

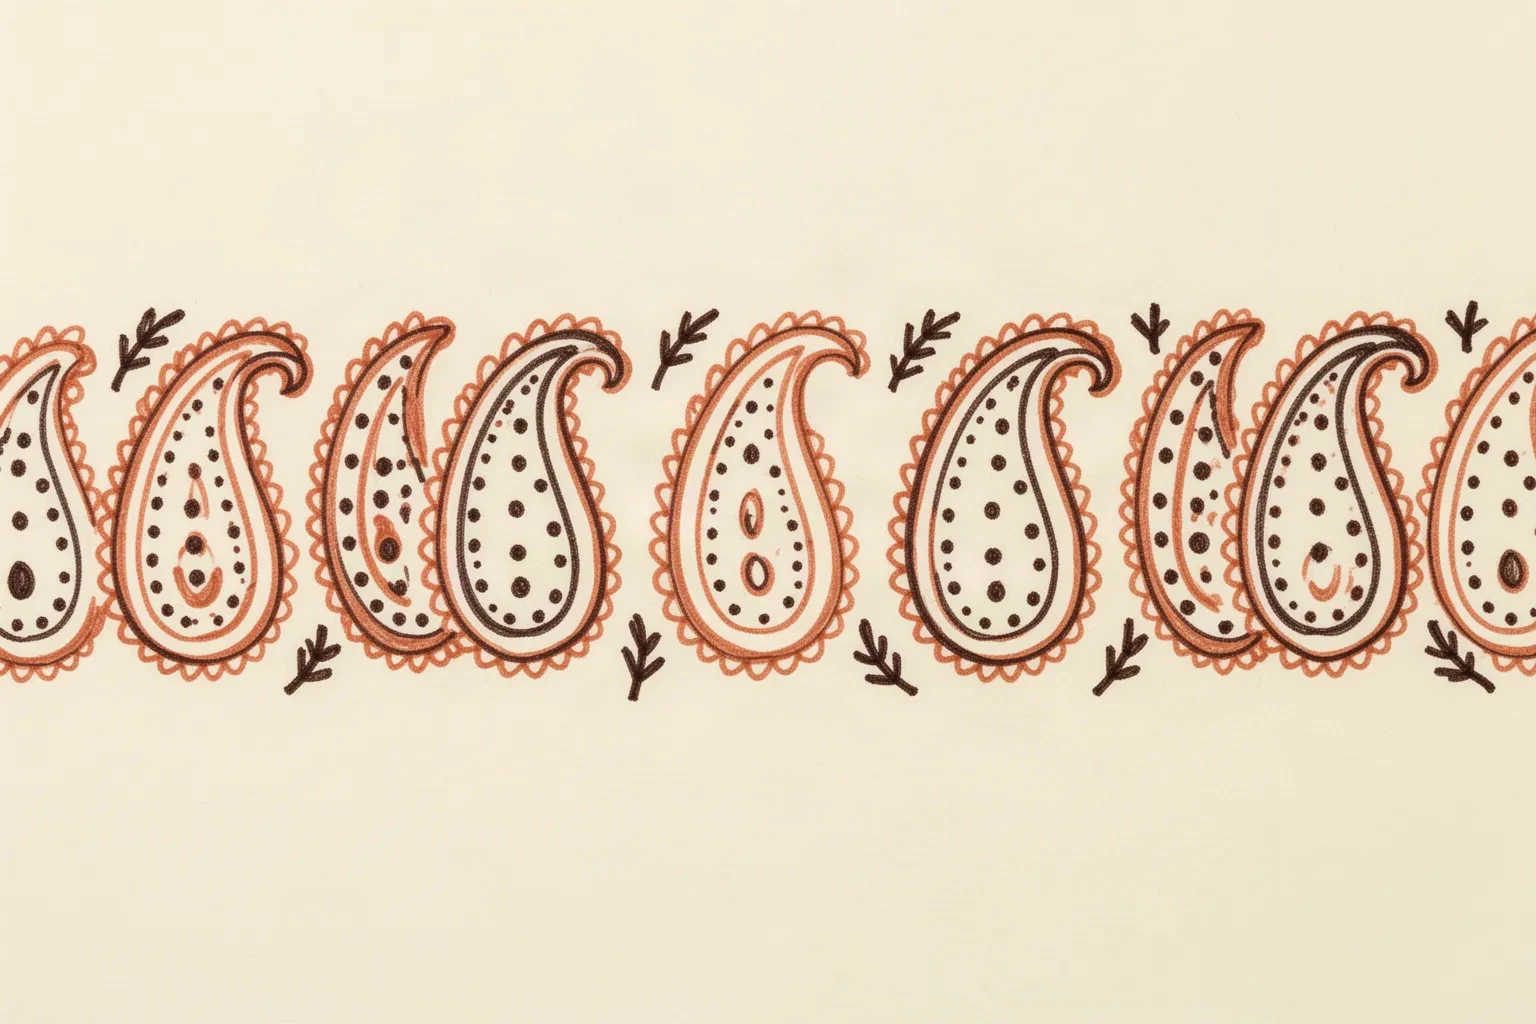
Editorial close-up illustration of a bandana paisley repeat with hooked tips pointing in one direction, interior dot rows inside each drop, open ground between drops, and small sprig ticks filling the space between motifs
Synthetic editorial illustration, not a stencil file or app output. Read the repeat, not the detail: hooked tips point one direction, interior dots sit inside each drop, and sprig ticks fill the ground between drops. Cover the sprigs first, then the interior rows, and confirm the drop separations still read at your exact size.

Bandana evaluation framework

Score the reference in minutes, then act on the weakest check.

Four bandana constructions at labeled sizes. Each one names the protected structure, the fix, and the go or no-go verdict at that exact size. Confirm with a measured 1:1 print.

HOLDS AT STATED SIZE

Field medallion bandana panel at 15 cm

Intended width 150 mm

Source
Unfolded scarf field with one large central paisley medallion, a countable ring of medium drops around it, open ground with sparse dot sprigs, and a simple border band kept outside the medallion. Demanding on screen because the medallion interior carries dot rows and sprig ticks, but every drop separation and the medallion contour stay open at this width.
Protect
Full medallion outer contour with its hooked tip, the ring-drop separations around it, and the open channel between medallion and border band.
Fix
Keep medallion and drops as single-path outlines with open skin between them, hold interior dots to one spaced row per drop, and keep the border band outside the medallion channel. Keep tip direction and medallion mass unchanged.
Candidate stencil
Same bandana with consistent tip direction, single-row interiors with open ground, an open border-to-field channel, and fold lines held clear of print outlines at transferable mass.
Final-size verdict
Holds at 15 cm after an interior-row check. The medallion keeps its contour and tip at 1:1, drops stay countable, and the band frames rather than crowds the field.

SIMPLIFY INTERIORS FIRST

Dense border-band wrap at 10 cm

Intended length 100 mm

Source
Folded bandana strip where the border band does all the work: tight paisley-drop repeat plus dot rows and short floral ticks stacked in one narrow band, with a diagonal fold crossing two drops. Strong on screen because the repeat rhythm is bold, but interior dots and ticks stack thin parallel lines that narrow every separation at this length.
Protect
Border-band rhythm with one repeating drop shape, both band edges with their own skin breaks, and the fold location marked before editing.
Fix
Reduce each drop to one outline plus one interior row maximum, remove the floral-tick layer or the dot layer (keep one, not both), and shorten the fold to a single clean contour with open skin where it crosses outlines. Do not keep dot rows plus ticks plus fold shading together at 10 cm.
Candidate stencil
Same bandana with consistent tip direction, single-row interiors with open ground, an open border-to-field channel, and fold lines held clear of print outlines at transferable mass.
Final-size verdict
Holds at 10 cm once interiors are single-row construction at 1:1. The band carries the folded-strip read while the fold interrupts the repeat cleanly instead of merging with it.

RESOLVE KNOT PLACEMENT

Tied bandana with knot and pleats at 12 cm

Intended width 120 mm

Source
Tied scarf with a knot mass at one corner, radiating pleats gathering the print, and surviving paisley drops on either side of the knot. Suited to forearm and calf wraps because the knot sits at the edge, but pleat lines crowd the nearest drops where gathered fabric compresses the repeat.
Protect
Knot mass outline with its pleat origins, both surviving field sections with their drop rhythm, and the open ground between pleats and the nearest drops.
Fix
Keep pleats to three or four single-path radiating lines with open skin between them, convert gathered-print shading into spaced stipple or remove it, and reopen the nearest drop separations so pleats never touch paisley outlines. If the knot still crowds the field at true size, shrink the knot or shift it toward the placement edge.
Candidate stencil
Same bandana with consistent tip direction, single-row interiors with open ground, an open border-to-field channel, and fold lines held clear of print outlines at transferable mass.
Final-size verdict
Holds at 12 cm once pleats are countable lines with open separations at true size. The tied read comes from the knot plus radiating pleats, not from shaded gathering or compressed drops.

ENLARGE OR RECROP

Full folded scarf with knot, drape, and field at 5 cm

Intended width 50 mm

Source
Complete bandana composition shrunk small: full border band, full field with many drops, knot plus pleats, and drape shadows sharing one small panel. Attractive on screen with hairline interiors, tight drop spacings, and fine pleat separations competing for the same room.
Protect
Tip direction with drop rhythm, and the border-versus-field distinction that gives the piece its bandana identity.
Fix
Enlarge past the point where every drop separation, interior gap, and pleat spacing transfers as open skin, or recrop to the border band alone or one field medallion without knot and drape. Do not keep full band plus full field plus knot shading together at 5 cm.
Candidate stencil
Same bandana with consistent tip direction, single-row interiors with open ground, an open border-to-field channel, and fold lines held clear of print outlines at transferable mass.
Final-size verdict
At 5 cm the interiors function as one dark patch and the knot plus pleats print as a single blob. Enlarge, recrop to one construction, or choose a bolder minimal paisley unit for this width.


Generic ornament axis discipline, radial mandala method, and broad visual browsing stay in their specialist owners. This framework exists to judge bandana paisley repeat, border-versus-field separation, and knot and fold placement at a stated size, not to replace those owners.

Paisley, bands, and folds at final size

Judge the white space at the size you will print.

Screens forgive crowding that paper and skin do not. Set the size first, then inspect each feature below at true physical size with scaling off.

About 5 cm and below

Wrist accents, behind-ear marks, finger-adjacent panels, and small gap fillers.

Carry a recrop only, such as one paisley drop with its tip, a short border-band segment, or one knot-free fold hint. Keep one contour family and two separations maximum. If an interior gap or drop separation closes at 1:1, enlarge or reselect rather than forcing reduction.

About 6 to 12 cm

Common armbands, neckerchief strips, forearm folds, calf wraps, and chest bandana work.

The most flexible band. A border band with single-row interiors, a small field cluster, or a knot with countable pleats can work when every drop separation, band channel, and pleat gap is verified at true size. Check interior rows and fold crossings before approving detail.

About 13 cm and above

Large back panels, thigh fields, chest scarf pieces, and full unfolded bandana compositions.

Room for a medallion plus repeat field or a band plus field combination, but only when open skin separates every drop, every interior row, and the band-to-field channel. Larger width does not rescue merged interiors, touching folds, or compressed knot pleats.

Bandana feature checks by width band
FeatureAbout 5 cm and belowAbout 6 cm and above
Paisley outlines and tipsKeep one outline per drop with a clear hooked tip and open ground to the next drop. Inner-dot rows and sprig fill merge first and should be removed at small widths.One outer plus one interior row can work when each keeps its own spacing at 1:1 and drop-to-drop ground stays open. Check tip direction consistency with a squint test at true size.
Border band and field channelCarry the band or the field, not both at full density. The band-to-field channel needs more room than small fields allow.Band plus field can work when the channel between them stays visibly open at 1:1. Mirror band rhythm across corners so both sides read as one scarf.
Folds, pleats, and drape shadowsKeep one fold hint maximum as a single clean contour. Pleat fans and drape modeling need wider bays than small fields allow.Three to four countable pleats or one diagonal fold can carry the fabric read when each keeps its own skin break. Fold lines still need separation from paisley outlines and band edges.
Interior dots, sprigs, and fillKeep no interior-dot rows, sprig ticks, or stipple fields. Plan any drop modeling as open skin on the stencil itself.One spaced interior row or sparse stipple can carry modeling when each mark keeps its own spacing. Fill needs its own skin break outside drop outlines.

Reference to clean stencil

Build from the repeat outward, then rank the folds.

Work in this order so one change at a time can be judged at the same size. Stop when repeat, channels, folds, and interiors each read correctly.

  1. 01

    Lock size, placement, and construction first

    Set the intended physical size in millimeters, name the body area, and commit to one construction: border band, field, or knot-and-fold composition. A field medallion that holds at 15 cm on a back can fail at 5 cm on a wrist with no line being wrong on its own. Use the size calculator when target dimensions are still open.

  2. 02

    Verify repeat, band count, and fold map

    Confirm one paisley tip direction, count the nested motif layers, map every fold, pleat, and knot line, and check which print survives on each side of each fold. Resolve tip drift and fold-to-outline contact before touching line weight. A bandana with consistent tips, one band channel, and mapped folds is already halfway to stencil-ready.

  3. 03

    Set print-first hierarchy

    Assign every mark a role: print structure that carries the first read (drop outlines, band edges, medallion contour), support that shapes the fabric (fold contours, pleat lines), and texture that can be removed (dot rows, sprig ticks, drape shading). Strengthen print structure first, keep support lighter, and mark one removable texture row that can go if gaps close.

  4. 04

    Simplify interiors and folds at 1:1

    Reduce interior rows to one spaced treatment, convert drape shading into spaced stipple or clean fold contours, and hold fold lines clear of paisley outlines with open skin on both sides. Run a squint check: step back until fine dots disappear and confirm the tip rhythm, band frame, and knot read still hold. The line-weight guide covers fine, normal and bold behavior on the same stencil.

  5. 05

    Verify print and transfer path

    Export a true-size PDF with no fit-to-page scaling, inspect the narrowest drop separation, the tightest interior gap, and the closest fold-to-outline contact on plain paper, then measure the physical print with a ruler. If the digital file passes and only paper fails, move to print-stage evidence instead of simplifying again.

Size and placement decisions

Bands want limbs, fields want flat skin

A bandana is a placed piece of fabric print, not a floating motif. Flat placements preserve medallions and repeat rhythm with little compensation, while wrapped placements demand a band recrop or a knot shift.

Armband and leg band

Narrow wrap fields where a border-band strip runs well around the limb, while full fields wrap fast and clip the medallion on the far side.

Check: Choose a border-band construction aligned with the limb line, keep the band channel inside the flattest span, and confirm tip rhythm and corner turns at the exact millimeter length.

Neck, neckerchief, and collarbone

Curved, high-movement panels with limited flat span where only a folded strip or small knot survives. Full fields compress on one side in photos and transfers.

Check: Use a folded-strip or small-knot recrop, keep the composition inside the flattest available span, and run the small-size checks at the exact length before print.

Back, chest, and thigh

Broad panels with room for a field medallion plus repeat field or a band-plus-field combination. The most forgiving areas for a second motif layer.

Check: Center the medallion on the flattest span, keep the band-to-field channel open at 1:1, and preview the full composition on a live body photo before locking size.

Forearm and calf

Directional fields where the scarf should travel with the limb. Knot masses and wide medallions sitting across the limb wrap fast and crowd tips.

Check: Align the scarf axis with the limb axis, shift knots toward the placement edge, and transfer from the anchor end so the free end cannot drag the repeat off line.

Stencil-ready checklist

Approve the bandana only when every line passes

Run this short sequence with scaling off and a ruler in hand. One failed line means fix, enlarge, or reselect before transfer.

  • Confirm intended size in millimeters, the named placement, and the border-band, field, or knot-and-fold choice.
  • Confirm paisley tips share one direction with open ground between drops at 1:1.
  • Confirm the border-to-field channel stays open where both constructions appear.
  • Confirm folds and pleats keep open skin from every paisley outline and band edge.
  • Confirm interior dots and fill total one spaced treatment or zero with no merged channels.
  • Export a true-size PDF with scaling off and measure the physical print.
Tip rhythm first Verify channels at 1:1 Folds stay clear of print

FAQ

Bandana stencil decisions, answered

Short answers for the construction, viability, fold, and placement checks that recur when a bandana reference moves toward transfer-ready output.

A bandana print is a square scarf system: a border band with a repeating motif row frames a center field of paisley drops or one large paisley medallion, and knot or fold lines interrupt the print where the fabric gathers. For stencil use, name which construction carries your piece: a border band for folded strips and wraps, a field for unfolded panels, or a knot-and-fold composition for tied scarves. Then judge tip direction, band-to-field separation, and fold placement inside that construction.

Next steps

Use the neighboring owners for adjacent jobs.

This guide covers bandana repeat checks, border-versus-field and knot placement decisions, size-tied density plus fold-simplification rules, and reference-to-stencil preparation. Use the links below for related jobs such as sizing, print checks, paper, and placement.

Symmetric ornament theory, radial mandala method, and broad gallery browsing stay in their specialist owners. The links above hand off instead of repeating that detail.

From evaluated reference to working stencil

Turn the approved bandana into a stencil draft.

Start from the bandana that passed the repeat, channel, and fold checks, then continue on iPhone for body fit, exact-size print, mirror and professional export.