Money stencil evaluation

Vet the money motif before it hits skin

Money designs fail on dense interiors first: tiny numerals, packed portraits, and interlaced pattern that read on screen and merge on skin. Choose the bill, stack, bag, or coin construction for your width, prove every gap at true size, then transfer with a money-specific size and placement plan.

Built for working artists preparing client-requested money motifs. This page covers money element choice, small-text and portrait simplification with open-skin breaks, final-size readability with fold and bridging checks, and money-specific size, placement, and transfer prep only, not tattoo application or healing advice. Generic conversion steps stay with the photo path, clean-contour method stays with the simple-outline guide, and masculine subject shortlists stay with their owner.

Money versus neighboring jobs

Name the money job before judging the reference.

A money motif is a dense-detail emblem judged on element fit, numeral and portrait simplification, and overlap separation at final size. These boundaries keep it out of neighboring owners that solve different stencil problems.

Covered here

Money element choice across bill, stack, bag, and coin constructions, small-text and portrait simplification with open-skin breaks, final-size readability with fold and ink-bridging checks, and money-specific size, placement, and transfer-ready prep.

Neighboring owners keep

Generic photo-to-stencil conversion stays with the photo path, cross-subject comparison stays with the stencils and subject hubs, clean-contour method stays with the simple-outline guide, and masculine subject shortlists stay with their owner.

Photo path for conversion depth, simple-outline guide for contour method, and masculine shortlist for subject picks.

Money evaluation framework

Pick the element first, then act on the weakest check.

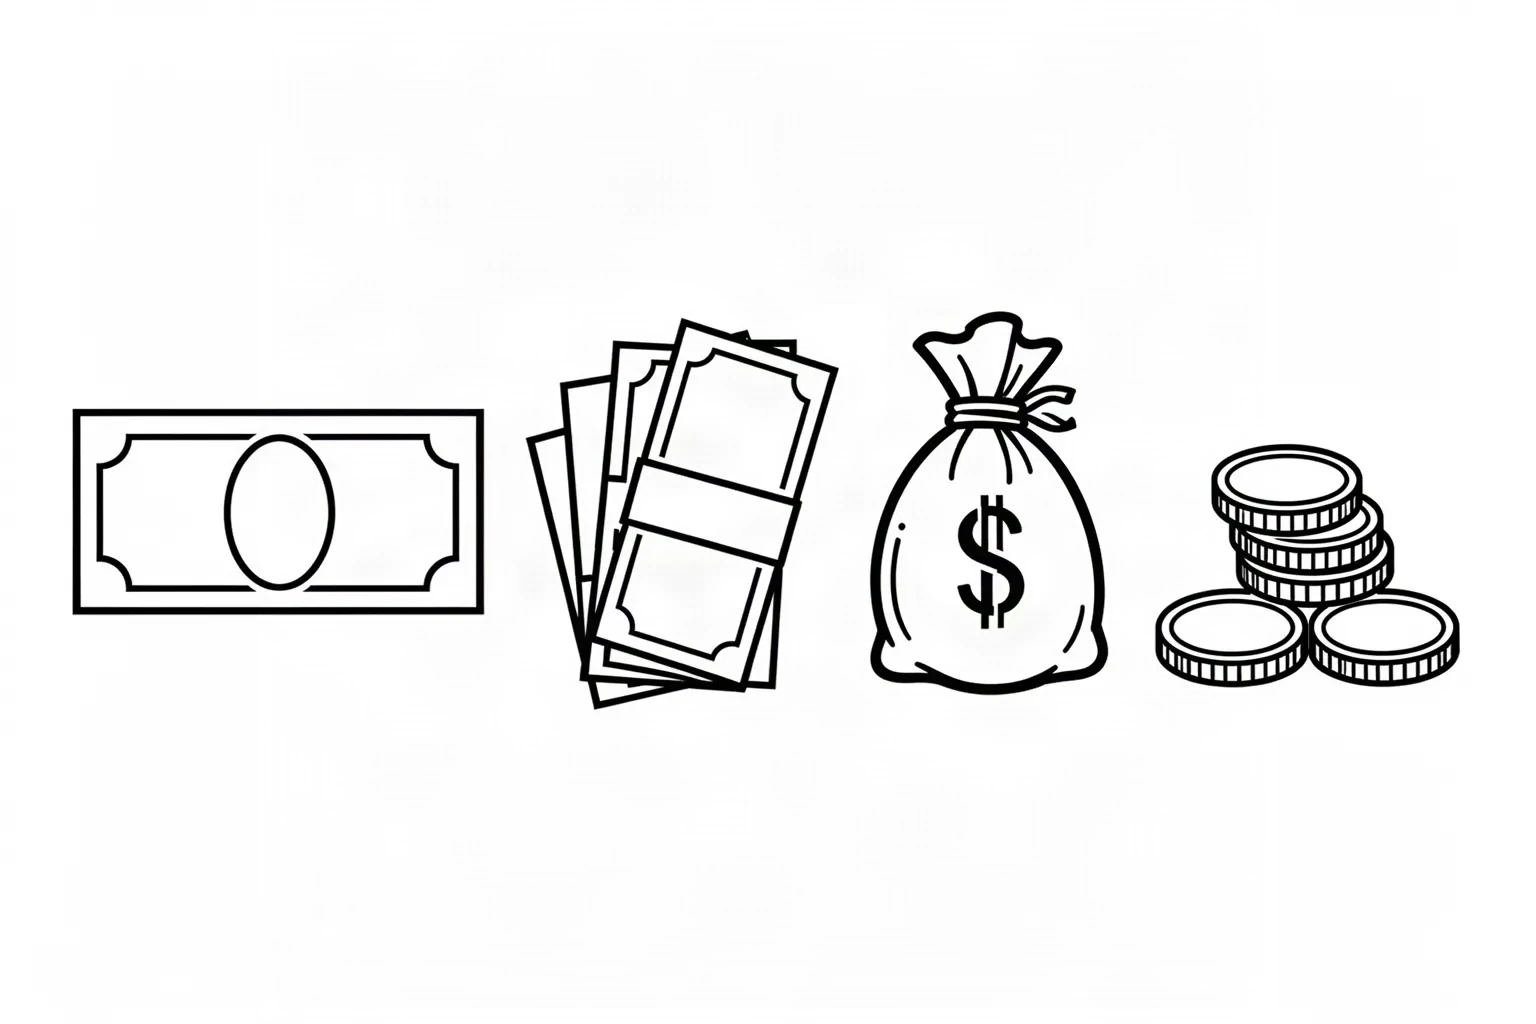
Four money constructions at labeled widths. Each one names the protected structure, the fix, the placement fit, and the go or no-go verdict at that exact size. Confirm with a measured 1:1 print.

Four simplified money constructions in black linework on white: a single bill with an oval portrait medallion, a fanned stack of overlapping bills, a tied money bag, and a small pile of coins.
Synthetic illustration, not StencilStudio app output, showing the four source constructions before simplification. Use it to compare silhouettes only: width, line weight, overlap channels, and every interior gap still need a measured 1:1 print check.

MOST FORGIVING STARTER

Single bill at 10 cm

Intended width 100 mm

Source
One banknote shown flat or with a slight corner fold: a rectangular field with a portrait oval near center, denomination numerals in the corners, and a border frame. Reads as money through the rectangle plus one portrait oval alone, so it survives forearms, calves, and thigh panels.
Protect
The outer rectangle with level top and bottom edges, the portrait oval position with open skin around it, and the corner numeral zones kept as four separate marks.
Fix
Rank one portrait oval and one numeral family, then convert guilloche background, lathework, and micro lettering into open skin or one light tone. Keep the border as a single contour with no doubled inner line.
Candidate stencil
Same money element with ranked numeral and portrait families, single border contours, cleared overlap and neck channels, and protected detail held at transferable mass.
Placement fit
Best for: forearm, outer calf, shoulder cap, and thigh panels with a flat run for the rectangle.
Trade-off
Avoid when: the client wants a full wealth scene with bands, sacks, and coins, because one bill has no room for that story. Choose a stack or bag composition with a larger field.
Final-size verdict
Holds at 10 cm once the rectangle reads level at true size and the portrait oval plus each numeral holds its own separation. When the interior crowds, remove a texture family before shortening the bill.


CHECK EDGE CHANNELS

Fanned stack at 12 cm

Intended width 120 mm

Source
Three to five bills fanned or banded into a stack: overlapping rectangles with stepped edges, one shared portrait zone, and a paper band or tie where present. Strong on screen because the stepped edges carry the first read, but stacked borders bridge where bills overlap at stencil size.
Protect
The stepped outer edge rhythm with open skin between each bill edge, the top bill portrait and numeral zones, and the band or tie position with its own separation.
Fix
Limit the fan to three countable bills, hold an open skin channel along every overlap, and demote lower bills to plain rectangles with one numeral family. Merge the smallest hidden bill corners before touching the top bill detail.
Candidate stencil
Same money element with ranked numeral and portrait families, single border contours, cleared overlap and neck channels, and protected detail held at transferable mass.
Placement fit
Best for: forearm, thigh, upper back, and chest panels with room for the full fan span.
Trade-off
Avoid when: the field wraps fast or tilts, because outer bills compress and overlap channels pinch shut. A single bill survives curved fields better.
Final-size verdict
Holds at 12 cm once each bill edge traces as its own line at true size with the band or tie clear of every portrait zone. Bill count never rescues a closed overlap channel.

CHECK NECK AND SYMBOL VOIDS

Money bag at 10 cm

Intended width 100 mm

Source
A tied sack with a cinched neck, a rounded body, and a currency mark or knot at center: one compact mass with a clear tie break. Recognition-led because the neck pinch plus the round body reads as a money bag even with minimal interior detail.
Protect
The sack outer contour with a pinched neck break, the tie or knot position with open skin above and below it, and one central currency mark with an open void around it.
Fix
Keep one tie only, hold the neck channel fully open at 1:1, and reduce folds to two or three spaced crease lines. Convert small coins, bills, or sparkle marks spilling from the sack to spaced dots or remove them.
Candidate stencil
Same money element with ranked numeral and portrait families, single border contours, cleared overlap and neck channels, and protected detail held at transferable mass.
Placement fit
Best for: hand, wrist, ankle, shoulder cap, and behind ear pieces where a compact round mass fits.
Trade-off
Avoid when: the client wants readable denomination or portrait detail, because a bag carries symbols, not banknote interiors. Choose a bill or stack for numeral and portrait depth.
Final-size verdict
Holds at 10 cm once the neck channel reads open at true size and the central mark holds its void from a normal viewing distance. Extra spill detail never rescues a closed neck.

NEEDS COUNTABLE SEPARATION

Coin pile at 12 cm

Intended width 120 mm

Source
Stacked or scattered coins with milled edges, face marks, and denomination hints: many small enclosed circles in one field. Rich on screen with heavy small-coin texture, and every shared coin edge is a potential bridge at transfer size.
Protect
The pile outer contour with a clear top coin, each top-face circle with its own enclosing line plus open interior, and milled edge ticks held as one light family.
Fix
Rank one face-detail family and demote the rest to plain discs, keep top coins countable with open skin between every pair, and convert the smallest buried coins to suggestion or remove them. Hold milled ticks clear of neighboring coin edges.
Candidate stencil
Same money element with ranked numeral and portrait families, single border contours, cleared overlap and neck channels, and protected detail held at transferable mass.
Placement fit
Best for: thigh, upper back, forearm, and chest panels with flat area for the full pile span.
Trade-off
Avoid when: the placement forces the pile below 10 cm, because face marks fill into solid dots. Recrop to a three-coin cluster or switch to a money bag for small fields.
Final-size verdict
Holds at 12 cm once every top coin reads as its own disc with an open center at true size. The smallest coin decides the minimum width.

Generic photo conversion steps, cross-subject silhouette comparison, clean-contour method, and masculine subject picks stay in their owners. This framework exists to judge money element fit, interior density, and separation at a stated width, not to replace those guides.

Small-detail simplification system

Dense money detail survives only with open skin.

Money fails on six contacts first: closing numeral counters, filled portrait ovals, merged guilloche fields, crowded seals, doubled borders, and folds that cross protected detail. Run each check below at true size.

Denomination numerals and small text

Fails as: Corner numerals, banner words, or date stamps print as broken scratches because the interior counters cannot carry enclosed openings at final size.

Fix: Keep one numeral family at a size where every counter stays open at 1:1. Move names, dates, and mottos out of the bill field or enlarge past the point where each letter holds separation, and never thin neighbors to fit more text.

Portrait oval and face detail

Fails as: The portrait fills into a solid blob because hair, collar, and background lathework share edges with the face contour at transfer size.

Fix: Rank the oval contour first, the face mass second, and background texture last. Reduce the portrait to outer oval plus one inner face family with open skin around it, and remove background lines that touch the oval.

Guilloche and lathework pattern

Fails as: Fine interlaced banknote pattern prints as one grey band because adjacent pattern lines sit closer than the stencil can hold open.

Fix: Convert guilloche fields to open skin with at most one light tone family. Never keep two competing pattern families in the same bill interior when the field is the shared ground for numerals and portrait.

Seals, serials, and micro marks

Fails as: Small circular seals, serial numbers, and micro marks cluster near numerals and borders and close the channels between them.

Fix: Keep one seal or serial family maximum, hold each as a separate mark with open skin on every side, and remove the rest. If a seal touches a numeral or border at 1:1, the fix is removal or enlargement, never thinner lines.

Bill borders and overlap edges

Fails as: Doubled border lines print as one thick bar, or stacked bill edges share one line and merge the fan into a single rectangle.

Fix: Carry one border contour per bill with level edges. Hold an open skin channel along every overlap in a stack, and remove the second inner border rather than thinning it.

Fold breaks and crease lines

Fails as: Corner folds and crease lines cross numerals, portraits, or edges and read as accidental breaks that split the bill read at transfer size.

Fix: Plan each fold as an intentional light line with open skin on both sides, kept clear of numeral zones and the portrait oval. When a fold crosses protected detail, move the fold or simplify the detail it crosses.

About 8 cm and below

Hand, wrist, ankle, behind-ear pieces, finger panels, and small gap fillers.

Carry a money bag or a three-coin recrop only, with one contour family and one mark family maximum. Keep no portrait interiors, no denomination rows, and no guilloche fields. If a neck channel or coin separation closes at 1:1, enlarge or reselect rather than forcing reduction.

About 10 to 12 cm

Common forearm, calf, shoulder, and chest money pieces, including most single-bill and money-bag builds.

The most flexible band. A single bill, a three-bill fan, or a money bag can work when every numeral, oval, neck, and edge channel is verified at true size. Check fold placement and ink-bridging risk before approving second detail families.

About 14 cm and above

Large thigh, back, chest, and sleeve panels, including fanned stacks and coin piles.

Room for a full stack or coin pile with ranked detail, but only when open skin separates bills, coins, numerals, and pattern fields at true size. Extra width does not rescue merged overlap channels or filled portrait ovals.

Reference to clean stencil

Work in this order so one change can be judged at size.

Money preparation is sequencing work. Lock the element, rank the interior, simplify at true size, then prove the print.

  1. 01

    Lock element, width, and placement first

    Set the intended physical width in millimeters, name the body area, and choose bill, stack, bag, or coins before judging the reference. A stack that holds at 12 cm on a thigh can fail at 6 cm on a wrist with no line being wrong on its own. Use the size calculator when target dimensions are still open.

  2. 02

    Rank structure over decoration

    Assign every mark a role: silhouette that carries the first read, support that frames it, and decoration that can be removed. Protect bill rectangles, stack edge rhythm, bag neck breaks, and coin pile contours first, then decide which numeral, portrait, or pattern family earns its room at this width.

  3. 03

    Simplify text, portrait, and pattern at 1:1

    Reduce numeral families, portrait interiors, guilloche fields, and seal clusters before thinning contours. Keep open skin around every numeral zone, portrait oval, neck channel, and overlap edge, and run a squint check: step back until fine texture disappears and confirm the money element still reads.

  4. 04

    Run the fold and bridging check at true size

    Export a true-size PDF with no fit-to-page scaling, inspect the narrowest numeral counter, the tightest overlap channel, and the smallest coin or seal void on plain paper, then measure the physical print with a ruler. Confirm folds sit clear of protected detail and no two neighbors share one edge.

  5. 05

    Verify print and transfer path

    If the digital file passes and only the paper print fails, move to print-stage evidence: the print checker and the paper guide linked below. Do not simplify the money element further to compensate for a scaling or printer setting error.

Placement and fold decisions

Dense money wants flat skin and folds kept clear

Money is a rectangle, fan, sack, or pile composition with small protected interiors. Placements with a clear flat span preserve numerals and ovals, while joints and flex lines demand recrops and planned folds.

Forearm and outer calf

Long straight fields where a bill rectangle or fan can sit level along the limb axis. Stepped stack edges read cleanly here with little compensation.

Check: Align the bill or fan base with the limb axis, keep full overlap channels inside the flat run, and mirror numeral spacing at 1:1 before print.

Thigh, back, and chest

Broad flat panels with room for stacks and coin piles, but the body midline becomes part of the design on chest and sternum pieces and asymmetry shows fast.

Check: Center the composition on the flattest span, hold open skin between every bill and coin, and preview on a body photo before locking numeral and portrait count.

Hand, wrist, and ankle

Small curved fields where only bags and coin recrops survive. Bill interiors, fans, and piles forced into these bands merge first.

Check: Carry a money bag or three-coin recrop with one mark family, keep the neck channel open, and confirm every separation at the exact millimeter width.

Joints, knuckles, and flex lines

Fold zones where bill rectangles and coin rows distort when skin moves. Folds drawn for style compete with real skin folds after transfer.

Check: Keep protected numerals and ovals clear of every flex line, plan intentional crease lines away from detail zones, and confirm with a dry wrap before print.

Transfer-ready checklist

Approve the money stencil only when every line passes

Run this sequence with scaling off and a ruler in hand. One failed line means fix, enlarge, remove a detail family, or reselect before transfer.

  • Confirm the money element, intended millimeter width, and named placement with the reason for the choice.
  • Confirm every numeral counter and portrait oval holds open separation at 1:1 with scaling off.
  • Confirm each stack overlap and coin pair keeps an open skin channel with no shared edge.
  • Confirm folds and crease lines sit clear of numerals, portraits, and border contours.
  • Confirm orientation and mirroring: the composition reads upright on the body and any text is checked for mirroring before transfer.
  • Export a true-size PDF with scaling off and measure the physical print with a ruler.
Rank numerals and portrait first Verify gaps at 1:1 Keep folds clear of detail Count every coin and bill edge

FAQ

Money stencil decisions, answered

Short answers for the element, simplification, readability, size, placement, and tooling checks that recur when a money reference moves toward transfer-ready output.

Match the element to the available width and field shape. A single bill suits flat runs near 10 cm where the rectangle plus one portrait oval carries the read. A fanned stack needs about 12 cm with room for the full fan span and open overlap channels. A money bag suits small curved fields near 10 cm and below because the neck pinch plus round body reads with minimal interior. A coin pile needs about 12 cm or more so each top coin keeps its own disc with an open center.

Next steps

Use the neighboring owners for adjacent jobs.

This guide covers money element choice, small-detail simplification, final-size readability with fold and bridging checks, and money-specific size, placement, and transfer prep. Use the links below for related jobs such as conversion, sizing, print checks, and specialist depth.

Generic photo conversion, cross-subject comparison, clean-contour method, masculine subject selection, paper manufacturing detail, and placement mechanics stay in their specialist owners. The links above hand off instead of repeating that detail.

From evaluated reference to working stencil

Turn the approved money motif into a stencil draft.

Start from the money element that passed the simplification, readability, fold, and placement checks, then continue on iPhone for body fit, exact-size print, mirror and professional export.