

Poppy Tattoo Stencils: Variant Choice and Thin-Petal Prep
Vet any poppy reference for stencil work by deciding the structure first, protecting thin-petal separations second, and locking size and placement before transfer. This…
- 6
- Practical
- Artist-first
Vet any poppy reference for stencil work by deciding the structure first, protecting thin-petal separations second, and locking size and placement before transfer. This collection compares six structural studies drawn from reviewed floral stencil work: a thin-petal overlap study, an open-cup separation study, a stem-curve study, a bud-spacing study, a pod-rib study, and a petal-count study. The depicted flowers are honestly labeled peony, rose, branch, nightshade, and lotus analogues, not poppy photos; each one isolates a construction lesson that poppy references most often fail. For the full width-tied vetting protocol with go or no-go verdicts, continue to the poppy vetting and prep guide.
Choose the Poppy Structure Before Drawing Anything
A poppy is a small family of presentations, not one bloom. Common garden and field poppies (Papaver) build each flower from a few large, thin petals, usually four, in a wide-open cup around a dense center of many stamens ringing an ovary that matures into a ribbed seed capsule with a radiating crown disk. Two sepals typically fall as the bloom opens, and buds nod on slender bent stems before straightening. Stencil viability comes from matching the structure to the detail budget, because each presentation fails differently.
- Open bloom: a wide cup seen from above or three-quarter view with four large readable petals and a compact stamen center. The most forgiving poppy to stencil because the petal count is low and every separation can stay open. Best when the reference shows each petal edge reaching open air with visible skin between neighbors.
- Side profile: a cup seen edge-on with layered overlapping petals and a long run of edge frill. Attractive but riskier, because overlap stacks petals at one density and frill ripples merge into a serrated band when reduced. Best at medium widths and above, after the frill run is reduced to three or four spaced ripples.
- Nodding bud: a closed teardrop on a bent stem, often with a sepal cap and one nearby leaf. Simple in silhouette but fragile in spacing, because bud-to-leaf contact closes into one mass below about 7 cm. Best as a single bud with a short stem stub, or paired with an open bloom only when a clear stem gap separates them.
- Seed pod: a rounded capsule with a crown disk and vertical ribs on a straight stem stub. The stencil read comes from silhouette plus disk plus a few spaced ribs, never from countable rib texture. Best when ribs are reduced to three or four marks at true size; a packed rib field needs a larger width or a different structure.
- Count check before committing: trace the reference and count distinct petals with a visible separation between every pair, confirm one compact center with open skin around it, and for pods confirm the crown disk plus spaced ribs. If the count fails on paper at the intended width, reselect the structure before touching line weight.
Keep Thin Petals Readable in Linework and Transfer
Poppy petals are tissue thin, so stencil failure looks like merging, not like missing detail. Work through this hierarchy in order and fix the first failure before moving on.
- Petal contour first: give the outer edge of every petal one continuous readable line from the center to open air, and keep open skin between neighboring petals. Use the open-cup separation study as the baseline: if its outer-ring logic holds, the poppy holds. Reduce frill ripples to a few spaced marks instead of a continuous ruffled edge; frill that touches a neighboring petal at 1:1 is the first thing to shorten.
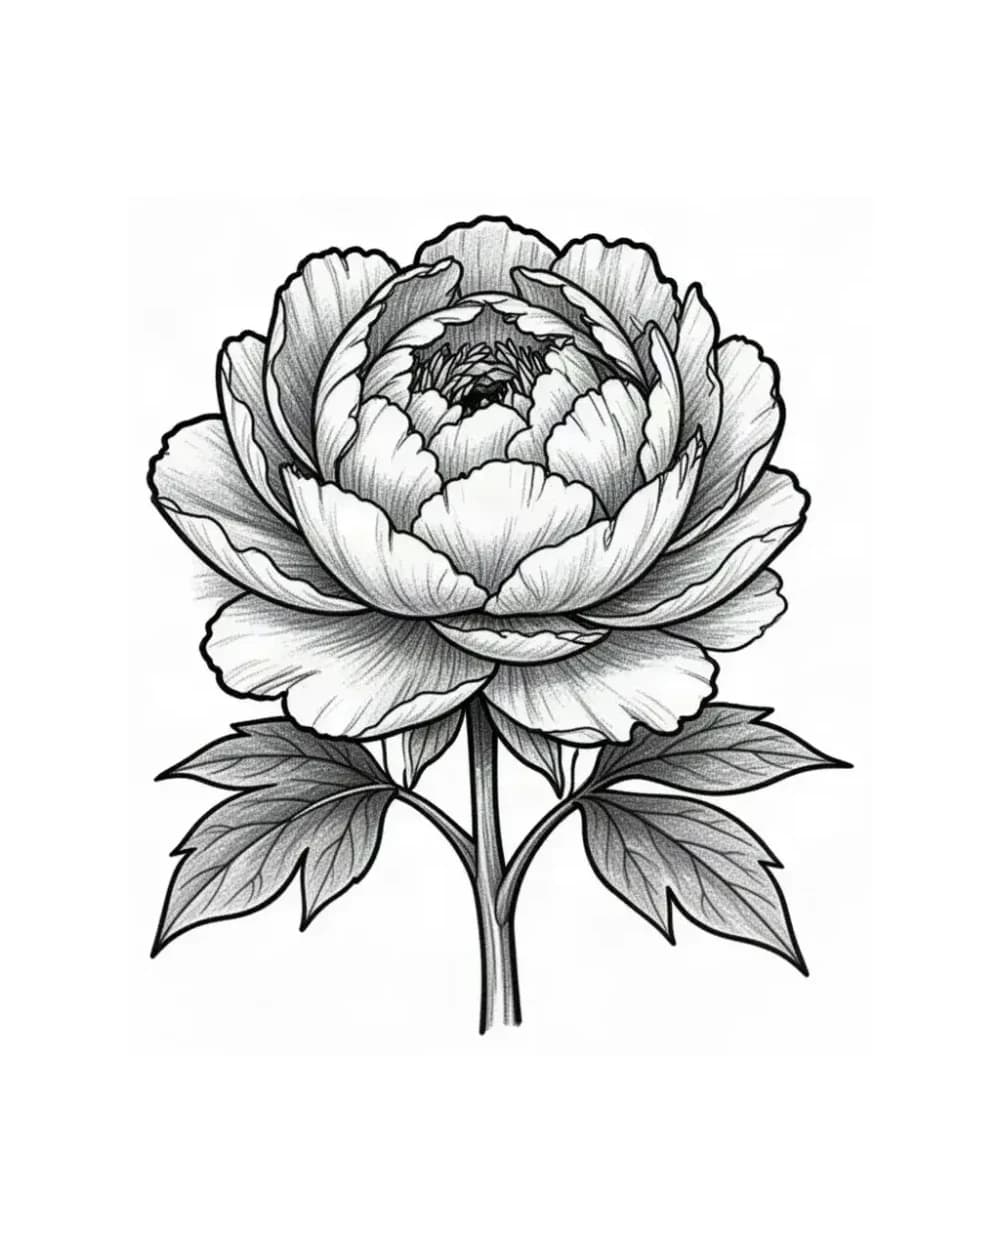
- Overlap ranking second: in side and three-quarter views, let the near petal overlap and shorten while far petals sit higher and read smaller. The thin-petal overlap study shows the largest outer shapes leading while secondary tiers stay subordinate. If every overlap carries equal weight, the bloom collapses into a flat rosette, so merge the weakest hidden layer into the front petal before changing any line mass.
- Stem and leaf discipline third: give the composition one primary stem path from base to bloom with no crossing petal, competing stem, or equal-mass leaf. The stem-curve study shows bloom, stem, and leaves forming one vertical movement that can run with a limb. Separate any leaf from the bud or bloom with a clear stem gap, or recrop the leaf out.
- Tonal separation last: hold two tone families apart, airy petal tissue versus one dense center or capsule. Keep the stamen center as one compact anchor with open skin between it and the petals, merging filaments (fewer stamen marks, not thinner ones) when the center crowds. Keep pod ribs as a few spaced marks with open skin between them. When the question is which close lines merge, use the line-weight guide for gap behavior; this page does not repeat generic line theory.
Run the Size and Placement Check Before Print
Judge the finished stencil at the exact physical width with scaling off, because screens forgive crowding that paper and skin do not. Confirm every verdict with a measured 1:1 print.
- About 7 cm and below: wrists, ankles, behind-ear accents, and small gap fillers. Carry one bloom or one pod with a short stem stub and no leaf. Keep a single petal layer, a compact center with no countable stamens, and at most three spaced frill marks. If a petal separation or the center ring closes at 1:1, enlarge or reselect rather than forcing the reduction.
- About 8 to 12 cm: the most flexible band for forearms, shoulders, calves, and collarbones. One bloom with a curved stem plus one leaf, or a bloom paired with a bud or pod, can work when every petal gap, frill separation, and center opening is verified at true size. Check stem hierarchy before approving a second element, and keep bloom-to-pod contacts separated by open skin.
- About 12 cm and above: thighs, upper backs, shoulder caps, and side torsos. Room for a bloom with a real stem run plus a bud or pod accent, but larger width does not rescue merged frill bands, packed stamen centers, or touching contacts. Simplify the tightest cluster first at every band; width only helps separations that already exist.
- Placement flow: poppies are single vertical forms, so align the stem with the limb axis on forearms, calves, and thighs, keep sprays slim and vertical on ribs and side torsos, and reserve broad fields for multi-element pairings. Preview direction on a body photo with Fit to Body before locking width. Remembrance-context poppy placements follow the same construction rules; keep the bloom or pod architecturally clean first, then let spacing and inscription decisions live in the memorial planning rather than in petal detail. Set exact width and page layout with the size calculator and verify the finished file with a 1:1 check before transfer.
Compare Poppy Studies Before Preparing Your Own Reference
These are curated structural studies for poppy stencil vetting, not a separate poppy generator and not poppy photography. Browse the broader floral tattoo stencil collection for general botanical flow and lotus-led movement logic, compare the stepped petal logic in the cherry-blossom vetting guide when the brief is a woody spray rather than a single poppy, or compare every curated direction from the subject index when the job might belong to a different flower. When the structure decision is made and width-tied verdicts are needed, the poppy vetting and prep guide holds the detailed go or no-go protocol this gallery supports. If you are starting from your own photo, drawing, or reference, use the photo-to-stencil workflow first, then generate one stencil online when the source is ready. Keep generic conversion steps and board, quality-check, grid, and session-sheet mechanics in their owners; this page owns only the poppy variant decision, the thin-petal hierarchy, and the poppy size and placement checks.
FAQ
Which poppy structure should I stencil for my placement and detail budget?
Commit by architecture, not by photo appeal. Choose an open bloom when you can protect four separable petals with a compact center at your width; choose a side profile only when there is room to space the frill run; choose a nodding bud for small placements with a short stem stub and no leaf contact; choose a seed pod when the capsule silhouette plus crown disk plus a few spaced ribs reads without countable texture. Run the petal and center count at the intended width before drawing.
How do I keep thin poppy petals readable without blowout or fallout?
Protect each petal contour with open skin between neighbors, rank near petals above far petals instead of giving every overlap equal weight, hold one stem path with no crossing contacts, and keep the center or pod ribs as one compact anchor separated from petal tissue. Simplify the first cluster that closes at 1:1: shorten frill, merge filaments rather than thinning them, or drop one overlap tier before touching outer contours.
What size and placement keeps frill and pod texture legible?
There is no universal minimum size; the output-size test decides. At about 7 cm and below carry one bloom or pod with minimal frill; at 8 to 12 cm a bloom with stem plus one accent can work with every gap verified; above 12 cm multi-element pairings need open skin between every contact. Align stems with the limb axis, preview on a body photo while edits are cheap, then verify with a measured 1:1 print.
Why are peony, rose, branch, nightshade, and lotus examples on a Poppy page?
They are labeled structural studies, not poppy depictions. No poppy photography sits in the reviewed stencil inventory yet, so each example isolates one construction lesson poppies need: thin-petal overlap, open-cup separation, stem flow, bud spacing, pod-rib simplification, and petal countability. Captions and commentary disclose the depicted flower on each piece. When the actual job is a rose, a branch spray, or a geometric bloom rather than a poppy, the floral collection remains the right owner.
Can I turn my own poppy reference into a stencil here?
This page is a vetting and comparison guide, not a separate poppy generator. Use the photo-to-stencil workflow or the online generator for your own reference, then use the variant framework, the thin-petal hierarchy, and the size and placement checks above to judge petal separations, center density, stem flow, and transfer readiness before print.
Examples
Poppy stencil examples
Compare the linework, spacing and detail choices that make each stencil read differently.
A fine-line layered bloom used here as a thin-petal overlap study: large papery petals stack with visible separations, the same hierarchy a poppy open bloom needs before frill detail matters.
Explore more floral tattoo stencil group stencils
- The largest outer petals lead the read while secondary tiers stay subordinate, which models how poppy petals should separate instead of merging into one frilled mass.
- Artists vetting a wide-open poppy bloom who need to see how near petals stay dominant over far petals at final size.
- This depicts a peony, not a poppy; use it for overlap hierarchy only. The tightest inner tier closes first, so remove one tier before thinning outer petal contours.
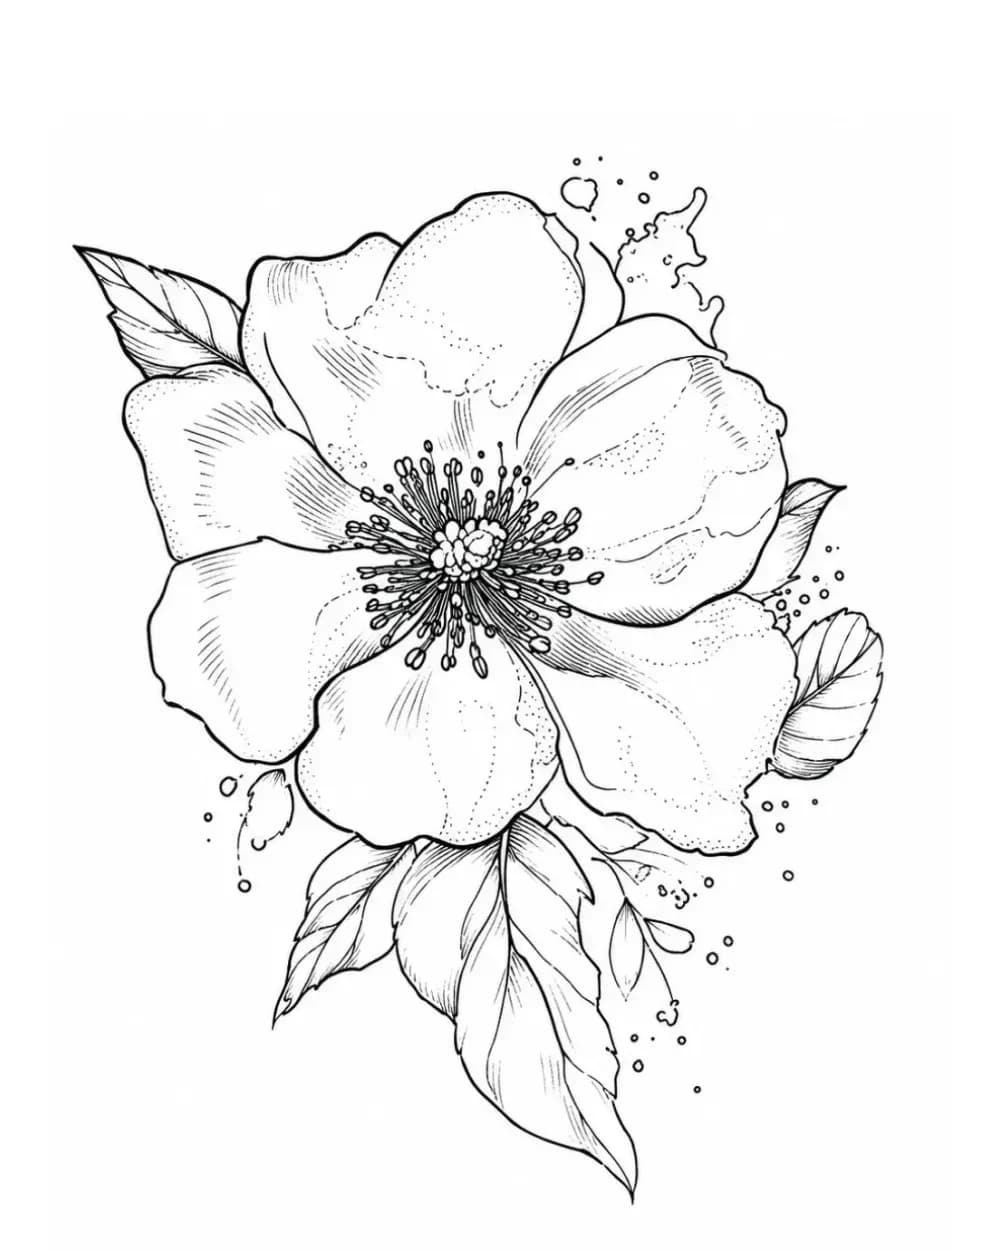
A compact single bloom used here as an open-cup separation study: one clear outer petal ring carries the read with open skin between neighbors, the same test four poppy petals must pass.
Explore more floral tattoo stencil group stencils
- The bloom stays legible through a clear outer ring with visible gaps between major petals, which is the standard to apply when counting poppy petals at final size.
- Artists checking whether a head-on poppy bloom keeps four separable petals at a compact width for shoulders or calves.
- This depicts a wild rose, not a poppy; use it for outer-ring separation logic only. Stippled shading and tight inner folds close first, so protect outer separations before interior texture.
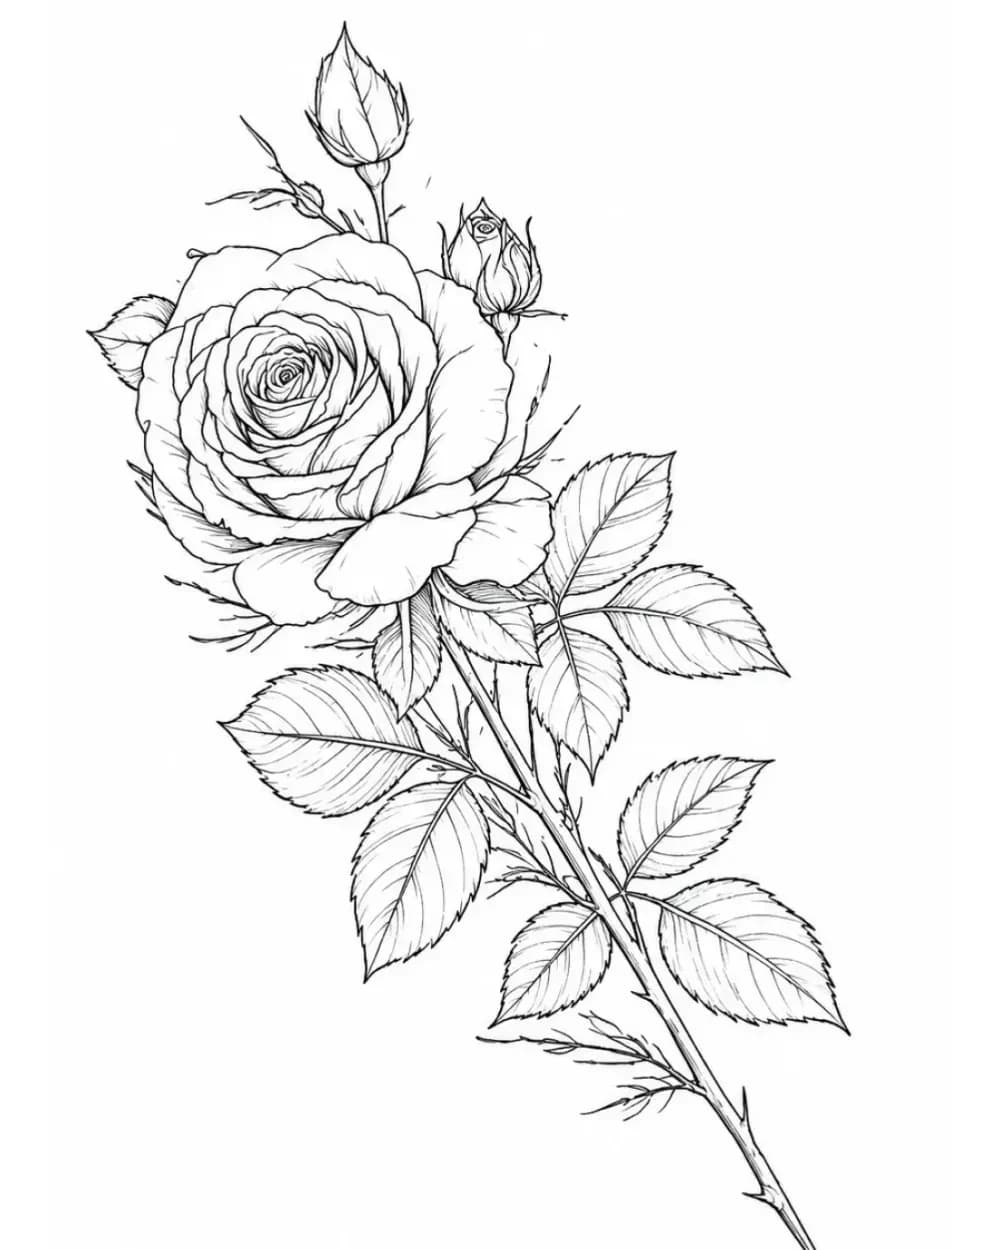
A single long-stem bloom used here as a stem-curve study: bloom, slender stem, and leaves form one vertical movement, the same arrangement a stemmed poppy with a nodding bud needs.
Explore more floral tattoo stencil group stencils
- The flower head leads while the stem creates one directional line, so the whole piece reads as a single vertical movement that can run with a limb.
- Artists planning a stemmed poppy for forearms, calves, or thighs where one slender stem must carry the placement flow.
- This depicts a rose, not a poppy; use it for stem and leaf-rhythm logic only. Inner petal folds and thorn clusters merge first when undersized, so protect the outer bloom map and major stem path before fine folds.
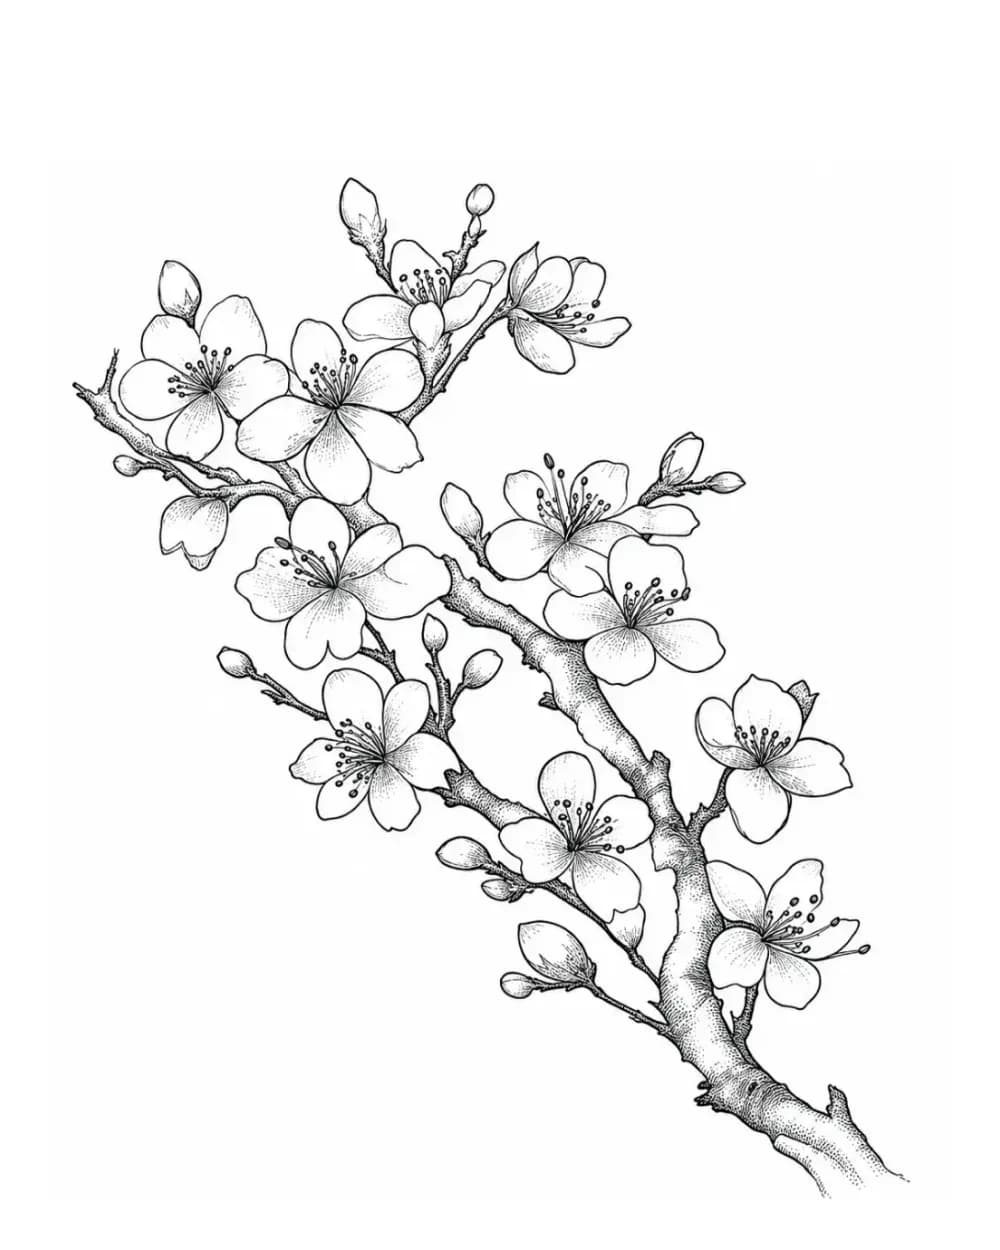
A diagonal flowering branch used here as a bud-spacing study: buds and open blooms sit as stations along one line with open gaps between them, the same spacing a poppy bloom-plus-bud pairing needs.
Explore more floral tattoo stencil group stencils
- The diagonal line gives the composition one built-in direction, so buds and blooms read as ordered stations instead of scattered detail competing at equal weight.
- Artists composing a poppy bloom with a nodding bud for ribs, shoulders, or thighs where bud crowding most often causes failure.
- This depicts a cherry branch, not poppies; use it for bud-gap and hierarchy logic only. Bud clusters and overlapping petal edges crowd first, so protect open gaps between blooms before keeping every bud.
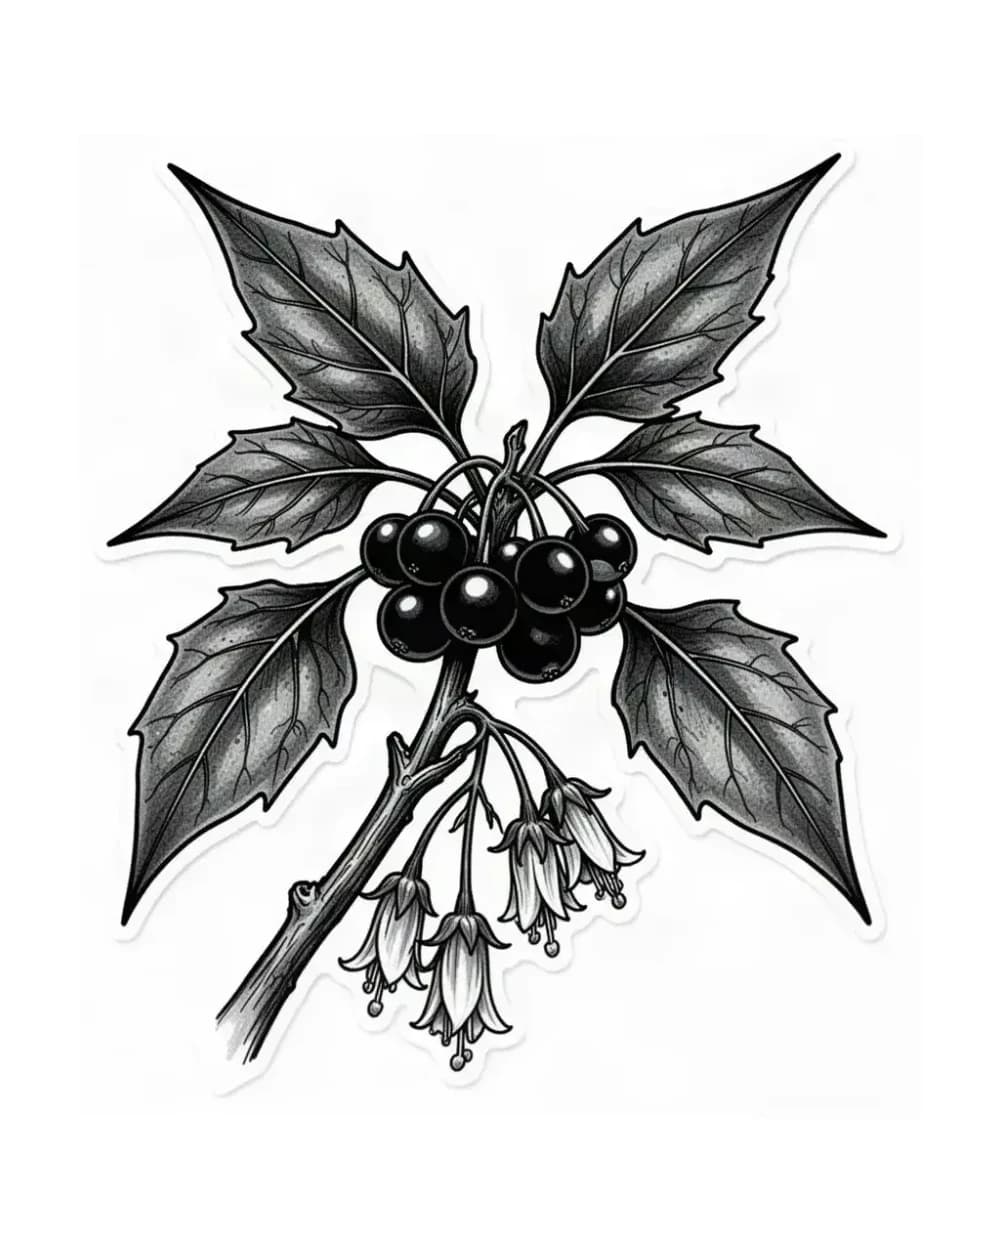
A botanical branch with hanging seed heads used here as a pod-rib study: rounded capsules carry a few spaced surface marks with open skin between them, the same simplification a ribbed poppy seed pod needs.
Explore more floral tattoo stencil group stencils
- Each capsule reads through silhouette plus a small number of spaced marks, which models the poppy pod rule: crown disk first, a few ribs second, no packed hatching.
- Artists vetting a poppy seed-pod capsule who need to see how few rib marks can carry the pod read without forming a packed texture field.
- This depicts nightshade berries, not a poppy capsule; use it for capsule-simplification logic only. Tight rib or berry clusters merge first, so keep three or four spaced marks plus the crown disk before any countable texture.
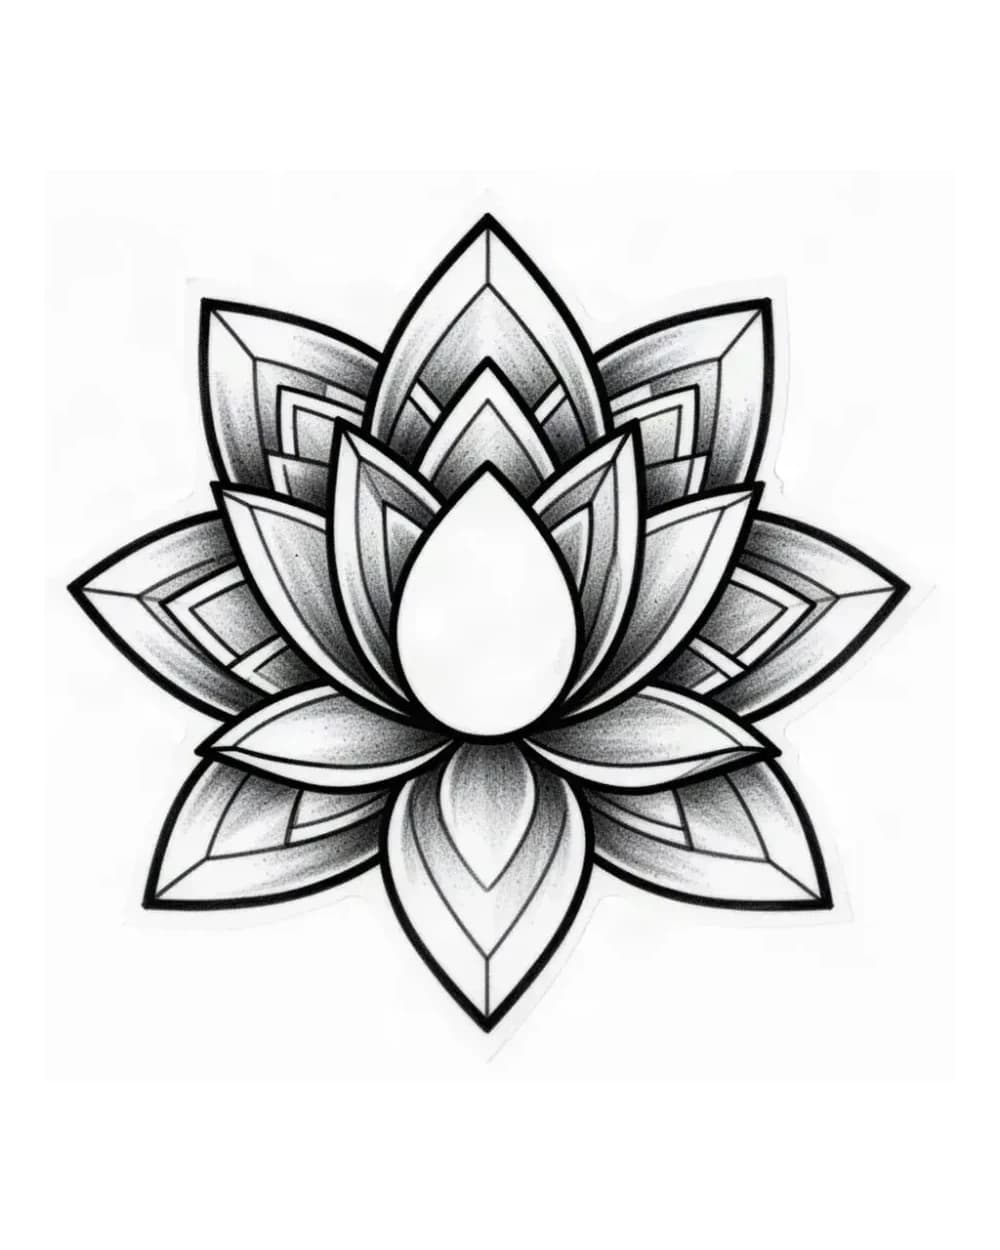
A symmetrical geometric bloom used here as a petal-count study: evenly spaced petals around an open center show how to verify a small poppy petal count instead of letting petals merge into one rosette.
Explore more floral tattoo stencil group stencils
- The open center and even petal spacing keep every segment countable at a glance, which is the check to run on any head-on poppy reference before committing to it.
- Artists deciding between a head-on poppy presentation and a three-quarter cup view, and needing a countability baseline.
- This depicts a geometric lotus, not a poppy; use it for symmetry and count logic only. The open center is the first thing to protect; once it fills, the few-petal poppy read is lost regardless of petal detail.
Related galleries
Keep browsing nearby stencil ideas.
FAQ
Quick questions about poppy stencils.
Commit by architecture, not by photo appeal. Choose an open bloom when you can protect four separable petals with a compact center at your width; choose a side profile only when there is room to space the frill run; choose a nodding bud for small placements with a short stem stub and no leaf contact; choose a seed pod when the capsule silhouette plus crown disk plus a few spaced ribs reads without countable texture. Run the petal and center count at the intended width before drawing.
Next step
Turn your own reference into a clean stencil draft.
Use what reads clearly here as direction, then start from your own reference.