

Artist Photography
Tattoo Photography for Artists: A Repeatable Portfolio Workflow
Photograph finished tattoo work with controlled lighting, glare reduction, faithful geometry, consistent color, and honest editing boundaries.
tattoo photography · how to photograph tattoos · tattoo photography lighting · tattoo photo glare · tattoo portfolio photography
- September 9, 2026
- September 15, 2026
- 11 min
Good tattoo photography is less about buying a better camera and more about controlling light, glare, body position, camera angle, focus, and color before you press the shutter.
If you want to photograph tattoos for a portfolio or social media, start with one goal: make the finished work easy to see without editing the tattoo into something it is not.
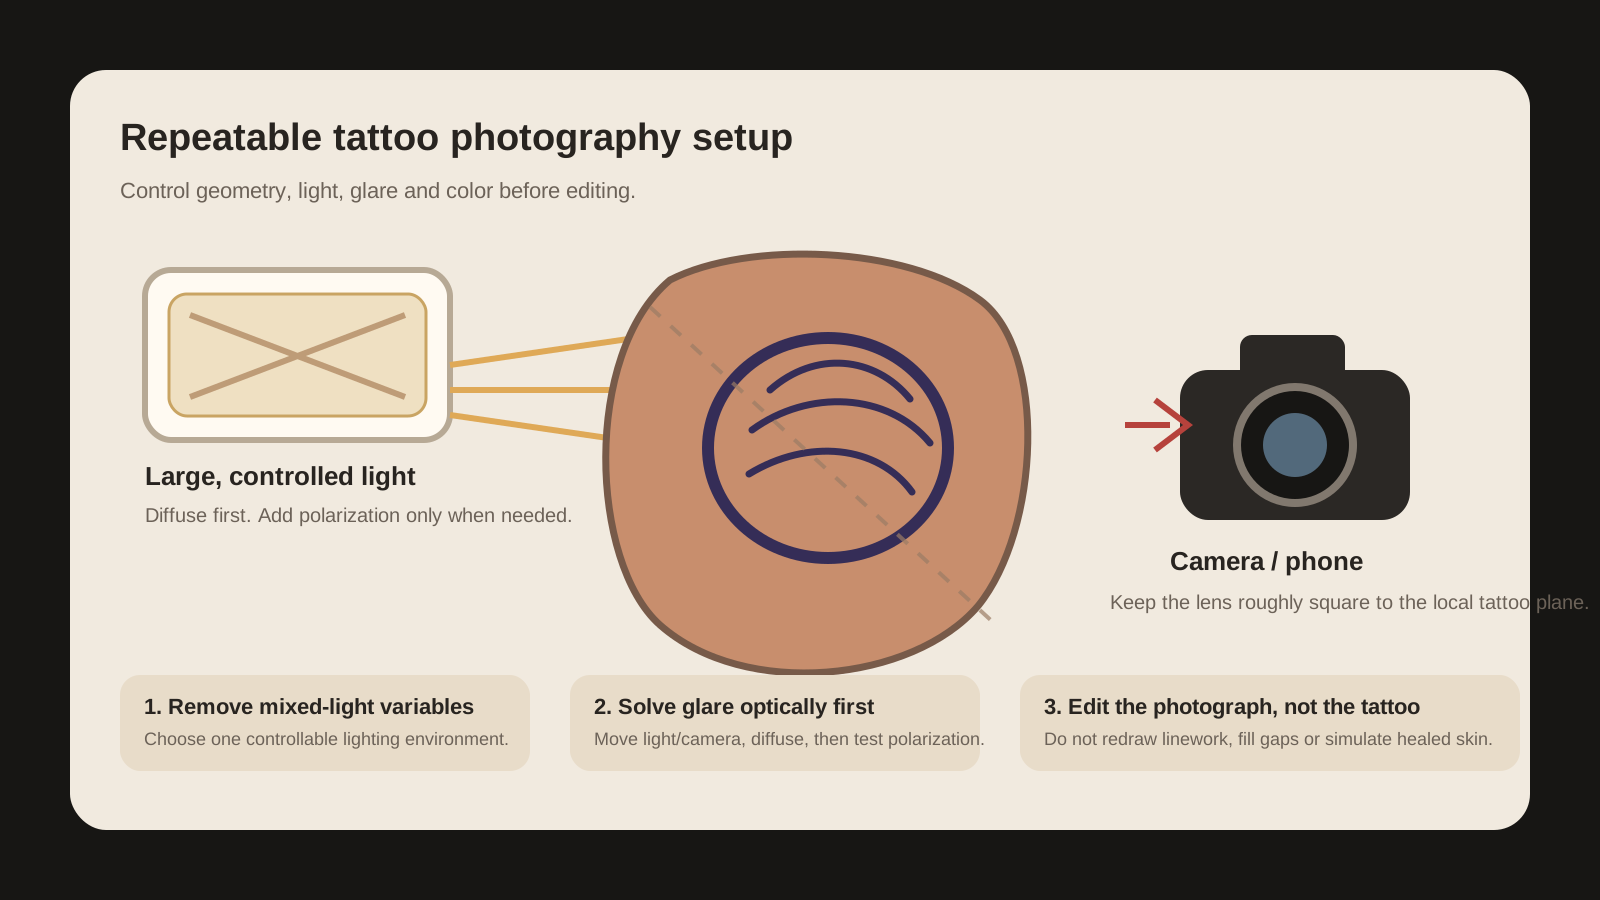
A repeatable setup matters more than a dramatic one-off shot. When you can recreate the same lighting and camera position across different clients, your portfolio becomes easier to compare and your editing becomes much simpler.
How to photograph tattoos: the practical workflow
Use the same basic sequence whether you shoot with a phone or a camera:
- Position the client first. Put the tattoo in the body position you actually want to show before you frame the shot.
- Simplify the background. Move clutter and anything that competes with the tattoo.
- Use one controlled light setup. Avoid mixing window light, warm ceiling lights, and cooler task lights when color consistency matters.
- Keep the camera square to the tattoo when possible. For the main view, avoid an unnecessarily oblique angle that stretches one side of the piece.
- Check glare before taking the final shot. Move or diffuse the light, adjust its angle, or change your camera position before trying to fix reflections later.
- Lock focus on the tattoo. Fine linework, edges, and texture should be sharp enough to inspect.
- Check exposure and white balance. Make sure highlights are not hiding ink and the room light has not created an obvious color cast.
- Take a small useful set. Capture one strong main view, enough body context to understand placement, and extra angles only when the piece wraps or needs them.
- Choose the clearest frame. Prefer the photograph that represents the tattoo well over the one with the most extreme contrast or mood.
- Edit the photo, not the tattoo. Crop, straighten, and make restrained global corrections without repainting the work.
If glare hides part of a black fill or a color transition at capture time, stronger contrast afterward cannot recreate information the camera never recorded.
Fix the capture problem before reaching for editing
When a tattoo photo looks wrong, use the visible problem to decide what to change:
- Bright white glare or shiny hotspots: move, enlarge, or diffuse the light; change the light angle; then test polarization if needed.
- Orange, green, blue, or magenta cast: reduce mixed lighting and check white balance.
- Tattoo looks stretched on one side: move the camera closer to square with the local body surface and use another angle for wrapped work.
- Fine lines look soft: check focus, motion, camera distance, and depth of field before adding sharpening.
- Black looks gray or color looks washed out: check reflection, exposure, and white balance before increasing saturation or contrast.
- Background competes with the tattoo: simplify the scene or crop the photo without changing tattoo or body geometry.
- Fresh and later photos look very different: label the stage honestly rather than editing one to imitate the other.
Several problems can look similar, so change one obvious variable at a time and compare the result.
Keep the tattoo's proportions believable
A tattoo sits on a three-dimensional body, while the photograph is flat. Camera position therefore changes how the tattoo appears even when the tattoo itself has not changed.
For a main portfolio photograph:
- choose the body position deliberately;
- keep the lens roughly perpendicular to the local tattoo surface when practical;
- avoid very close, strongly angled wide-lens views when accurate proportions matter;
- include enough body context to make placement understandable;
- use additional views for sleeves, ribs, shoulders, knees, and other areas where the design wraps around the body.
One photograph can be the main image. It does not have to pretend that a curved piece has only one useful angle.
Tattoo photography lighting: soft, controlled, and repeatable
Skin reflects light, and fresh tattoo photos can be especially prone to glare. A powerful light in the wrong place can hide linework and color just as easily as a weak camera setup can.
Start simple:
- use one large or diffused light source;
- give the light a clear direction instead of lighting the client from every side;
- soften small hard hotspots;
- use a neutral or visually quiet background;
- switch off other room lights when they add a different color cast or create extra reflections.
Soft window light can work well when it is stable enough for the session. A controlled studio light is easier to reproduce from one client to the next.
A ring light can work, but it is not automatically the best tattoo light. Because it sits close to the camera axis, it can still create reflections depending on the skin, body angle, diffusion, and surrounding light. Judge the result on the tattoo rather than on the type of lamp.
How to photograph tattoos without glare
Glare is a reflection problem, not simply an exposure problem. If the light reflects directly toward the lens, it can cover ink information even when the rest of the exposure looks correct.
Try these changes before editing:
- make the light larger or more diffused;
- move the light farther off the camera axis;
- adjust the camera angle slightly while keeping the tattoo proportions useful;
- switch off uncontrolled lights that are producing extra reflections;
- take another frame and compare it at full size.
If glare still limits the photograph, a polarizing setup can help.
CPL and cross-polarization for tattoo photos
A circular polarizing filter (CPL) on a camera lens, or a compatible clip-on polarizer on a phone, can reduce some reflections. Rotate the filter and judge the actual image because the effect depends on the angle between the light, skin, and camera.
Cross-polarization adds polarizing material to the light source and a polarizer at the camera. When the orientations are set correctly, the combination can suppress more surface reflection than a lens filter alone.
There are tradeoffs:
- polarizing material reduces the light reaching the sensor, so exposure may need to change;
- removing surface reflection can make pigment and contrast appear stronger;
- skin texture can look different under polarized and unpolarized light;
- uncontrolled room light can bring reflections back;
- filter orientation still needs to be adjusted rather than treated as a simple on/off setting.
Rosco documents meaningful light loss through its linear polarizing film and recommends pairing it with a camera polarizer for cross-polarization. Tattoo photography guidance from CO:CREATE likewise recommends polarized lighting when glare is the main problem. The practical takeaway is simple: polarization is a useful capture tool, not permission to make the tattoo look unrealistically perfect.
White balance and tattoo color
Consistent color starts with consistent light.
If daylight, a warm ceiling lamp, and a cooler LED all hit the client at once, the camera has to interpret several different light sources together. Auto white balance can also make slightly different decisions between sessions.
For more repeatable color:
- choose one dominant light setup;
- remove unnecessary competing lights;
- keep the same light settings when practical;
- use a neutral gray or white reference under the actual capture light when your camera supports custom white balance;
- check skin, neutral objects, black ink, and known colors for obvious casts before accepting the frame.
Nikon's white-balance documentation describes setting a preset from a neutral white or gray reference under the light used for the photograph. The useful principle applies regardless of camera brand: give the camera a stable lighting environment instead of expecting automatic processing to make every room look identical.
No setup can make every phone, browser, and social platform display color exactly the same. The realistic goal is a repeatable capture and edit process that does not knowingly change how the tattoo looks.
Phone vs camera for tattoo photography
You do not need a professional camera body to make useful tattoo portfolio photos.
A dedicated camera can make several things easier:
- RAW capture;
- lens choice;
- manual exposure;
- repeatable custom white balance;
- easier mounting of polarizing filters;
- more control over depth of field.
A modern phone can still work very well when the fundamentals are controlled: light, glare, angle, focus, exposure, and color.
Before buying more gear, ask:
- Is the tattoo actually sharp?
- Is glare hiding part of the ink?
- Is the camera angle distorting the piece?
- Is mixed lighting creating the color problem?
- Can I reproduce this setup on the next client?
Upgrade the camera or lens when a real limitation remains after the setup is under control.
Fresh vs healed tattoo photos
Fresh and healed tattoos can look materially different in photographs. Fresh work can show more surface shine, redness, and texture, while a later photograph may show the tattoo under a different skin condition and completely different lighting.
For portfolio use:
- label a session-day or fresh photograph as fresh when that is what it is;
- call a tattoo healed only when you actually know it is healed;
- do not guess a healing stage from appearance alone;
- do not edit a fresh photograph to imitate a healed result;
- if you have useful images from both stages, label them clearly.
This guide does not set a medical healing timeline or provide aftercare guidance. The photography job is simply to represent the stage honestly.
Edit the photograph without repairing the tattoo
A useful rule is:
Correct the photograph without rebuilding the tattoo inside it.
Reasonable photo adjustments
When used conservatively, these can improve presentation without changing the work:
- crop and straighten;
- global exposure correction;
- highlight or shadow recovery when the file contains the information;
- white-balance correction;
- modest global contrast changes;
- restrained noise reduction or sharpening;
- cropping away background distractions without reshaping the tattoo or body;
- consistent export size while keeping the original file.
Edits that misrepresent the tattoo
Do not use portfolio editing to:
- redraw a shaky or missing line;
- clone out blowout or patchy fill;
- fill gaps in black packing;
- change the tattoo to another hue;
- reshape the body or tattoo geometry;
- replace tattoo details;
- smooth skin in a way that hides problems in the work;
- simulate a healed tattoo from a fresh photo;
- push saturation, black level, or contrast until the result no longer resembles the real tattoo.
If you need to paint, clone, generate, or reconstruct tattoo information, you are no longer making a simple photographic correction.
For restrained post-capture work, use the Tattoo Portfolio Photo Editor. It is designed around crop, straighten, exposure, white balance, and whole-photo tonal preparation rather than tattoo retouching.
Capture a small, useful shot set
You usually do not need dozens of nearly identical images.
For many tattoos, capture:
- Main view: the clearest overall reading of the tattoo.
- Body-context view: enough surrounding body area to show scale and placement.
- Detail view: only when fine detail or a focal area benefits from closer inspection.
- Wrap view: another angle for work that continues around a limb or curved body area.
- Healed follow-up: when you later have a known healed result and permission to photograph it.
This gives you options without turning every tattoo into a 30-photo shoot.
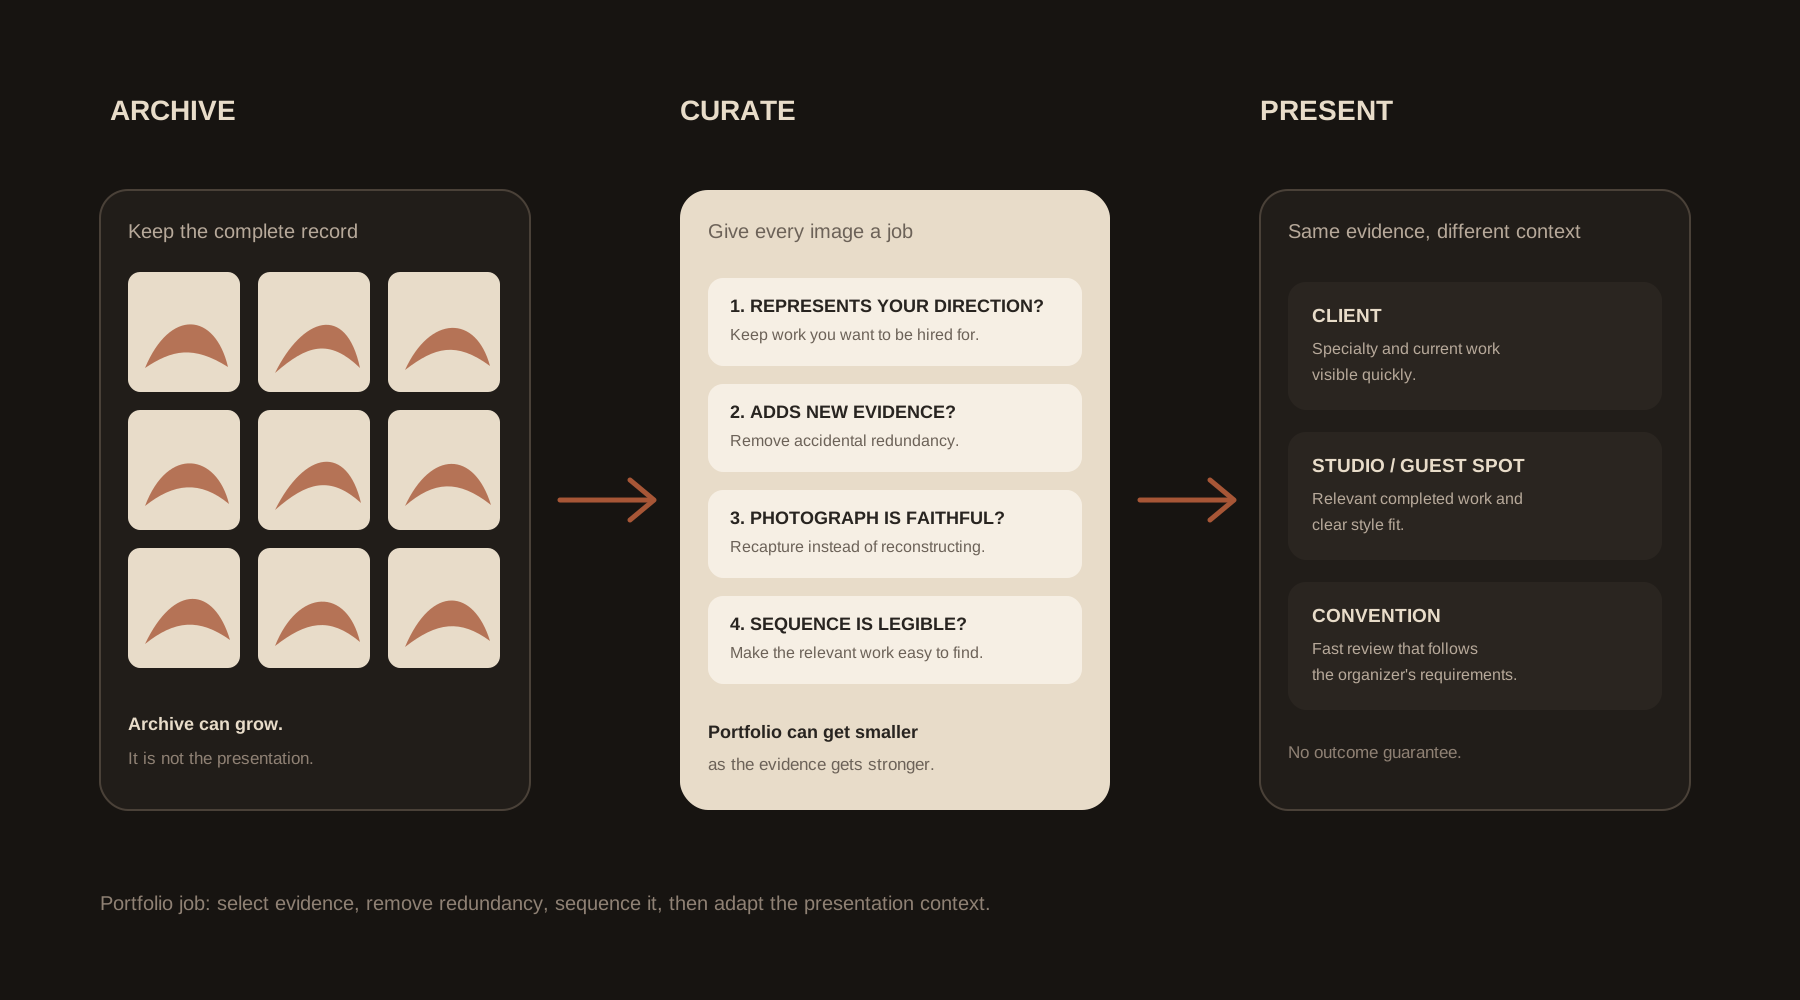
Choosing which completed projects belong in the final portfolio is a separate job. Use the Tattoo Artist Portfolio guide for selection, sequencing, and tailoring the portfolio to clients, studios, guest spots, or conventions.
A 60-second tattoo photo check
Before you finish the shoot, check:
- Body position: does the pose show the tattoo properly?
- Background: is anything distracting from the work?
- Lighting: are several different color temperatures hitting the client?
- Glare: is reflection hiding ink?
- Angle: does the main view keep the tattoo proportions believable?
- Focus: are the important lines and transitions sharp?
- Exposure: are highlights or shadows hiding useful detail?
- Color: is there an obvious cast from the room light?
- Stage: is the photo fresh/session-day or known healed, and will you label it correctly?
- Editing: can you finish the photograph without redrawing or reconstructing the tattoo?
Fix a problem at capture time when you can. It is usually faster and more consistent than trying to rescue every tattoo with a different edit later.
FAQ
How do you take good pictures of tattoos?
Use a simple background, soft controlled light, a camera angle that keeps the tattoo proportions believable, accurate focus, and consistent exposure and white balance. Check for glare before taking the final frame, and keep editing restrained afterward.
How do tattoo artists photograph tattoos without glare?
Diffuse or enlarge the light, move it off the camera axis, reduce competing room lights, and adjust the camera angle without distorting the main view. If glare remains a problem, a lens polarizer can help, and cross-polarization can reduce surface reflection further.
Do I need a professional camera for tattoo photography?
No. Phones and interchangeable-lens cameras can both produce strong tattoo photos. A dedicated camera can make RAW capture, lens choice, custom white balance, and filter use easier, but lighting, glare control, focus, camera angle, and repeatability matter first.
Does a polarizing filter make tattoo colors more accurate?
Not automatically. Polarization can reduce reflections and make pigment and contrast easier to see, but it also changes the appearance of surface reflection and skin texture. Compare the result with the real tattoo and keep processing conservative.
Should I remove redness from a fresh tattoo photo?
Do not edit a fresh tattoo to simulate healed skin. Global color or exposure correction can fix a photographic cast, but local editing that materially changes the skin or tattoo appearance can misrepresent the work. Label fresh work honestly.
Should tattoo artists show healed photos?
Healed photos can be useful when you know the tattoo is healed and the photograph represents it clearly. They are not a requirement for every portfolio. If you show both session-day and healed work, label the stages accurately.
Sources
- SWGDE: Best Practices for Photographic Documentation of Scars, Marks, and Tattoos - camera alignment, glare control, diffusion, neutral backgrounds, color reference, and polarization guidance.
- Nikon: Setting White Balance - white-balance behavior and neutral white/gray reference workflow.
- Rosco: Polarizing Filters - manufacturer specifications for polarizing film, light loss, and cross-polarization.
- PubMed: Polarized light examination and photography of the skin - background on how polarization changes surface reflection in skin photography.
- CO:CREATE: How to Photograph Tattoos for Portfolios and Social Media - tattoo-industry guidance on lighting, glare, backgrounds, honest editing, and polarized capture.
- Tattooing 101: How to Photograph Tattoos Like a Pro - tattoo-education guidance on background, lighting, and portfolio capture. Product or skin-treatment suggestions from third-party tattoo guides are not treated here as universal safety guidance.
Related Guides
Keep reading from here
Author
Andrea Mezzadra
Founder and product builder at StencilStudio
Andrea builds StencilStudio and tests how the tools fit into real stencil prep, using real references and outputs to document what works, what changes, and where artist judgment still matters.
In the App
Prepare a usable portfolio photo without editing the tattoo
Use the Portfolio Photo Editor for restrained crop, straighten, exposure, white-balance and tonal cleanup after the source photograph is already usable.